Building a Kubernetes cluster using Raspberry Pi 4
Today, I’m building a locally hosted (“On-Premises,” if you will) Kubernetes cluster that runs on three Raspberry Pi 4 devices. The goal is to get Kubernetes working and being able to deploy WordPress and MySQL on the cluster.
But why?
Ah, great question. For a few reasons. I love the Raspberry Pi devices, and the form factor is simply great. I’ve wanted to build something more ‘enterprise’, but also to find an excuse to learn a bit more about Kubernetes and containers. As the Raspberry Pi devices are very affordable, and also low power, I feel it’s a great investment for learning without fear of not getting something to work.
Also, my homelab hardware rack had 1U free space left, and it just fits 4 Raspberry Pi’s.
The hardware
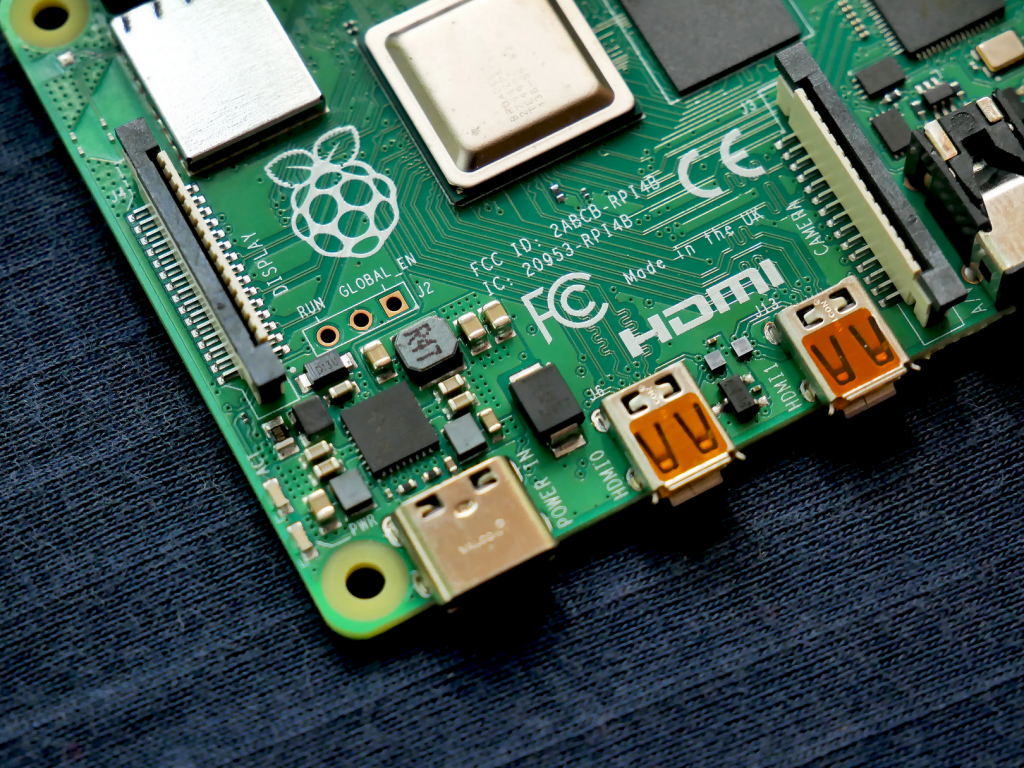
Before anything fun can happen, we need the hardware. I had a few Raspberry Pi 4 that I wasn’t using. I ordered one more to have three RPi’s to leverage. I mounted the Pi’s in my homelab rack to ensure the devices can be running at all times.
Here you can see the rack-mount for the Raspberry Pi’s:
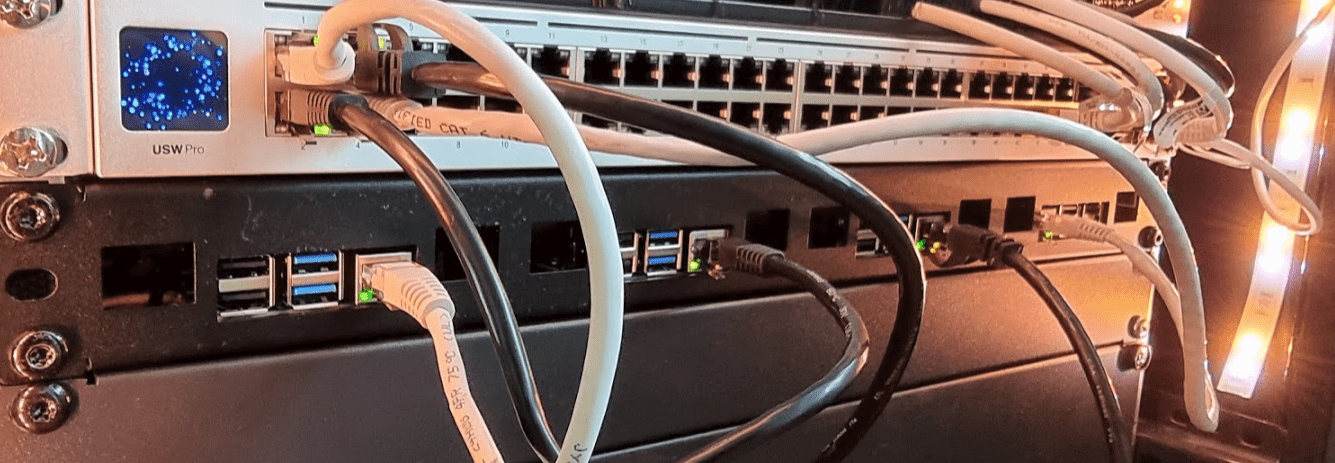
I ordered a cheap metal chassis from MyElectronics.nl for 49 € – the specific model is this. I’m still waiting for shorter Ethernet cables to clean up the cabling mess. If you’re thinking of opting for this rack approach, perhaps consider getting the ‘snap-off’ blank covers also – which I didn’t.
Preparing the Raspberry Pi devices
I deployed a plain Raspbian OS on each three Raspberry Pi 4 devices. For a headless install, I added an empty text file named ssh on the root of the SD card to ensure I can remote to the machines once they reboot.
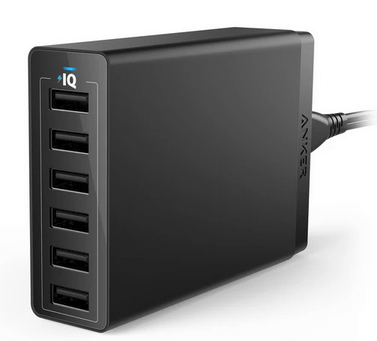
I then installed each Raspberry Pi in the rack chassis and powered them. I’m using a 6-port 60W USB-hub from Anker to power them.
I verified through my switch, that each device rebooted properly and came online. Unifi, the network device brand that I use, shows a little icon next to each device so I carefully selected the correct icons for each Raspberry Pi device:
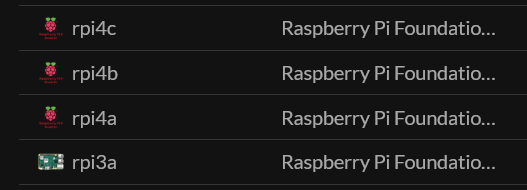
In summary, I have three Raspberry Pi 4 devices, named rpi4a, rpi4b and rpi4c. I also had a leftover Raspberry Pi 3, but as it only has 2 GB of RAM I use that for other things and it’s not part of this setup.
Installing Kubernetes
So, there are a lot of moving parts with Kubernetes. I still haven’t had enough motivation to learn it from the ground up, so a lot of my findings in this post are based on rapid googling with trial and error. Perhaps I’ll find motivation to study the basics some day.
Kubernetes comes in many flavors. I’ve used Microk8s for testing, as it’s super easy to install on a Linux VM. It’s “low-ops”, and you get up and running in a minute.
For Raspberry Pi, you have slightly more limited selection – as the processor architecture sets a small limit, and the low-power of the devices sets yet another limit. A company called Rancher has their implementation of this, called k3s. It’s especially well suited for edge computing scenarios, which in old-school terms also implies it works with On-Premises.
I SSH’d to the first node, rpi4a, and ran the installation:
curl -sfL https://get.k3s.io | sh -It was quite uneventful, and took about three minutes to complete. I then added the two other nodes, rpi4b and rpi4c with:
curl -sfL https://get.k3s.io | K3S_URL=https://rpi4a:6443 K3S_TOKEN=mynodetoken sh -I replaced mynodetoken with the Kubernetes cluster token, which you can see in /var/lib/rancher/k3s/server/node-token:

Now that all three nodes were part of my fancy new k3s cluster, it was time to test if it actually works! By running sudo kubectl get nodes I can see the nodes:
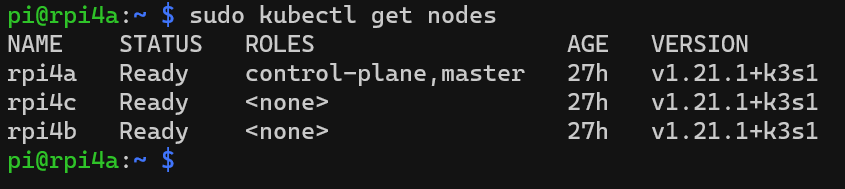
rpi4a is the master, and the control-plane. These are Kubernetes components, where control-plane makes global decisions and reacts to cluster events. In essence, it’s in charge of things and reminds me of an Active Directory Domain Controller with the Global Catalog and other FSMO roles.
To gain more insights into my nascent k3s cluster, I installed Kubernetes Dashboard. It’s a fancy Web UI to see what actually is happening within the cluster. I followed the somewhat lengthy manual steps from Rancher’s website. But it didn’t work. The reason for this is that in order to get access to the dashboard, you need to use the Kubernetes proxy approach – and wherever you run that, the proxy works from that specific machine. So running the proxy from rpi4a or any other node wouldn’t help much, as I couldn’t use a real browser from my workstation to access the dashboard.
I resolved this by copying the Kubernetes configuration file to my local user profile on Windows 10, and then using kubectl to manage the cluster remotely. This way, I could finally run kubectl proxy which pipes the connection to the Kubernetes Dashboard from my localhost.
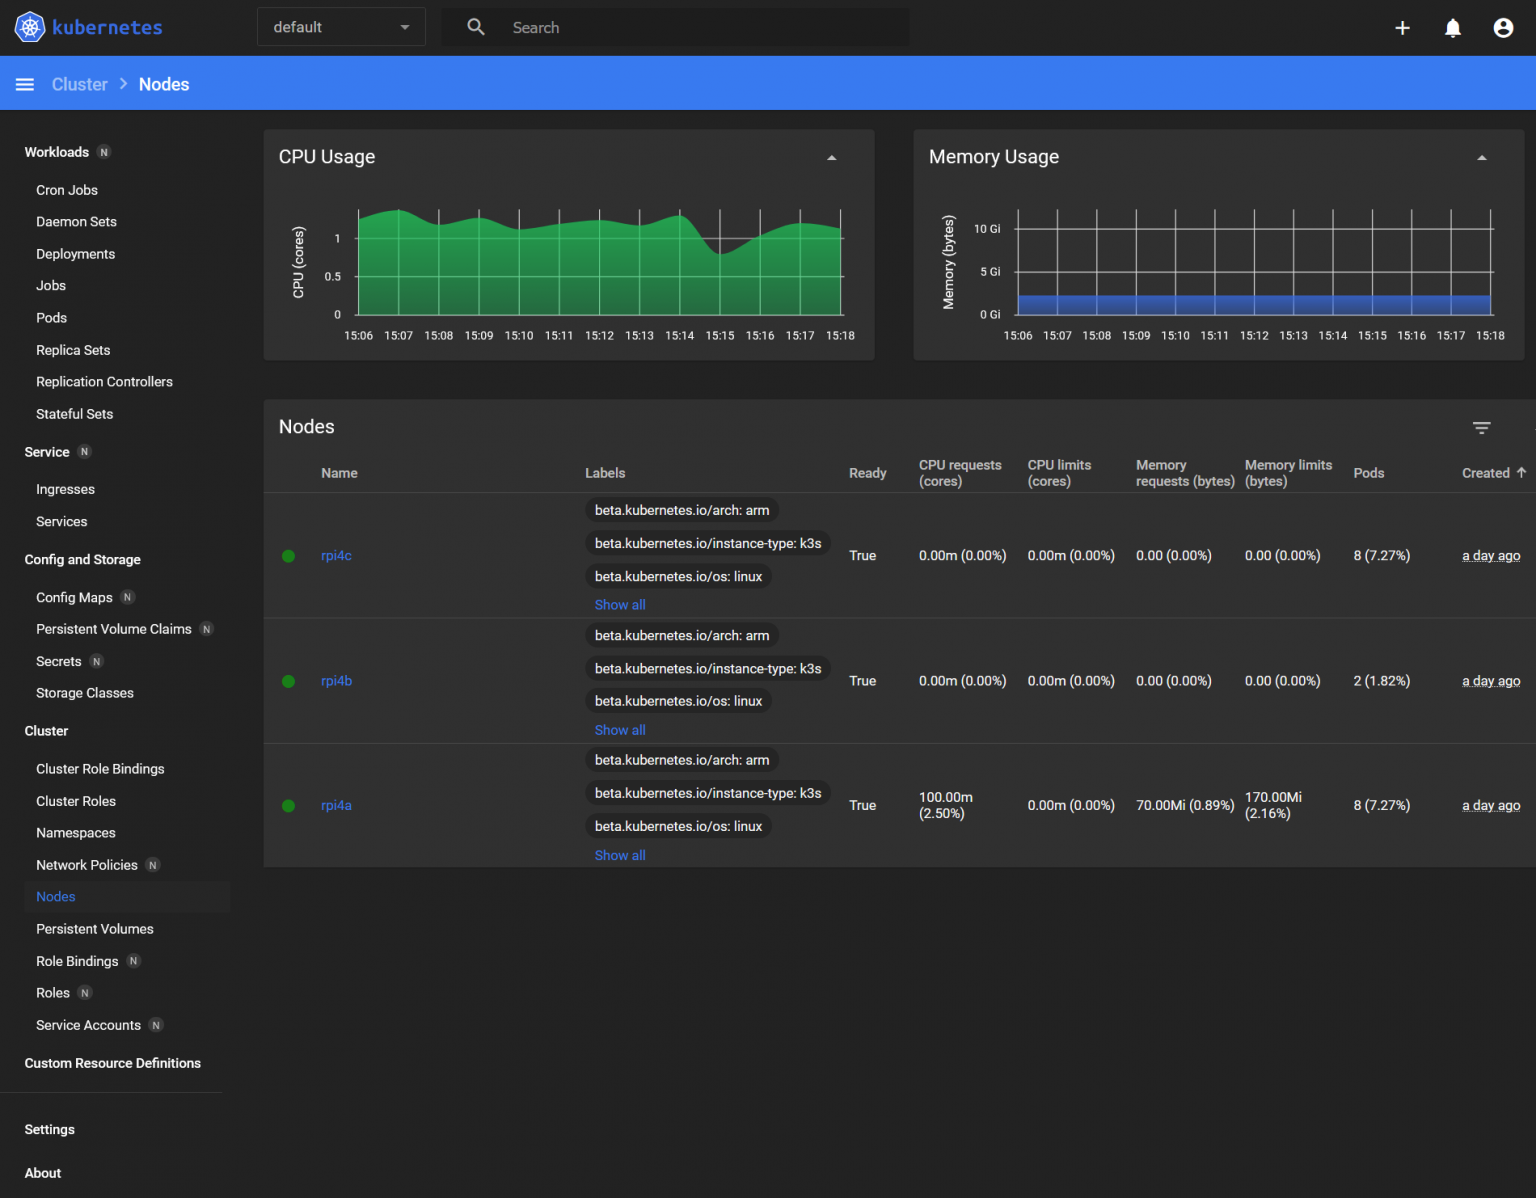
It’s a nice tool – allowing me to view the nodes (each Raspberry Pi and how they are doing), the pods (whatever I’ve deployed to my k3s cluster), and other relevant information.
Deploying WordPress to k3s
Once my k3s cluster seemed to be stable, I wanted to deploy something that it could run. And what’s better than WordPress? I use it to run this blog, so it never hurts to have a test deployment to try out new things. I’ve previously written how to run WordPress locally using Windows 10, Docker Desktop and WSL 2 – but this time, it’s slightly trickier.
Kubernetes.io has a nice example setup for this. In essence, you need three files – the secrets file (that stores the MySQL password that WordPress uses to authenticate), one deployment file for WordPress, and another for MySQL. They are described in YAML format, which I already dislike. You then instruct the k3s cluster to pick up these three files and deploy the containers to the cluster.
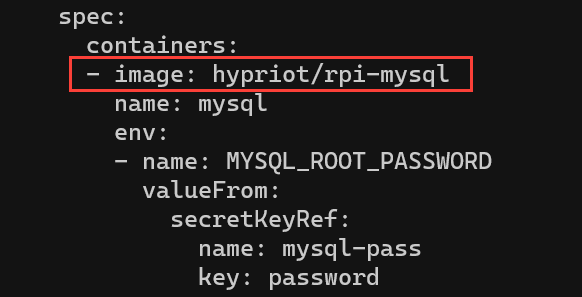
It turns out that the MySQL deployment file has the Docker container image for mysql:5.6. While this might work, the processor architecture is wrong, as Raspberry Pi is based on the ARM architecture, not the traditional x86 or similar. I found a promising image, hypriot/rpi-mysql, that someone had created (see details here). It’s somewhat old but good enough to try out for now. I replaced the line in mysql-deployment.yaml to point to this image:
The only thing needed was to deploy WordPress, the command for this is sudo kubectl apply -k ./ in the directory where the three files are stored. The -k is a shorthand for kustomize, telling the tool to process all .YAML files in the directory.
Once done, I can query the pods with sudo kubectl get pods -n default:
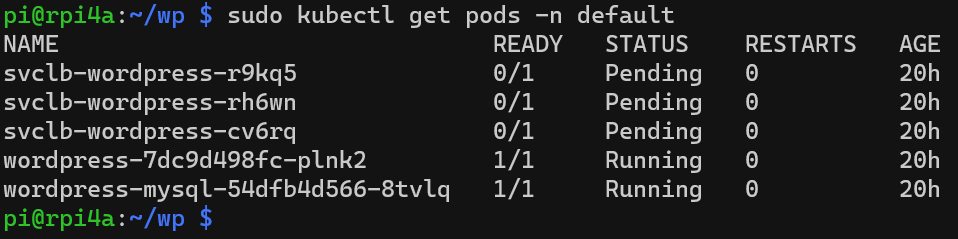
We have two pods ready – one for WordPress, and another for MySQL. But where are they running? Let’s query further with sudo kubectl get pods -n default --output=wide:

rpi4a, our master Raspberry Pi, runs MySQL and rpi4c runs WordPress. Perfect!
Checking via Kubernetes Dashboard, everything looks good also:
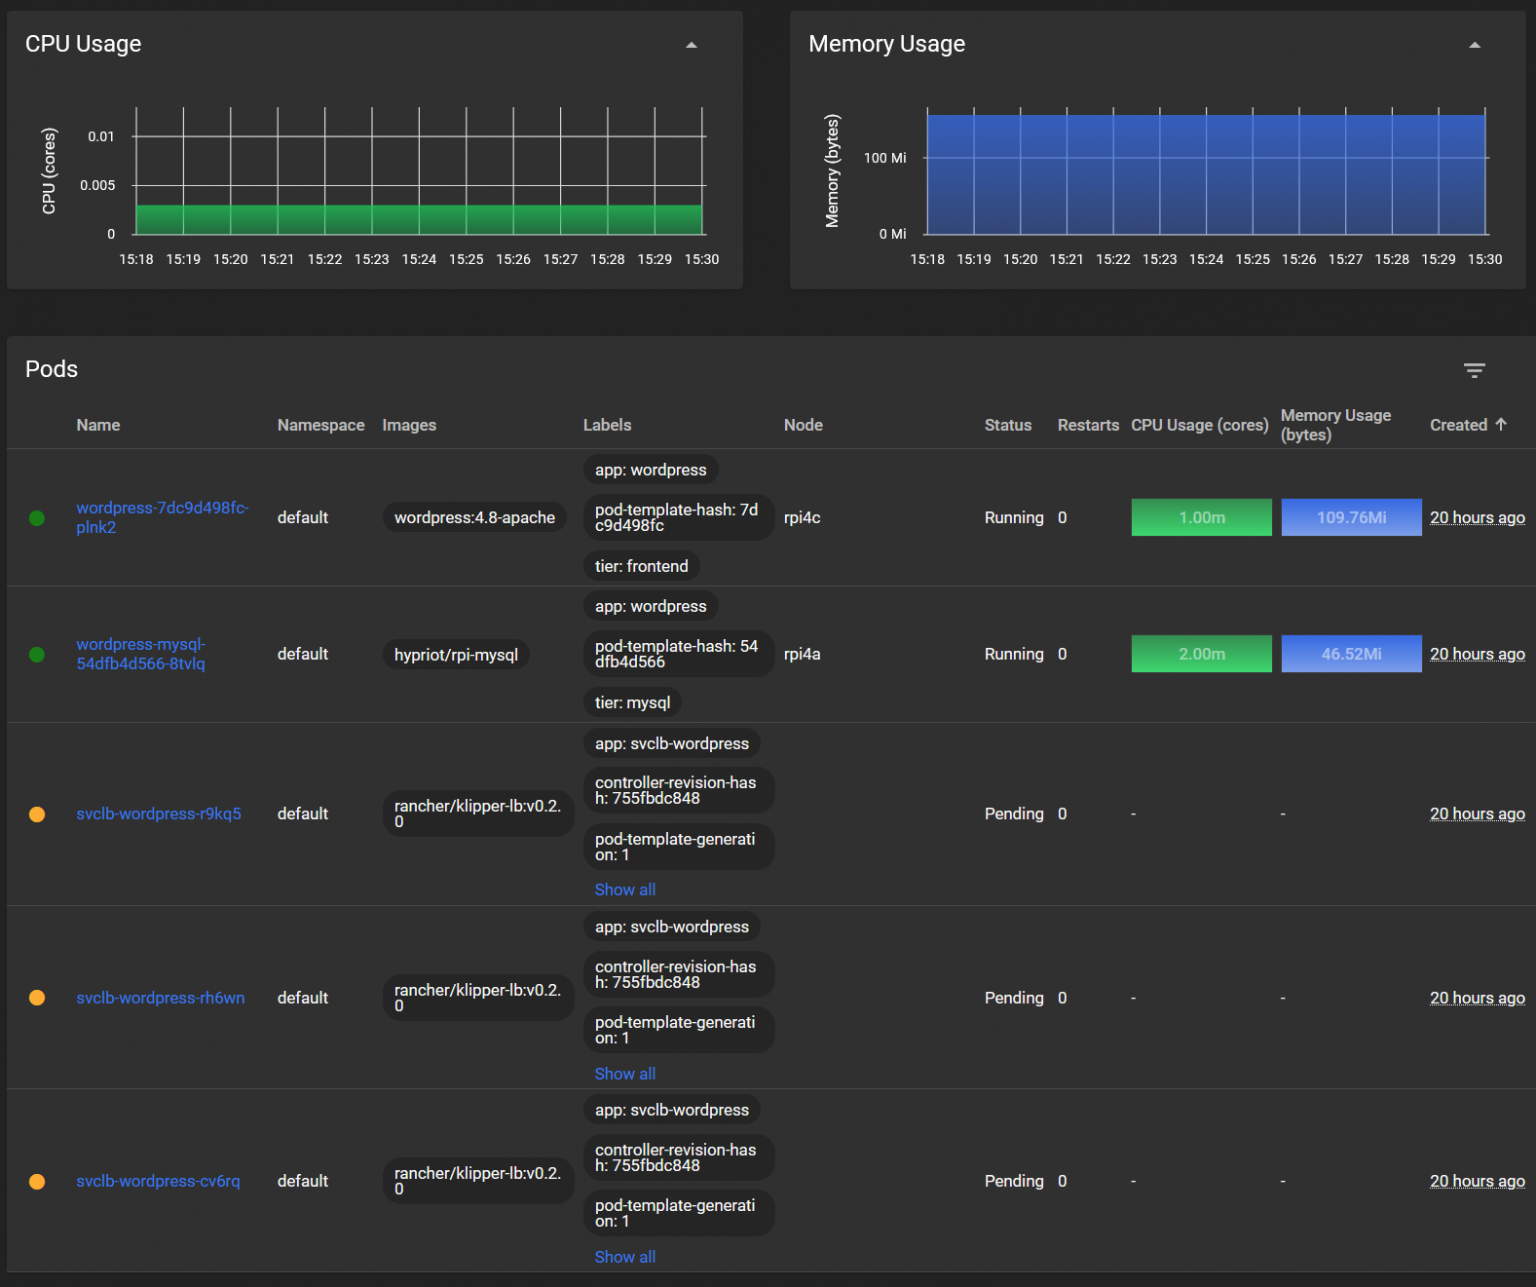
Very low CPU usage, obviously as we aren’t really utilizing our WordPress for anything. Memory footprint is also very low, and my Raspberry Pi 4 nodes each have 8 GB of RAM to utilize.
The solution also deployed a few load balancing solutions, but to be perfectly honest – I didn’t yet figure how these work.
With sudo kubectl get service I can peek a bit deeper into the actual services I now have – WordPress:

WordPress is of type LoadBalancer, which in Kubernetes is a service for publishing other services. Initially, this service did not have an external IP – just the private k3s cluster IPs I cannot access directly. I patched the IP address of rpi4a for the service using the following command:
sudo kubectl patch svc wordpress -n default -p '{"spec": {"type": "LoadBalancer", "externalIPs":["192.168.0.212"]}}'But as WordPress is actually defaulting to localhost, it sort of fails in a catastrophic way. To access WordPress for the first time, to finalize the setup, I port-forward myself from the workstation:
kubectl port-forward service/wordpress 80:80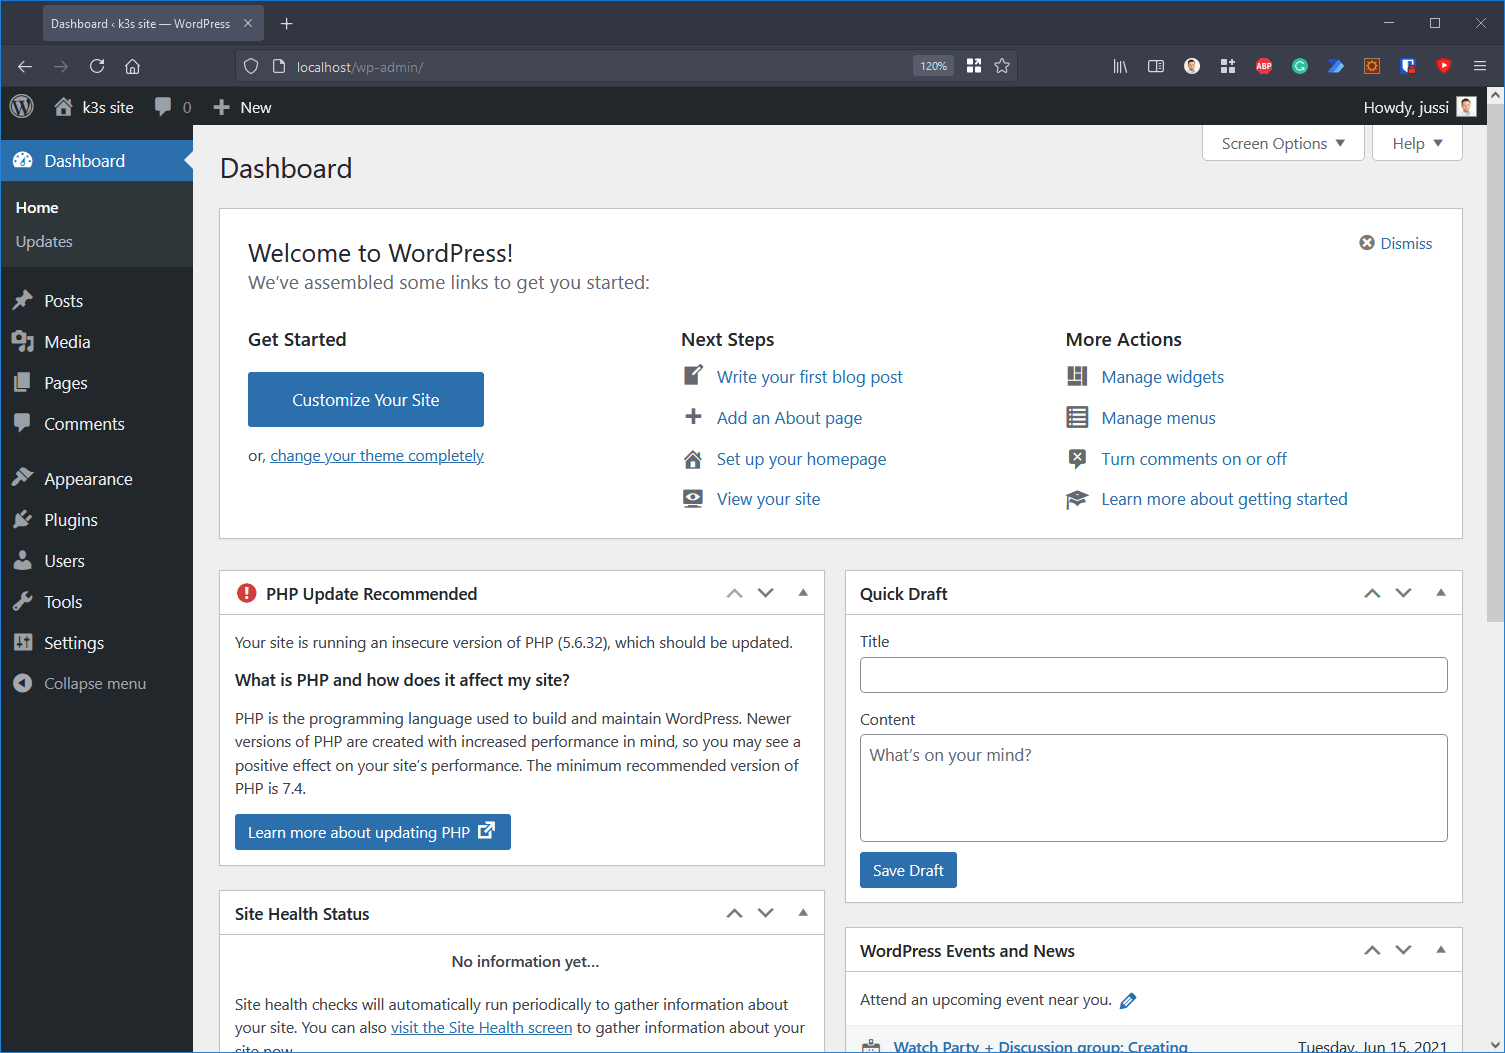
And hey, it works! In WordPress, you can change the address of the site – which I tried changing to http://rpi4a, but it sort of worked, and didn’t.
As it’s a test solution, I now have some more work to do in figuring out if the LoadBalancer approach is the best way forward or not.
In closing
So, how did it go? I’m surprised how easy k3s was to set up, eventually. But I also ended up copying each command to a text file, as I found them hard to memorize at times. Kubernetes still feels somewhat clumsy at times, when the most simplest of things – like adding an IP address to a service – could be made more easier.
I’m happy with how the cluster works. The three Raspberry Pi 4 cost me 100 € each, plus the 16 GB memory cards were about 25 euro in total. Super affordable in the end, but obviously you could get by with just one node.