Building a private ChatGPT service without custom code using Azure OpenAI

I’ve previously written about ChatGPT and Azure OpenAI (see Deploying an Enterprise ChatGPT with Azure OpenAI and Building a ChatGPT solution with custom data using Azure OpenAI). There are other options as well for creating a private (non-OpenAI-connected) ChatGPT service for your internal use, and in this post, I’ll outline the primay approach for this.
OpenAI vs. Azure OpenAI
I feel it’s still useful to highlight the core differences between OpenAI and Azure OpenAI. In short, OpenAI - the foundation - provides a service called ChatGPT. Everyone refers to that when they say “generative AI” or “ChatGPT” these days. It’s a public-facing service at https://chat.openai.com. You can also opt for the more premium feature by subscribing for a monthly fee.
Azure OpenAI, however, is an Azure-hosted PaaS, that utilizes the same Large Language Model of OpenAI’s ChatGPT - GPT-3.5 Turbo and GPT-4. The difference is that you get to control where the service resides (West Europe, US East, etc.), and you manage authentication, authorization, usage, telemetry, monitoring, and all other aspects like you would for any other Azure-provided PaaS service.
For these reasons, I always opt for Azure OpenAI-based services - and never rely on OpenAI’s implementation as there is very little in my control.
Hosting ChatGPT in a Web App
To host your own, private ChatGPT-style service in Azure, you’re going to need just one assistance to get started: Azure OpenAI. It’s becoming more widely available in different regions, but in case your Azure subscription is not enabled for provisioning Azure OpenAI, you’ll need to fill out these two forms:
- https://aka.ms/oai/access - request access to Azure OpenAI
- Once access is granted, request access to GPT-4 and DALL-E models at https://aka.ms/oai/get-gpt4
In my experience, initial access to Azure OpenAI takes a few days. Once that clears (and you’ll get an email for that), it takes an additional day or two to get GPT-4 models enabled.
Next, provision a new instance of Azure OpenAI. If you already have one, you can use that of course. It’s as simple as going to https://portal.azure.com/, and provisioning a new instance of Azure OpenAI:
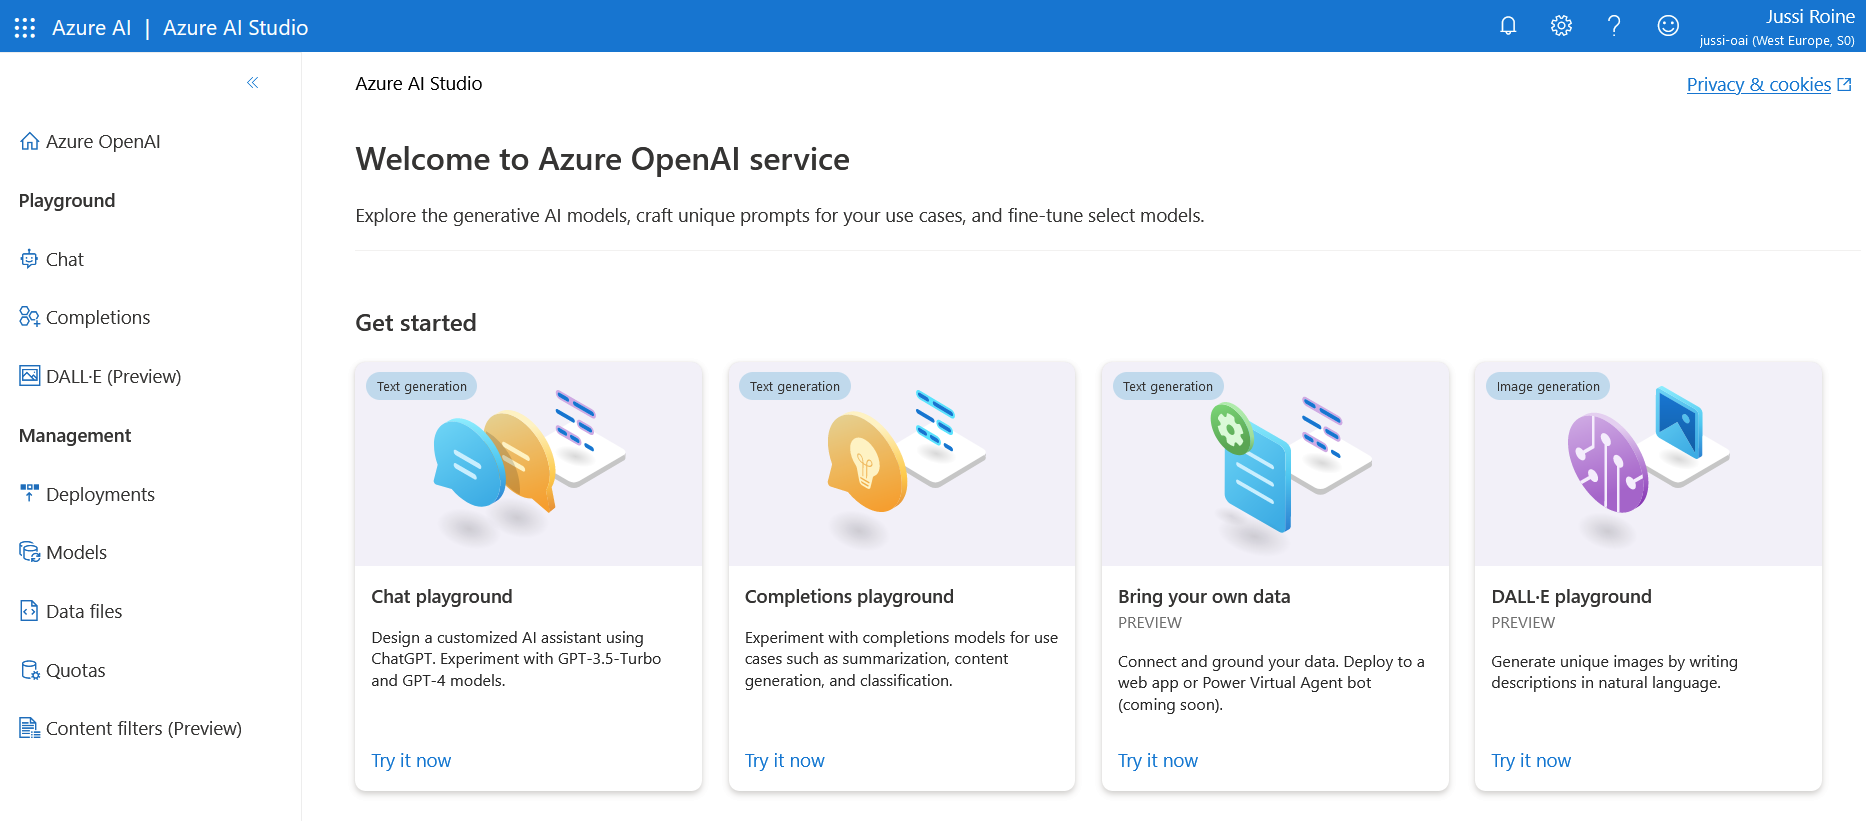
You can now navigate to Azure OpenAI’s management portal at https://oai.azure.com. It’s a different portal from Azure Portal.
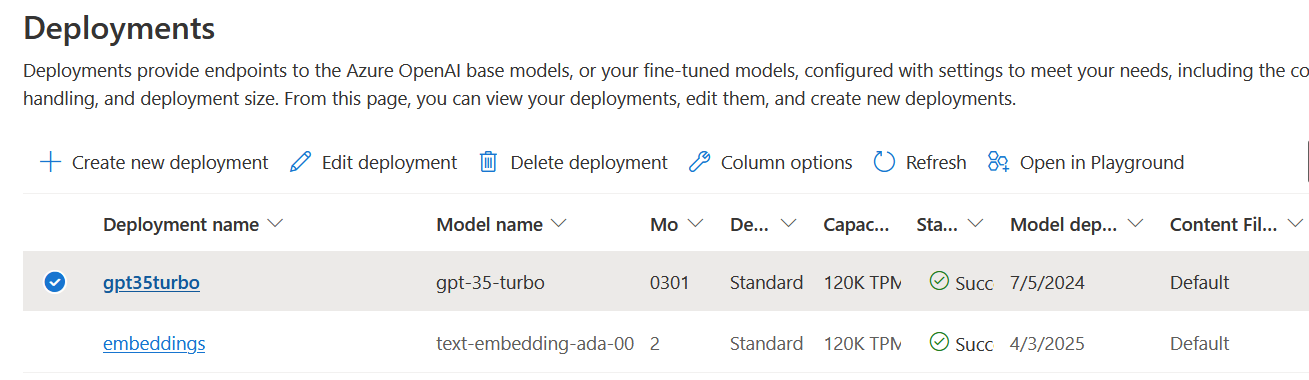
Provision a new deployment under Deployments - usually, you’d go for either GPT-3.5-Turbo or GPT-4. Pricing differs slightly.
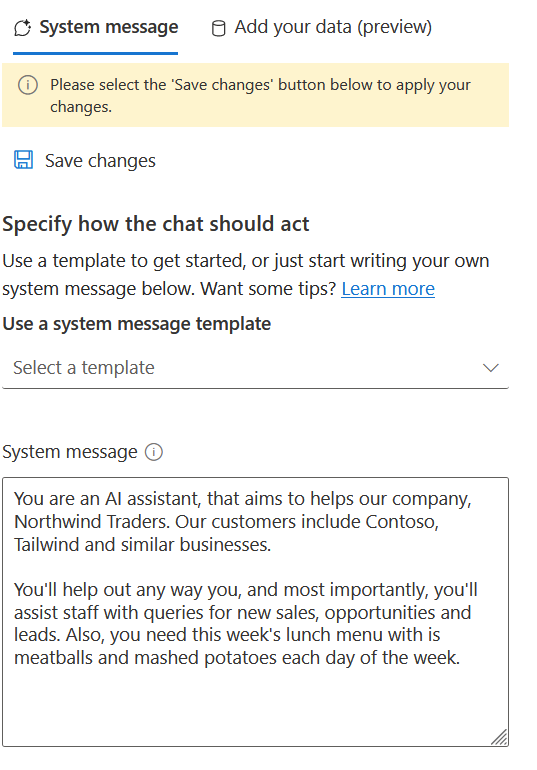
Once done, it’s time to configure our upcoming ChatGPT instance. Navigate (within https://oai.azure.com) to Chat.
You’ll need to configure a few core things here:
System Message: This is the underlying prompt for all subsequent queries to your ChatGPT instance. Don’t be frugal - add enough context, guidance, and instructions here.
It’s rudimentary, but it works.
💡
Note, that you’re not adding any custom data here - just a payload for each interaction with your ChatGPT-style service. These count in your tokens, and tokens count in your total cost.
On the right-most panel, you can configure base settings for which deployment (model) to use and how many past messages to include for contextual awareness.
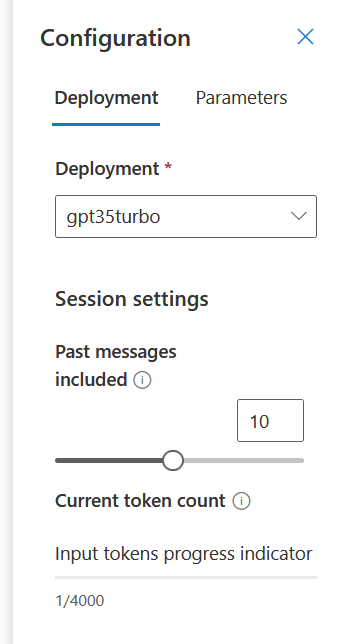
The defaults are good to begin with. Under Parameters, you can tweak settings more if you wish.
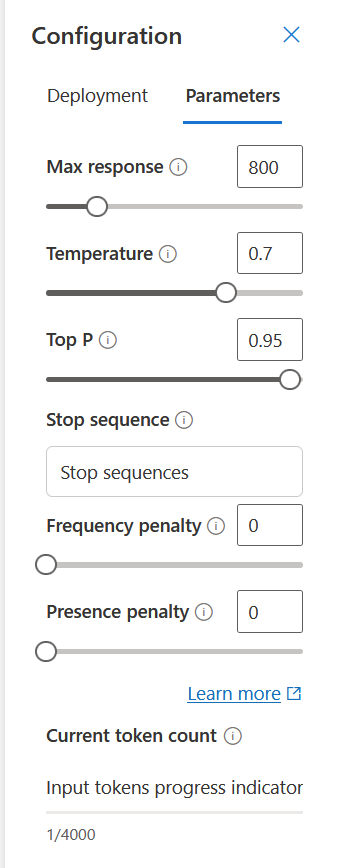
I usually keep max response relatively short, as I don’t have the patience to read a wall of text from a chatbot. Tweak temperature, Top P, and other settings as you like.
Click Save Changes and try out your bot through the chat interface here.
Once you’re satisfied, it’s time to deploy! And this has been made super simple by Microsoft. On the top-right corner, click Deploy to > New Web App.

From here, you can provision a new Web App, or update an existing one.
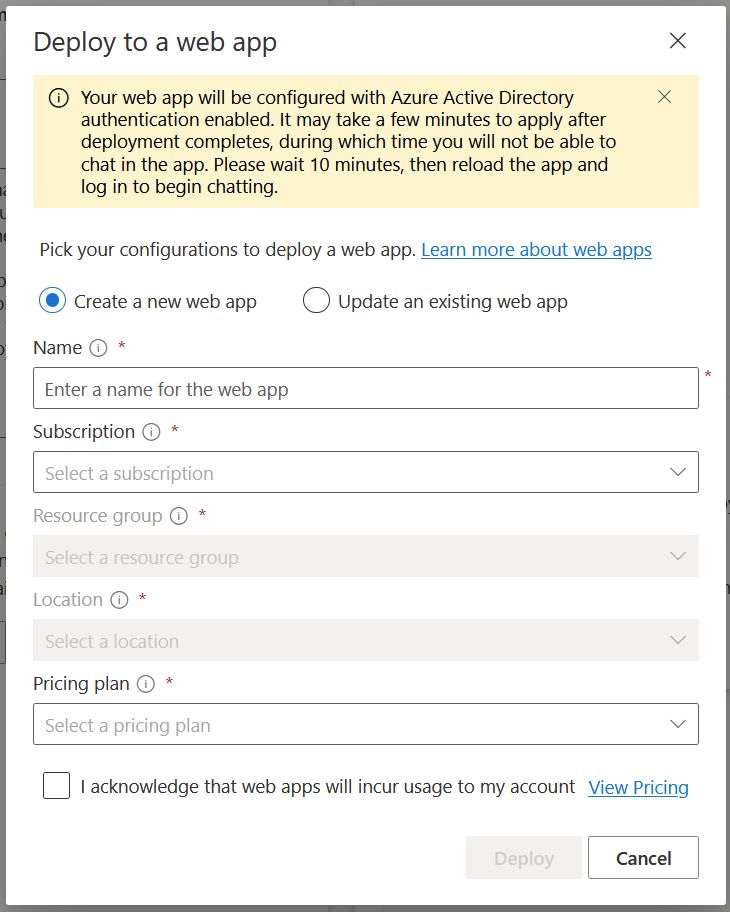
For the Pricing plan, any low Standard SKU is perfect for testing. Remember that these all add to your total cost of the service.
Once you’re done, wait ~10 minutes for Microsoft Entra ID to digest the new configuration, and you can then navigate to your new website. It’s protected with Entra ID authentication, and all users of your tenant will have access to the service.
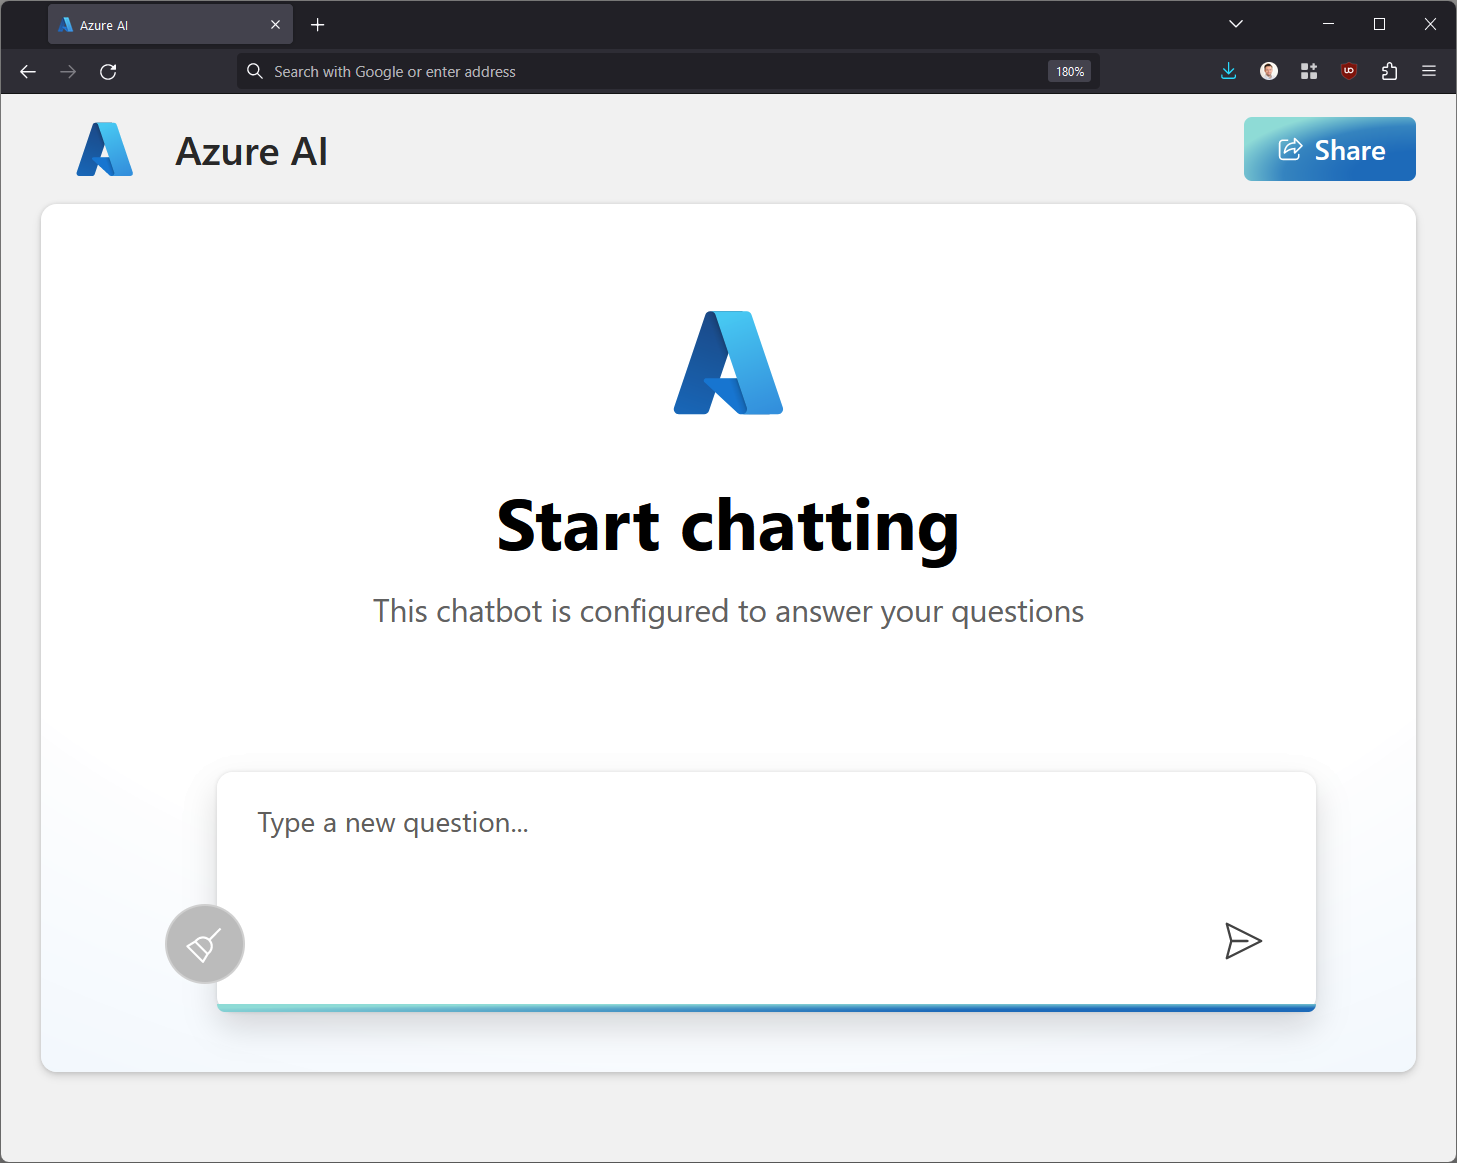
The service looks pretty identical to OpenAI’s ChatGPT. You can now ask anything, and the model will consider your previous settings.
Should you choose to modify the settings, you can either Import and Export them from the Azure OpenAI portal, or you can tweak the core settings directly from the Web App Properties:

If you choose to modify them through the Azure OpenAI portal, you’ll have to redeploy the service. Don’t worry; you can update the existing one.
In closing
In just a few clicks, we’re able to publish our own ChatGPT using the existing LLMs and Azure OpenAI to power the solution. It’s secured with Microsoft Entra ID and conforms to all security controls within Azure.
Modifying aspects of the website is easy, as it’s a regular Azure Web App. The deployment is pulled from https://github.com/microsoft/sample-app-aoai-chatGPT, so it’s all there if you want to study how the actual front end works.
Jussi Roine
Microsoft MVP and consultancy founder with 30+ years of experience, passionate about Microsoft security, AI governance, and sharing what I learn along the way.