Fun with Raspberry Pi: Building a Flightradar24 ADS-B receiver

I’ve used Flightradar24 for as long as I can remember. Occasionally to check what aircraft is circling near our house or track enjoyable flights while waiting in the queue in the grocery store. Another aspect is checking when a friend’s flight is about to land in Helsinki and driving to the airport in time.
Now that we have our new house mostly completed, it is time to check how I can contribute to this fantastic service. This blog post is my journey on how to build the ADS-B receiver and contribute to Flightradar24.
First things first – what is ADS-B?
I’m not a colossal aviation expert. I’ve flown my fair share of Flight Simulator and F-15 Strike Eagle ][ back in the 1990s. ADS-B stands for Automatic Dependent Surveillance-Broadcast, and it’s a way for aircraft to determine their position and broadcast it. This information can then be gleaned from the sky and sent to FlightRadar24.
When you look at FlightRadar24, you can usually see a vast swath of aircraft:
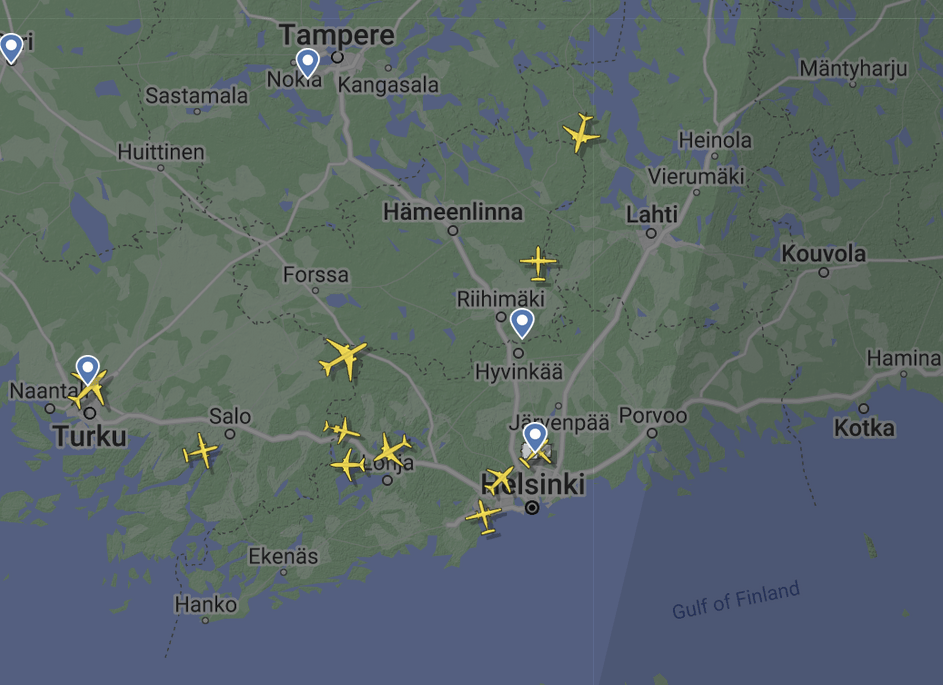
Well, maybe less so in southern Finland. That’s about as good as it gets close to the capital area. Compare this to, say, Los Angeles:

I digress, but I needed to understand this while building the solution. There isn’t as much air traffic in my part of the world, so immediate results will not happen even with the best ADS-B receiver.
ADS-B commonly operates at 1090 MHz. This is important for the parts bit that follows.
The hardware parts
The setup is fundamentally reasonably simple. You’ll need the following:
- A computer that can stay on for 24 hours a day – a Raspberry Pi is ideal for this
- An ADS-B antenna operating at 1090 MHz
- A USB dongle to connect the antenna to your computer
- An antenna cable between the antenna and the dongle
And that’s it! The Raspberry Pi requires Internet access, so Wi-Fi or wired connection is required.
I had a spare Raspberry Pi 3 Model B+ with an 8 GB memory card. I’ve used that for this setup. The USB dongle I got for free from a friend who suspected it was broken. It’s model R820T2, from Jetvision. The cost is about 30 € (including VAT).
The ADS-B antenna is also from Jetvision, and I went with the big one:
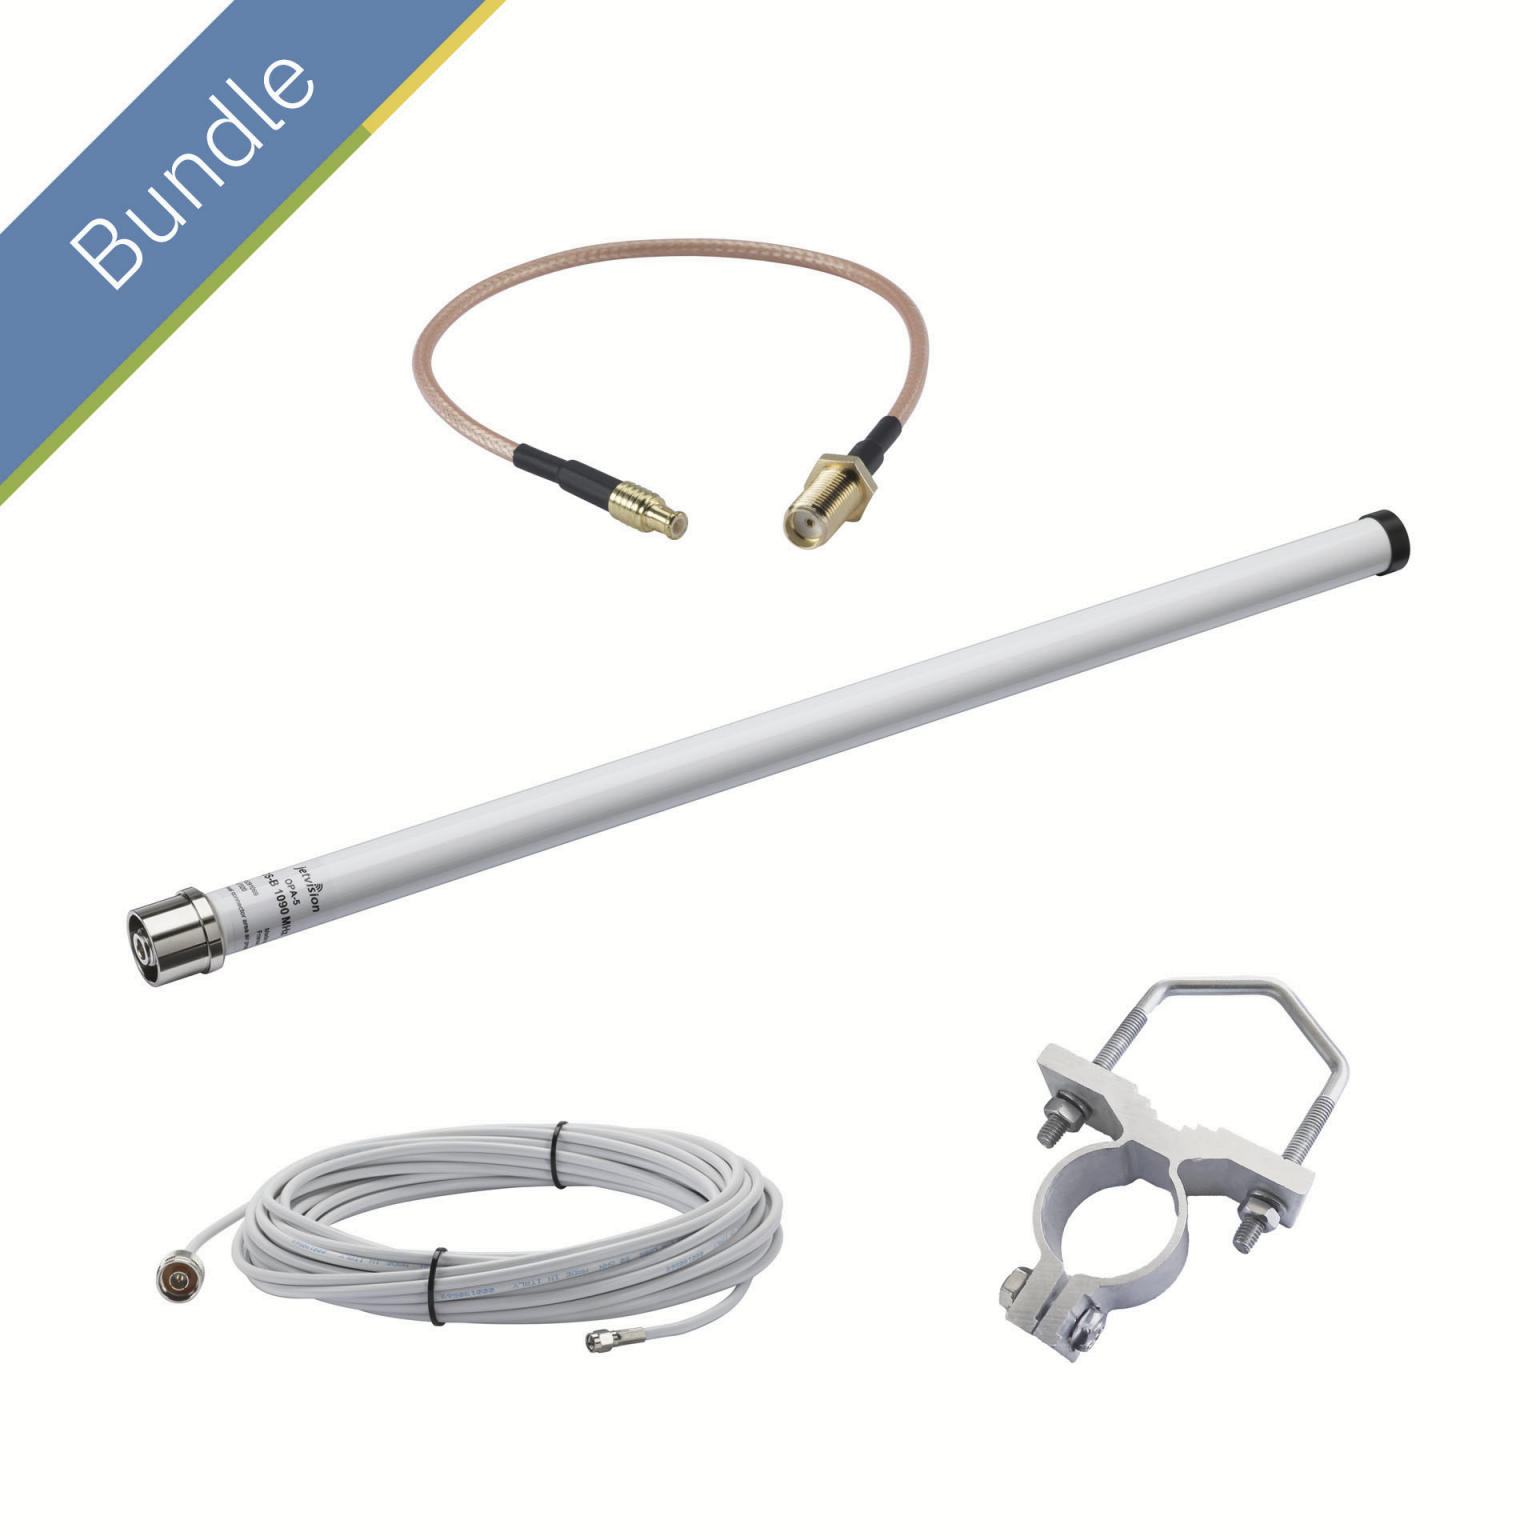
That sets you back about 100 €, and the bundle includes a 10-meter cable.
The total cost is, therefore, around 200 €, including the old Raspberry Pi, the antenna, and the USB dongle. I found a new case for the Raspberry Pi from a clearance sale for 4 euros 🤣.
Installation on Raspberry Pi
Installation is a breeze, as FlightRadar24 provides an image you can drop on the memory card, Pi24. You can find the download link here. It reboots swiftly, and you can ssh directly into the Pi. The default password for the pi account is raspberry. Note! In order to have Wi-Fi working from the get-go, you’ll need to configure it through a particular text file. See here for guidance.
Registering to FR24
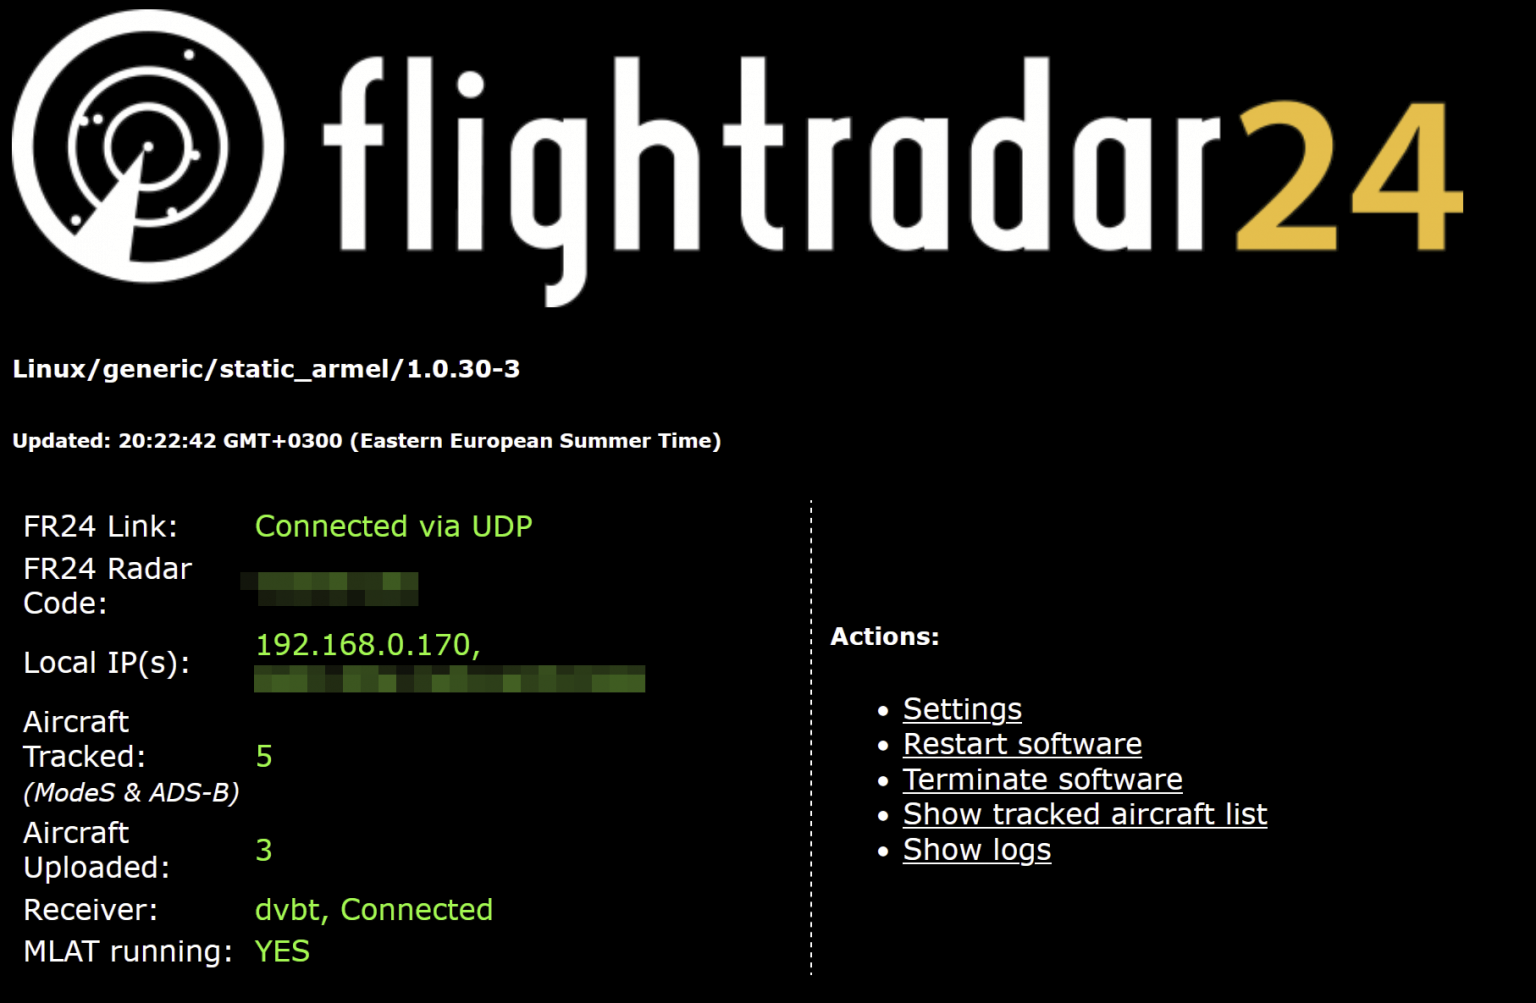
The last thing to get this thing working is registration with FlightRadar24. You’ll need to activate your device here, and fill out the details of your deployment. This includes your physical location and other settings. You can now also open a browser to see locally what’s happening with the receiver at https://IP.ADDRESS:8754/
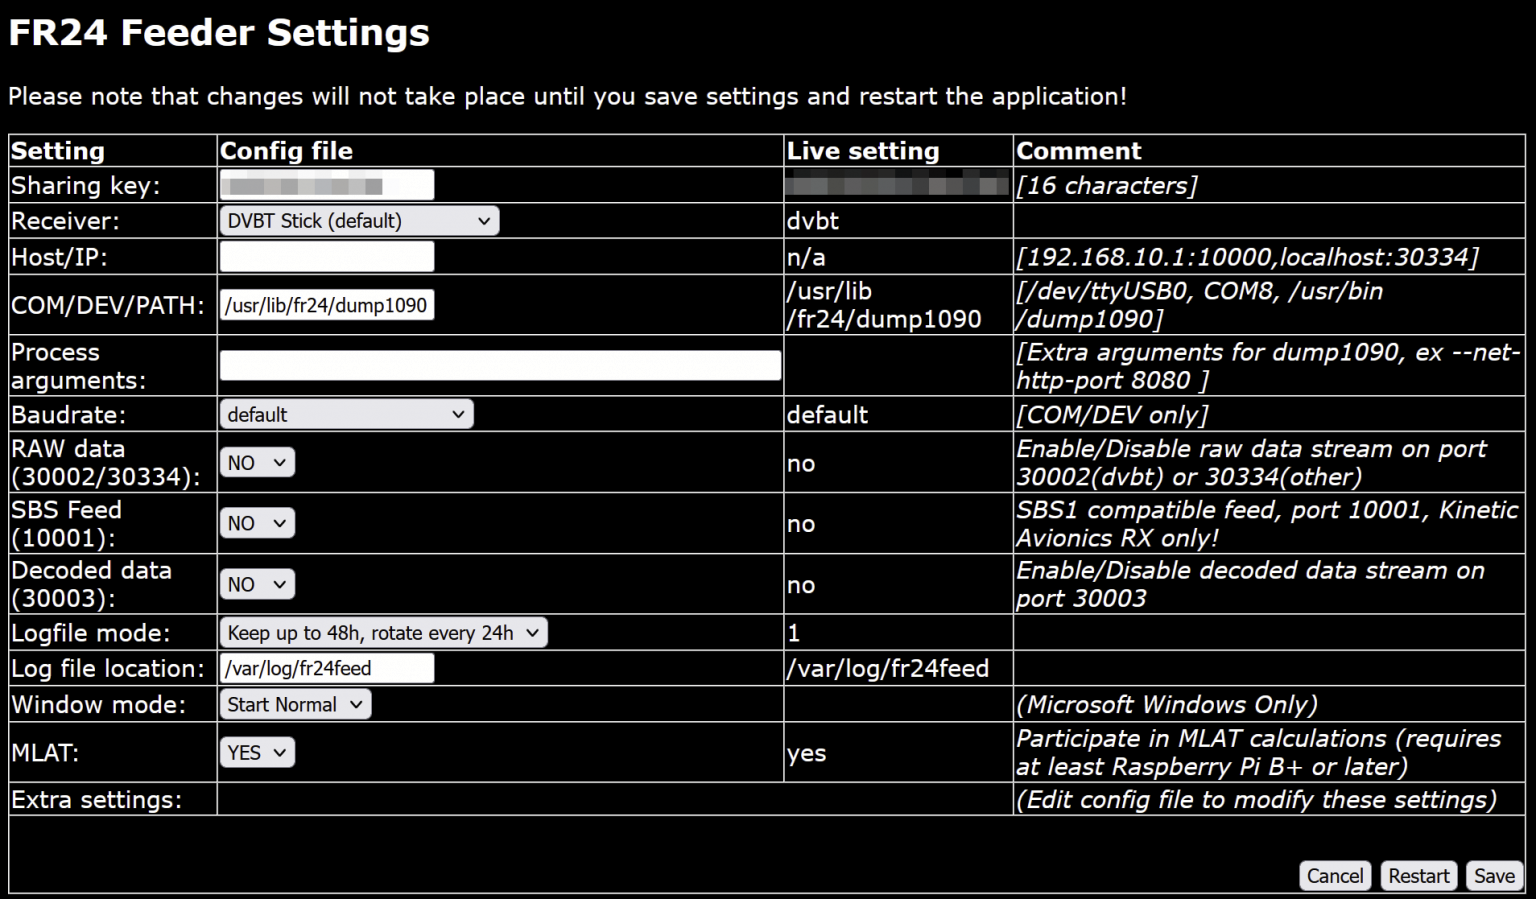
Under Settings you can verify the runtime settings of your dongle.
Finally, when you log in to https://flightradar24.com and click My Data Sharing under your account, you can verify if your receiver is submitting data to the service.
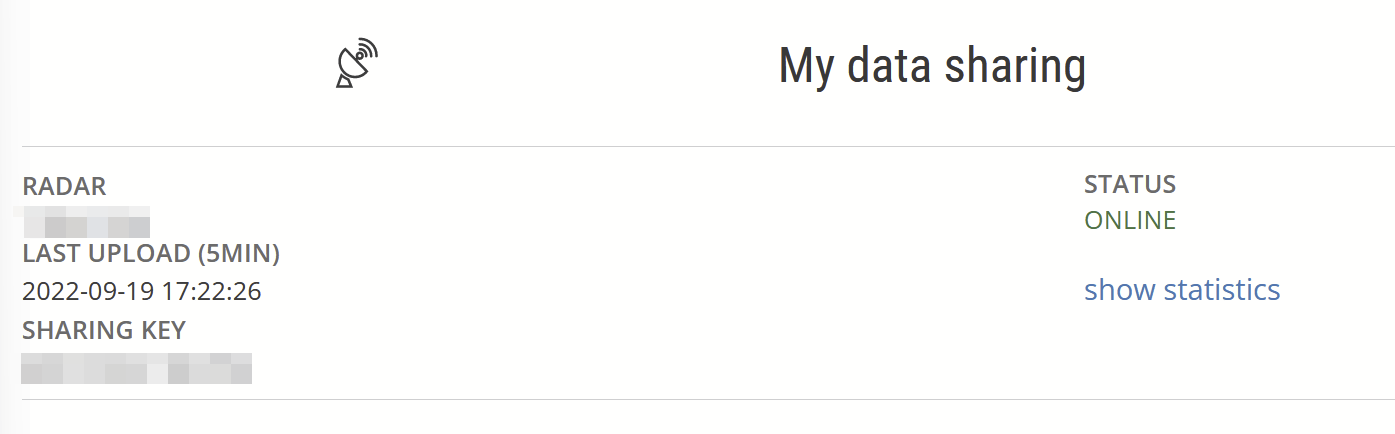
Under statistics, you can see all sorts of valuable data for troubleshooting and verifying your settings.
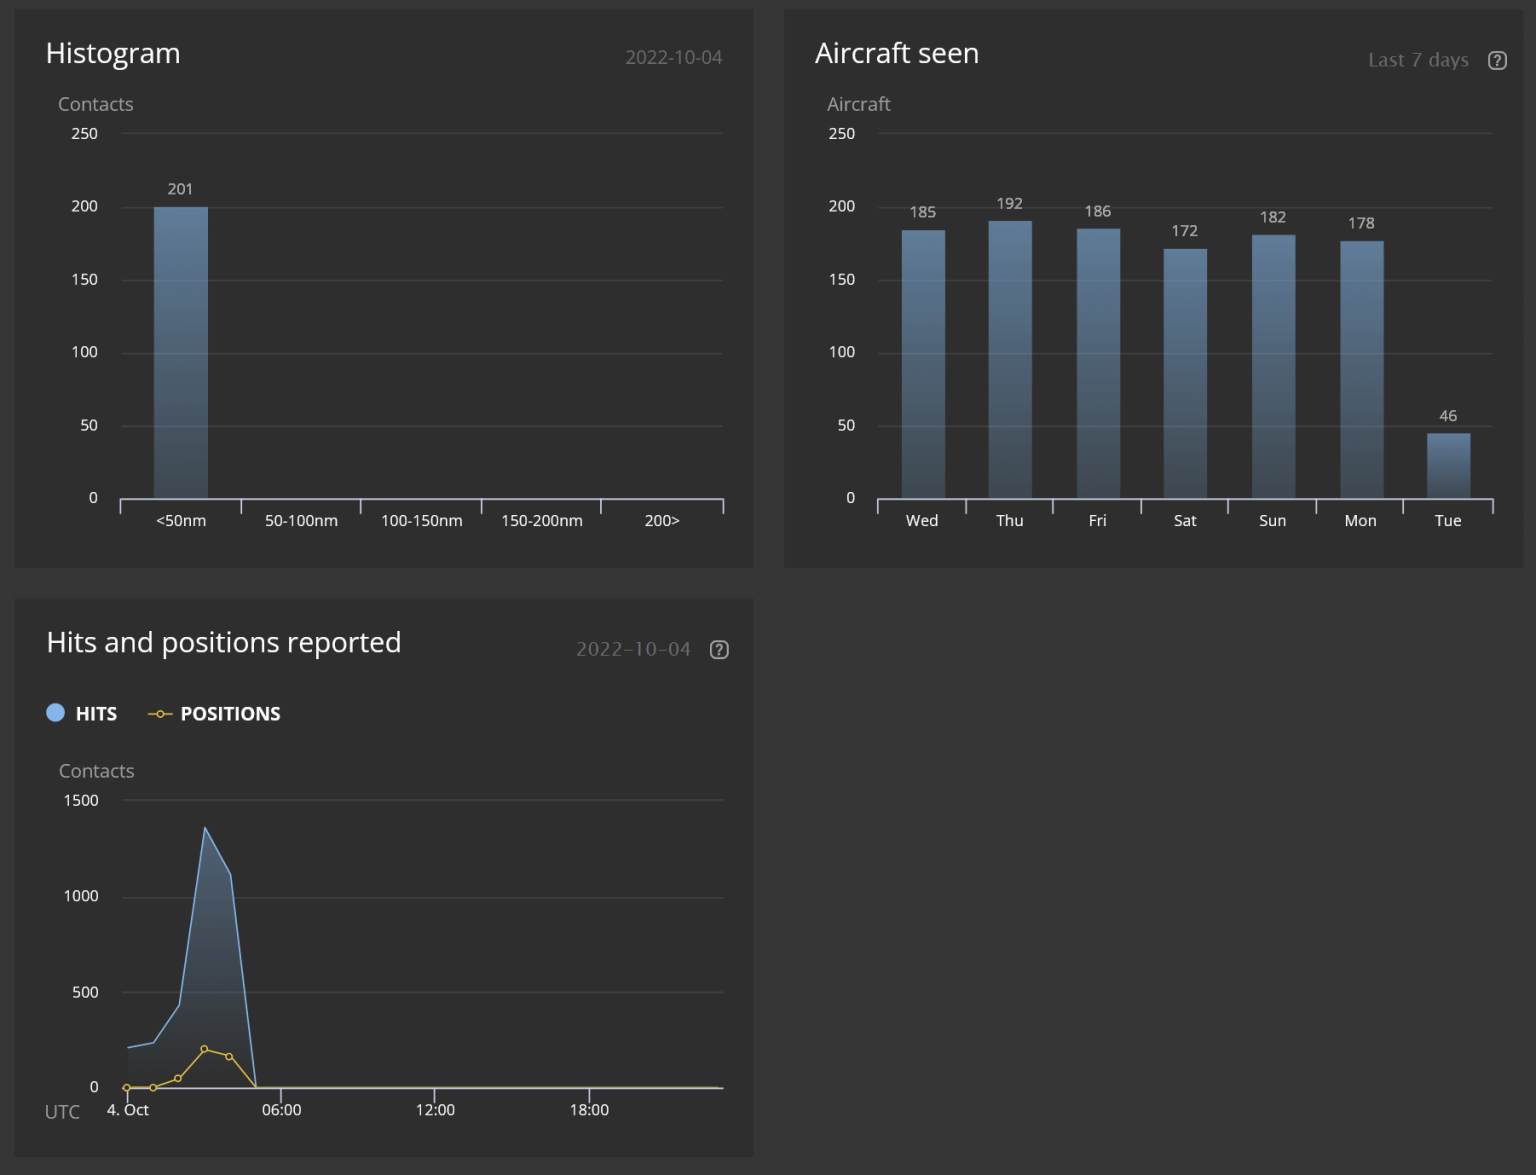
The antenna I’m using is reaching about 45 nautical miles at best. One nautical mile is about 1.8 km (or about 1.15 miles). I first had the antenna indoors, and I could get perhaps 30 nm. I’ve since installed it on the roof, but the range did not become much better. As the system requires a line-of-sight for the aircraft, the issue is that the antenna is not on the highest point of the roof – in my defense, my ladders didn’t reach that high.
As a solution, I’m spending some time in the coming weekend installing an aluminum pipe to extend the height of the antenna.
Verifying the radar works
When you log in to FlightRadar24.com, you can filter based on radar. I’ve added my ADS-B receiver as a radar to the filter – thus, I’m only tracking aircraft my antenna can ping.
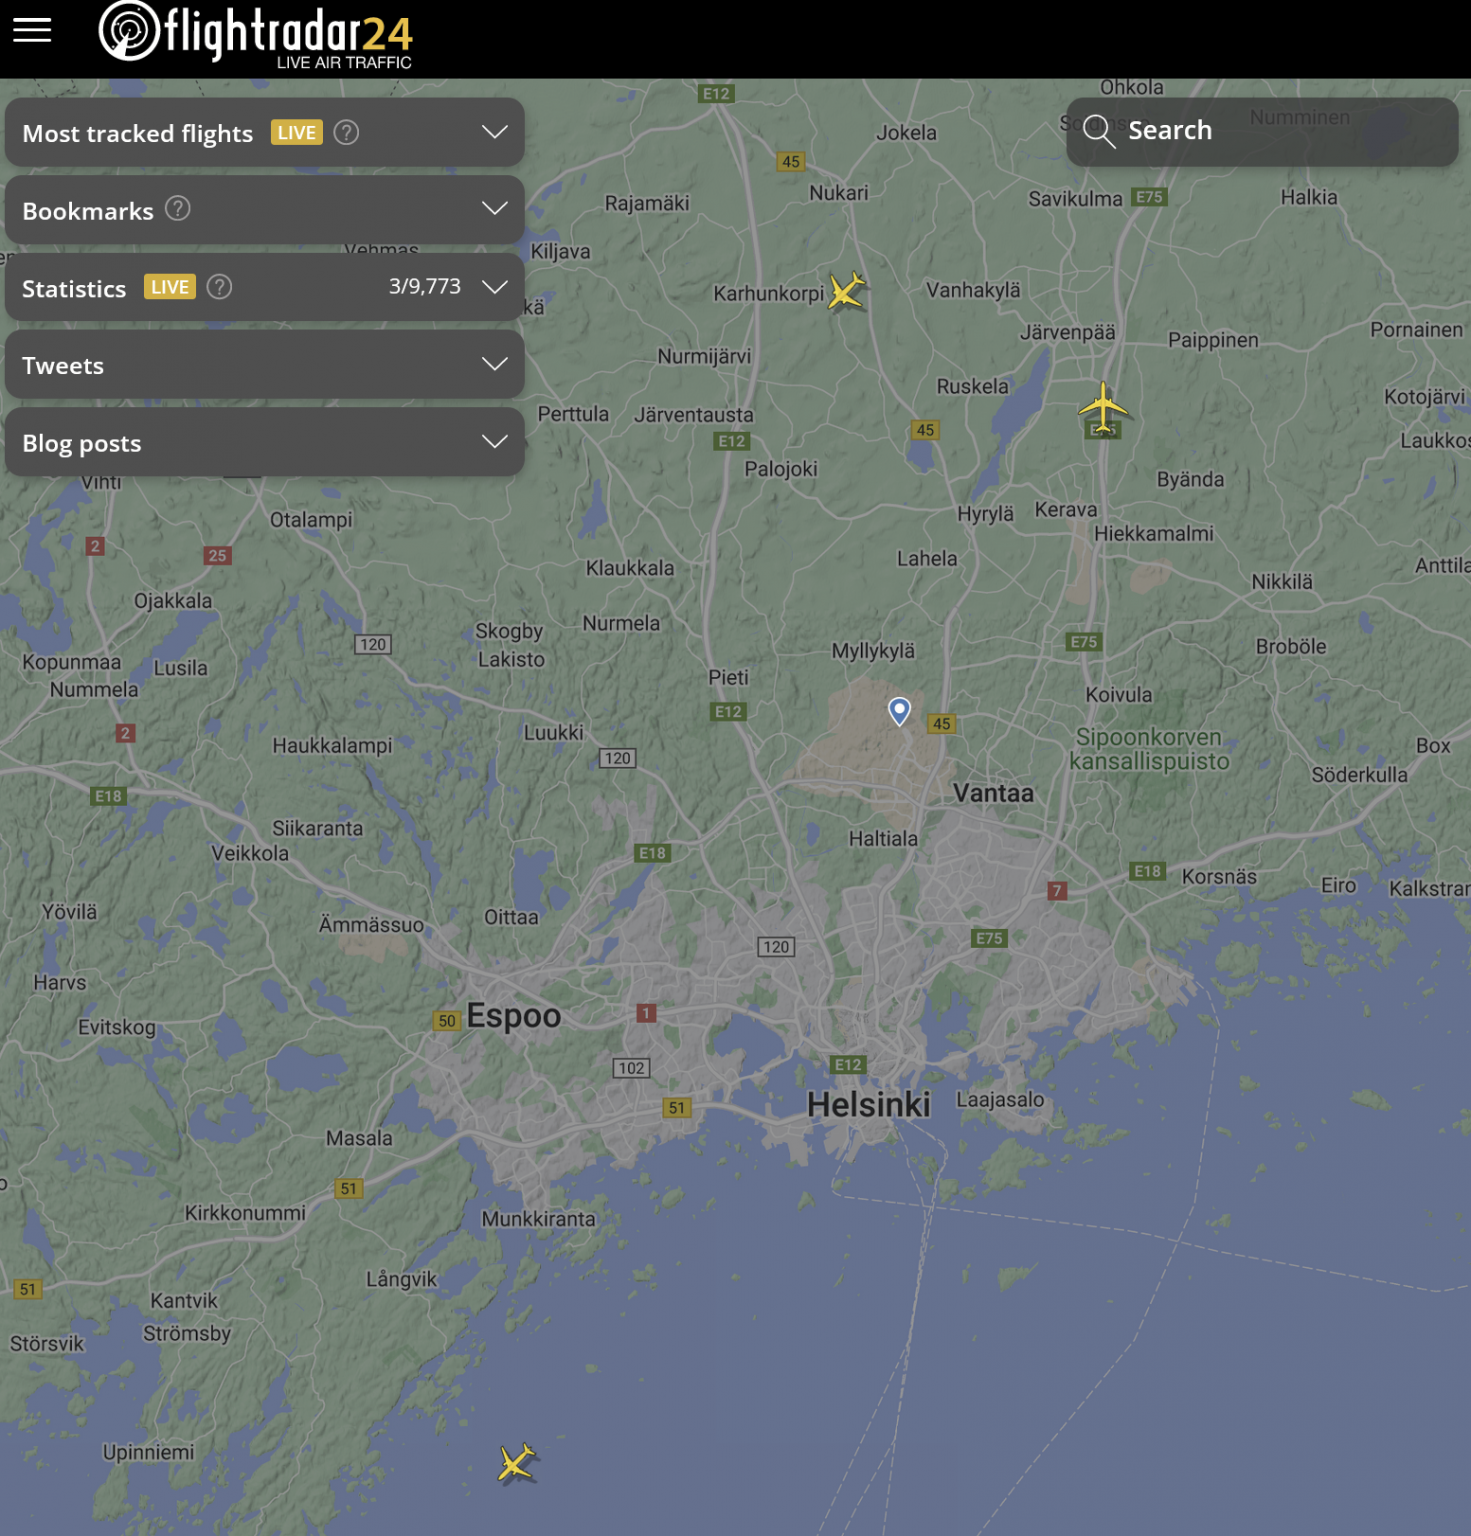
It’s mesmerizing! If I disable the filter and accept all radar data, I see more – pay attention to the cluster of aircraft at the HELsinki Airport now:
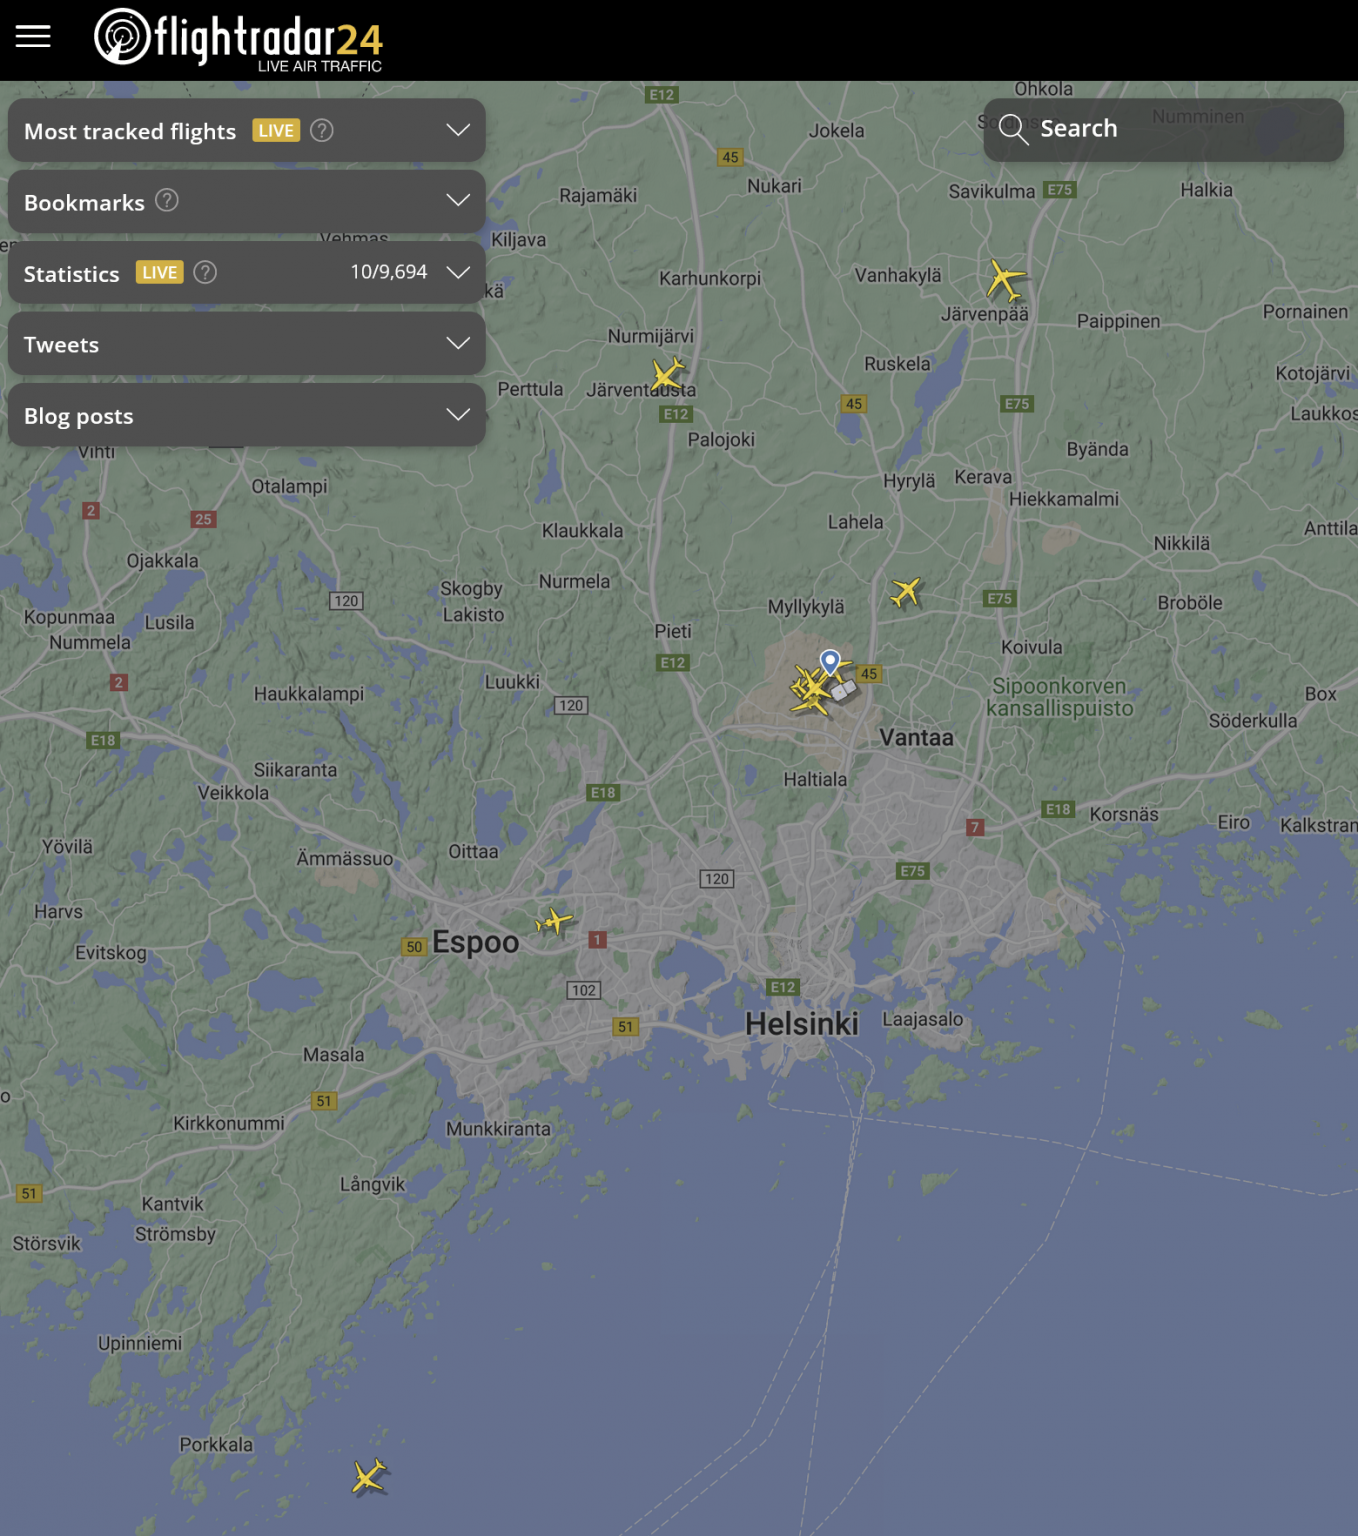
I’m too far away and blocked behind a few hills to ever reach stationary aircraft from where I live.
I can track several flights to and from St. Petersburg to Kaliningrad over the Gulf of Finland.
In closing
My wife asked me why specifically, am I doing this, and all I could think of “because I can.” It’s a fun little project. With some future improvements – specifically, I need to mount the antenna on higher ground. It’s now on top of my garage, which is not as high as my house. The house would be optimal, but I’m unsure where to install the Raspberry Pi then – as it’s not weather sealed, I would need to drill a hole somewhere to feed the antenna cable through. For the garage, it was much easier, as my home office is adjoined to the garage and I had everything necessary already installed.
In the past week, I’ve monitored my range with the antenna. Depending on the weather, it varies drastically – from just 10 nm up to 48 nm in specific directions. As my garage (and house) are still blocking parts of the surroundings, the typical pattern I’m seeing is this:
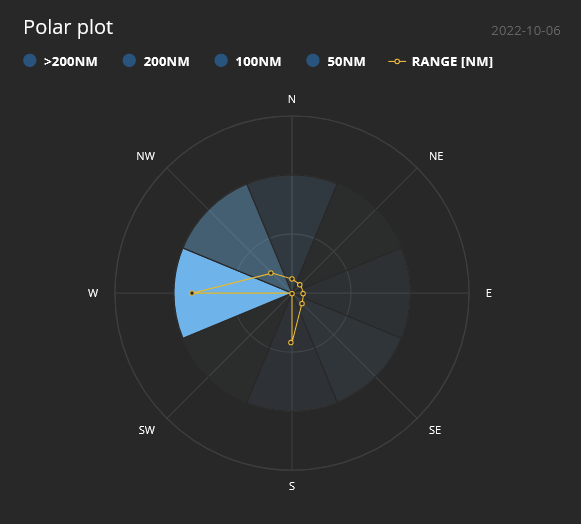
I’m still considering installing a two-meter rod for the antenna, but it’s a bit of work, and I’m not entirely sure how much it would make a difference. I’ll work on that shortly and will update you here with the findings.