Building a local WordPress test environment using Windows 10, Docker Desktop, and WSL 2

I realize this is awfully specific, but I needed to replicate my current hosted WordPress setup for some tests. I began this by exporting all content of my site using the All-In-One Migration WP extension – it results in a 2 GB file that contains all posts, settings, and other data of my blog.
First attempt: Using an Ubuntu virtual machine
As I already have Hyper-V configured and running, I quickly provisioned a new Ubuntu 20.04.1 LTS instance using the fantastic Quick Create feature.

Once Ubuntu was installed, I set out to install MySQL and WordPress. But there are so many guides out there for this. Needless to say, I spent a good 45 minutes installing numerous packages, fixing Apache config files, and just trying to get WordPress to say ‘hello.’ It was a painful experience, as Hyper-V disallows true copy-paste, so each 15 line modification you have to type by hand.
I eventually then gave up, it felt too cumbersome and clumsy.
Second attempt: Using WSL 2
A friend (thanks, Martijn!) then suggested that I look into WSL 2. It stands for Windows Subsystem for Linux, version 2.0, and it became available with the Windows 10 May 2020 (2004) update. In essence, WSL 2 allows you to run a Linux distribution – of your choice – side-by-side with Windows 10.
I set out to configure WSL 2 first. The instructions are fairly simple, but I ran into numerous issues. I trawled GitHub Repos issues, rebooted the host, uninstalled Hyper-V, but kept running into an issue when needing to upgrade to WSL 2 (from WSL 1). For me, the fix was to uninstall all elements of Hyper-V and WSL and reinstall them again: first Hyper-V, then WSL 1, the WSL 2.
So let’s take a brief moment here to look at how WSL 2 works. The service allows you to run Linux ELF64 binaries on Windows. It has full system call compatibility so that the elements you require on Linux are available, even if you’re running on WSL 2.
How it works is that WSL 2 discards the idea that WSL 1 embraced and doesn’t run on a traditional virtual machine. This time around, WSL 2 has a Linux kernel (built by Microsoft), and it’s been optimized for performance and size. For the user, it’s transparent, and no actions are needed to maintain this kernel. If you’re interested in technical architecture, see this article from 2016.
Once WSL 2 is running, you can download your preferred Linux distribution from the Microsoft Store:
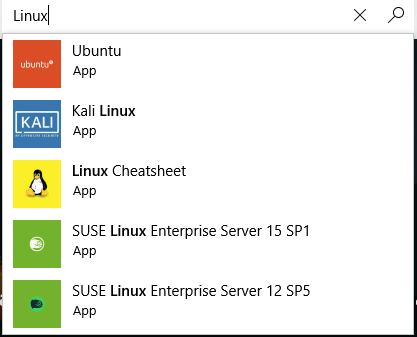
There seems to be some trickery involved, as quite often, the Microsoft Store app gives me an error when I search for Linux or Ubuntu:

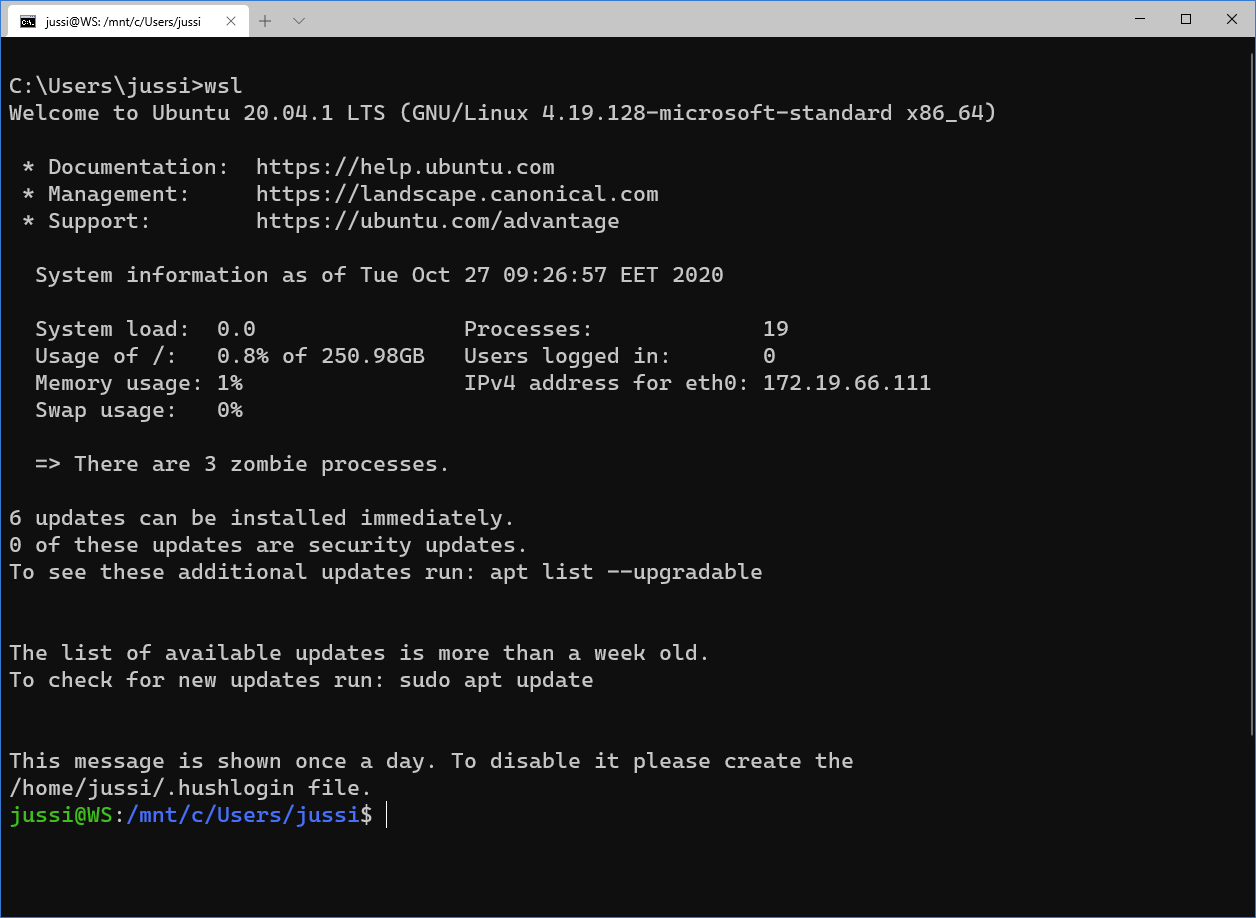
This is how Ubuntu looks like in WSL 2:
I dutifully set out to configure MySQL and WordPress on my Ubuntu Linux image hosted on WSL 2. And again, it failed. I kept getting errors on missing system services, and nothing worked.
Third, and final attempt: Using WSL 2 with Docker remote containers
Now that I had WSL 2 running, I realized I need to look at Docker Desktop. I was unclear how Docker containers (running on Docker Desktop) relate with WSL 2. Thankfully, Docker has a nice (technical) overview of this. Microsoft also has clear documentation on this matrimony of technologies.
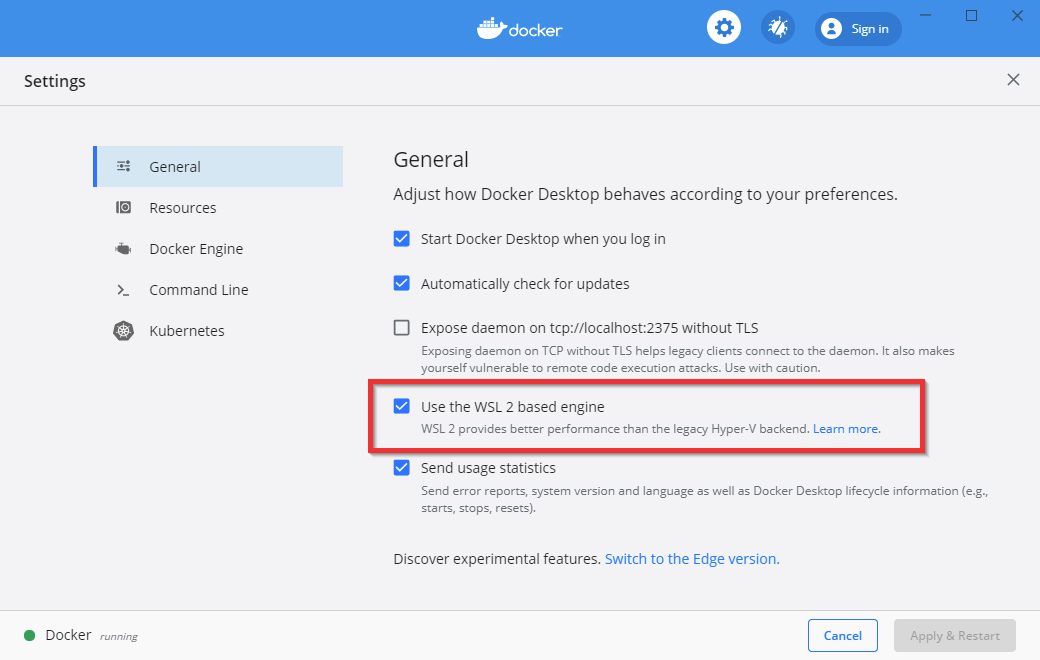
To paraphrase, Docker Desktop allows you to leverage the performance of WSL 2 to run your containers. Once you’ve installed Docker Desktop (get it free from here), you can configure it to use WSL 2:
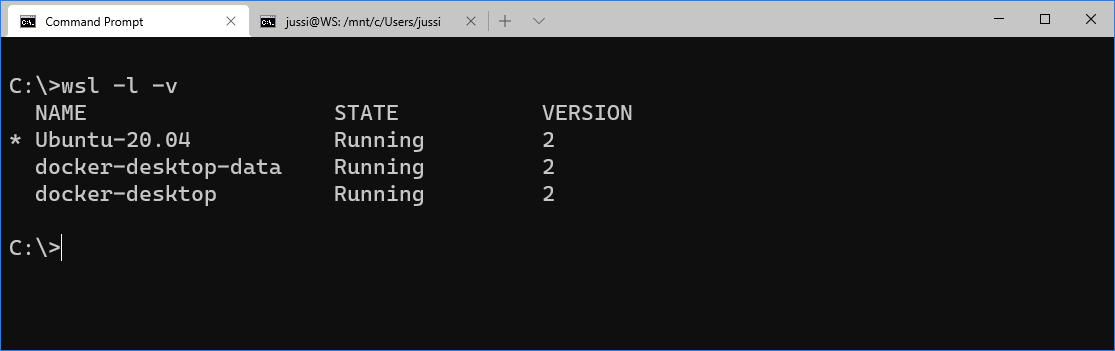
What happens now is that WSL 2 still works (with your preferred Linux distro), but Docker Desktop also leverages the same engine. If you type wsl -l -v, you can view the backends:
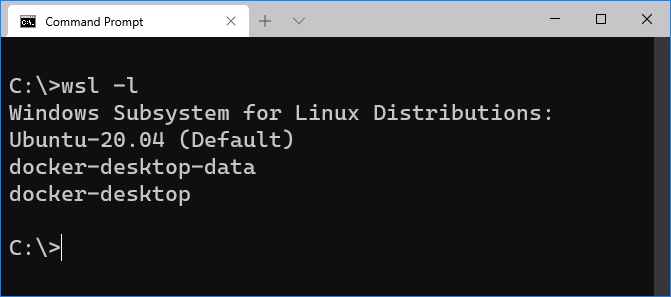
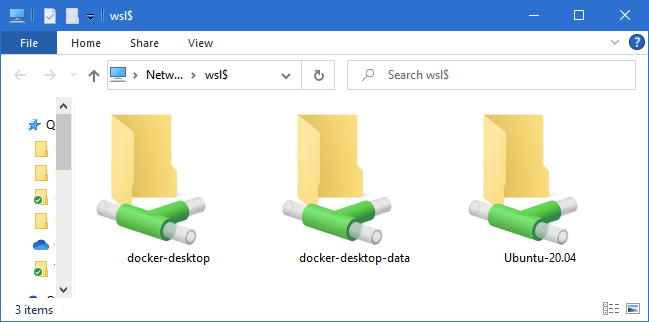
Ubuntu-20.04 is my default, and I get that when I type wsl on a command prompt. docker-desktop is the distro for running my containers, and docker-desktop-data is the distro used to store container images and other settings. Docker Desktop then manages these for you. By the way, you can access all these from the host with \\wsl$\:
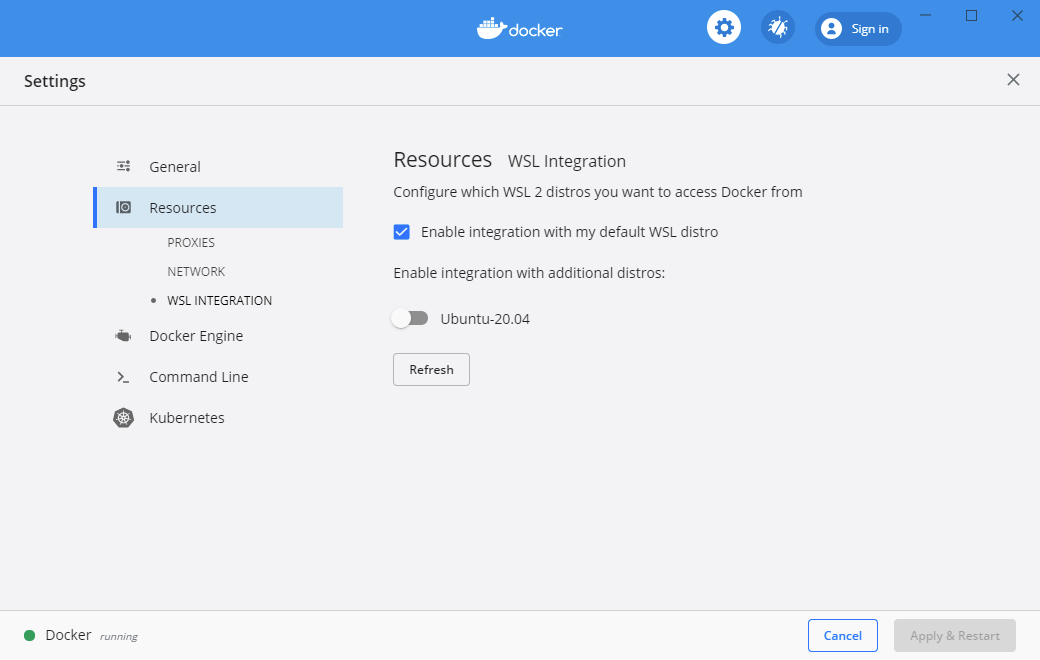
There is also another setting in Docker Desktop to specify which distros to integrate with. It’s under Resources:
To recap, we now have WSL 2 running and Docker Desktop running, and the latter leverages the lightweight Linux kernel of WSL 2.
Let’s verify this works by running the classic hello-world image in Docker:

Running wsl -l -v shows that everything is running, in the newer version 2:
Finally, we’re getting somewhere!
Running WordPress and MySQL in a container
Now that the underlying infrastructure is looking good, it’s time to get two containers running: WordPress and another with MySQL. You can do this from WSL 2 or a regular Windows Terminal command prompt.
Pro tip: use wt to quickly open a new Windows Terminal session 🙂
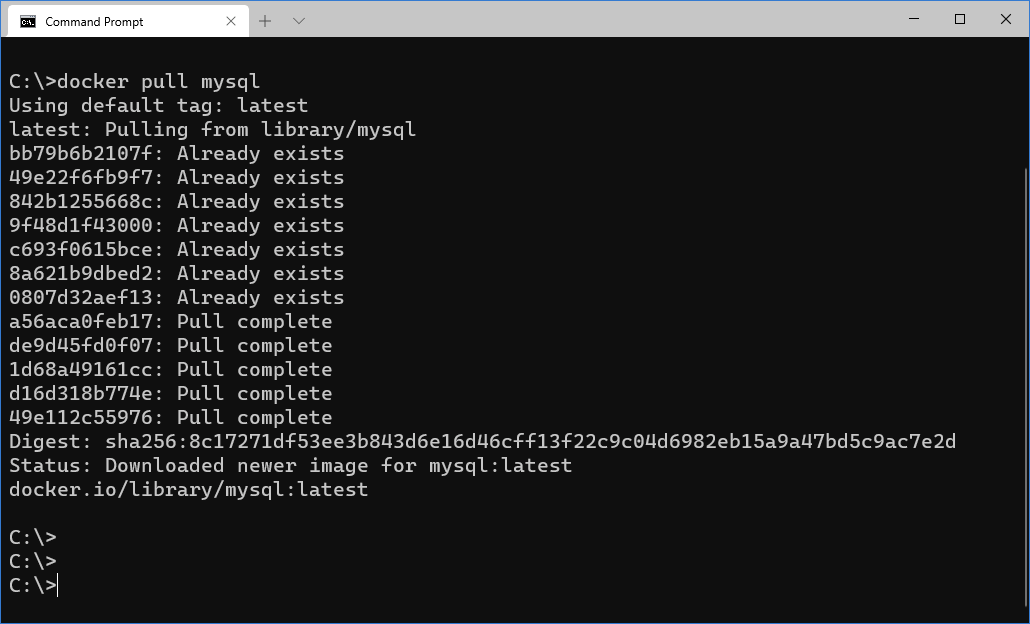
Let’s start with MySQL. It’s available on the Docker Hub, and you can get the image with docker pull mysql:
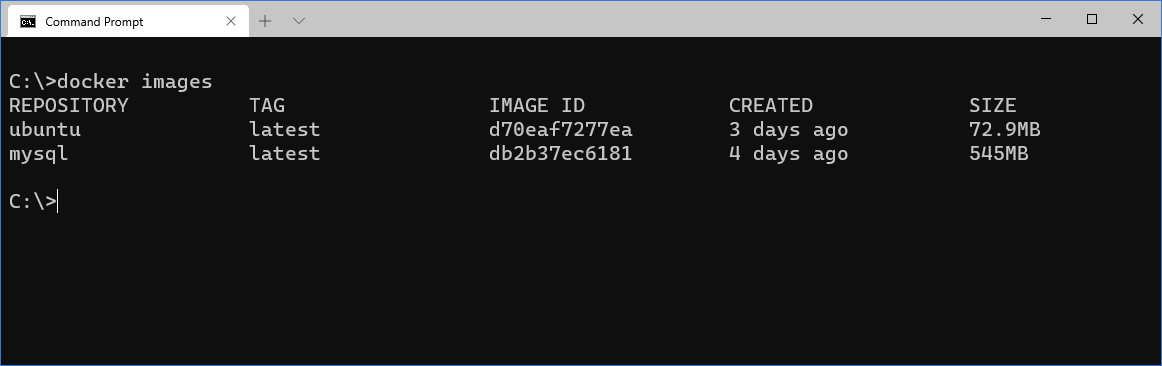
Verifying the image downloaded successfully, you can use docker images:
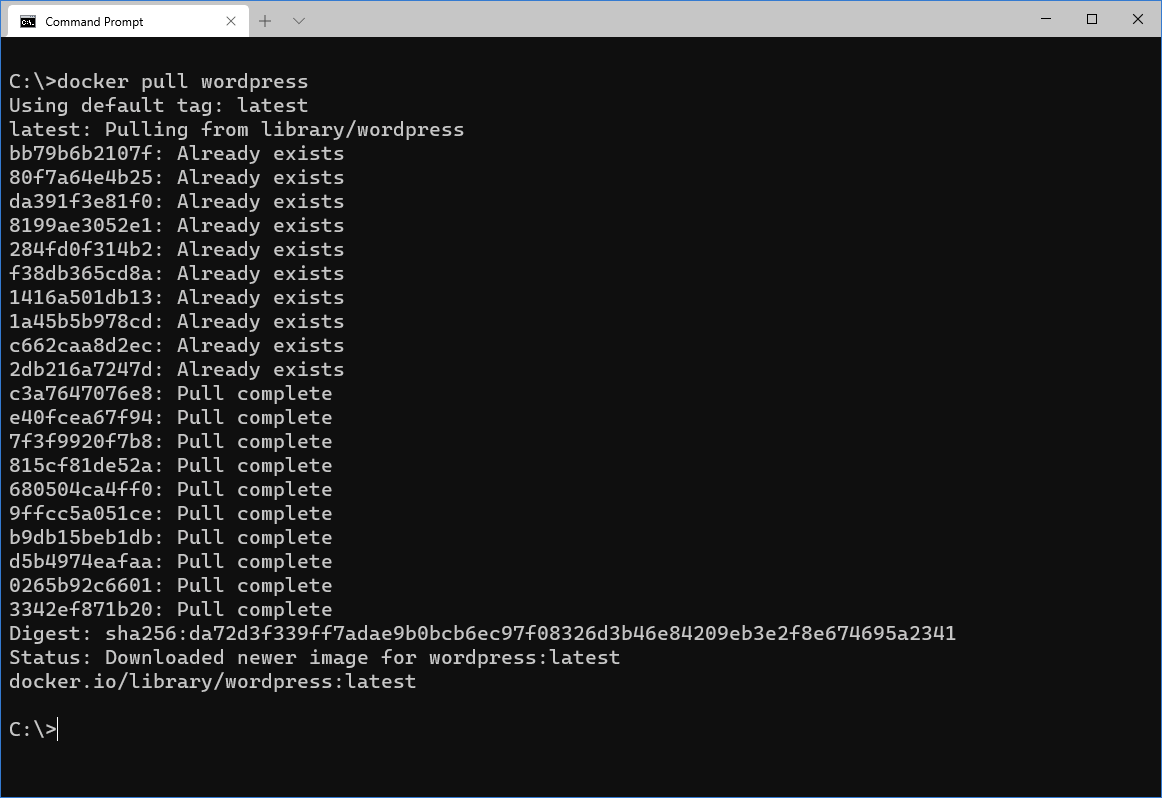
Let’s also get WordPress with docker pull wordpress:
First, we’ll need to run both images in their respective containers. Let’s do MySQL first. The command is
docker run --name mysql -e MYSQL_ROOT_PASSWORD=Password1 -d mysql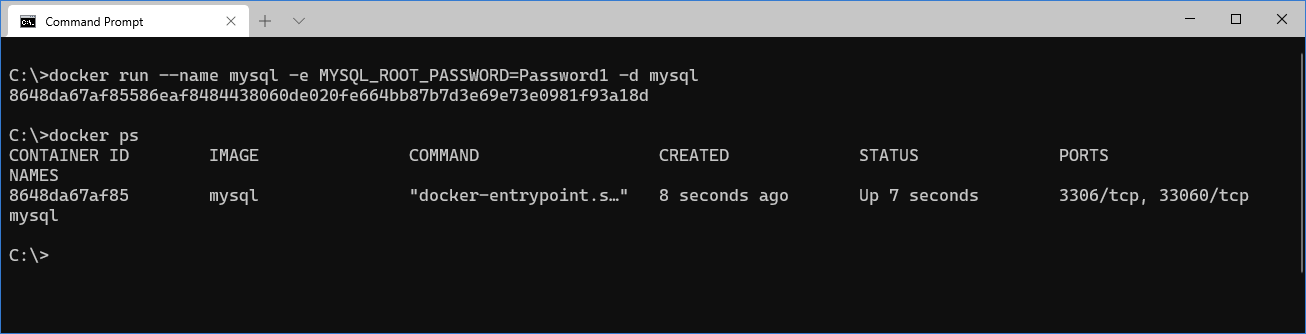
So what the command does, is that it runs (run) the mysql container (-d mysql) and sets the MySQL root password to Password1 (-e MYSQL_ROOT_PASSWORD=Password1). We’ll also give it a name, mysql (–name mysql). With docker ps it’s easy to verify that it’s running.
Now we have a container running MySQL, but we lack the database. So we can now log in to the MySQL instance and create one. To do this, we need to execute a command interactively against the container with docker exec:
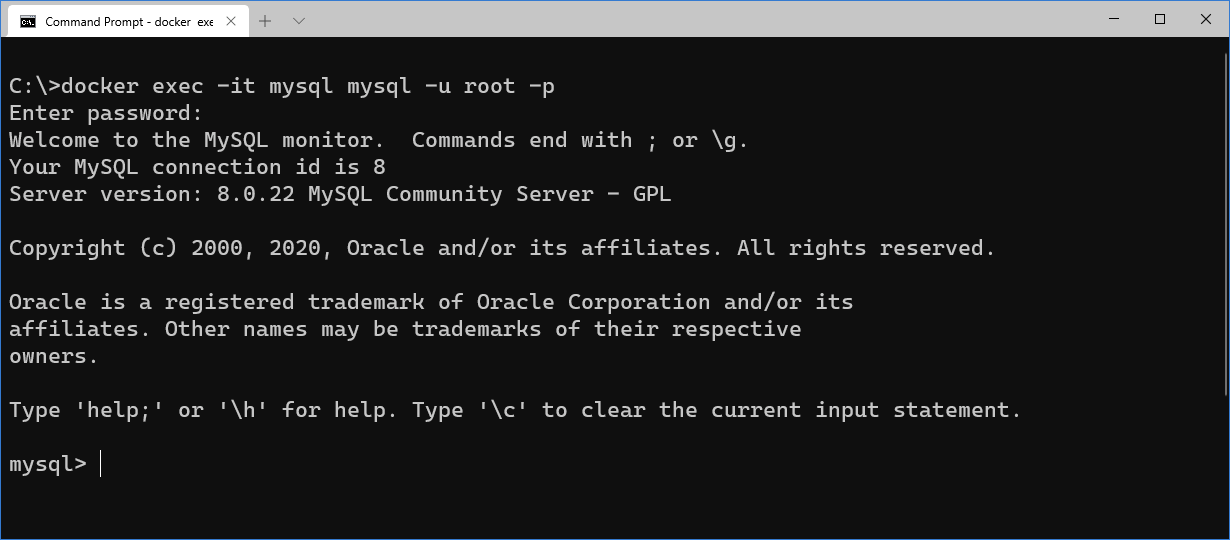
The command specifies the container (mysql), and then the command to execute (mysql) and its parameters (-u root -p). Now we have an interactive prompt with MySQL, so following WordPress guidance, it’s easy to create a new (empty) database:

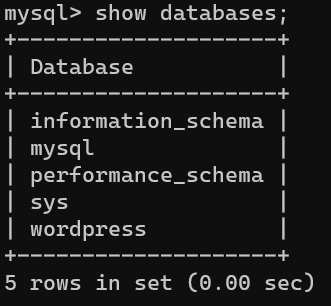
To view the databases, use show databases;
Next, let’s spin up WordPress. First, we’ll run the WordPress image with docker run –name wordpress -p 8080:80 -d wordpress:

Again, with docker ps it’s easy to verify that MySQL and WordPress containers are running:
With docker stats, I can see a rudimentary statistics view on how much resources these two containers are utilizing:

As we set the WordPress container to map port 8080 to its port 80, WordPress should now be accessible via http://localhost:8080.
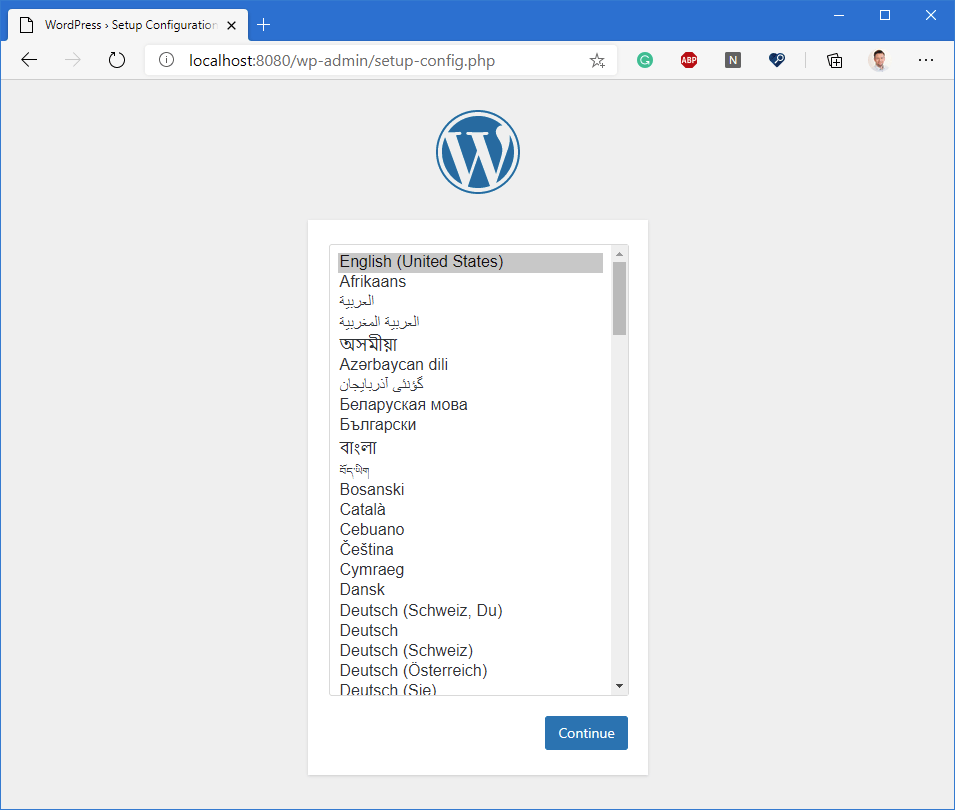
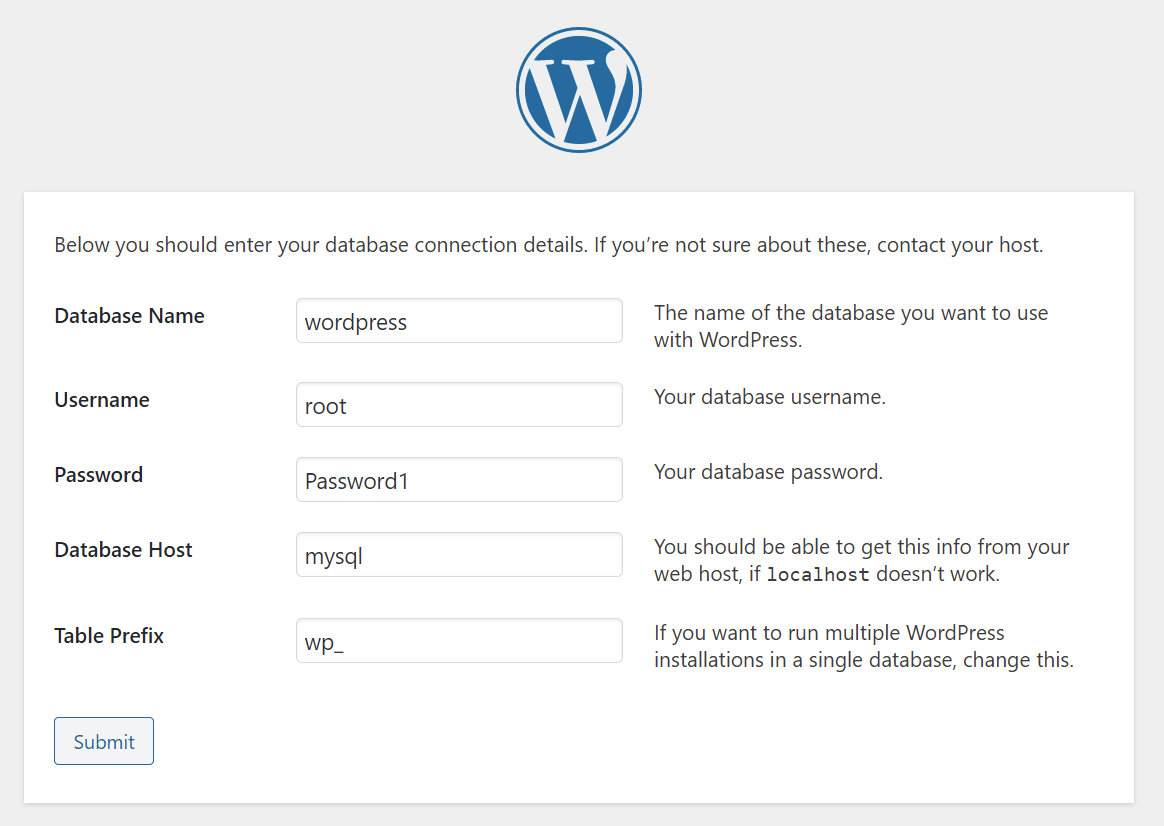
And there it is! But wait, how will WordPress find our MySQL instance? You can check the networking features here, and it seems I need to create a network and bind the two containers to use that same network.
This is done with the docker network command, by specifying a name for the network and specifying it to be —attachable. This latter option means that we can
manually add containers to the network.
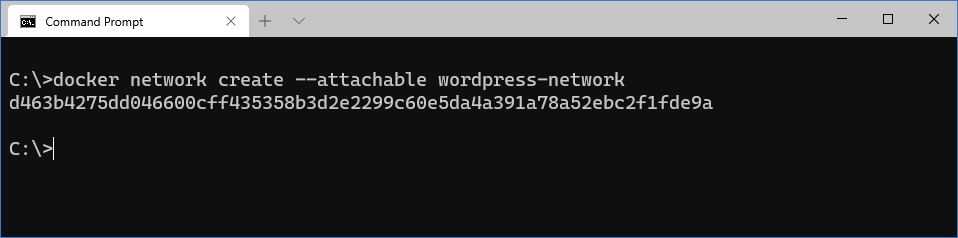
And now all that is needed is to add the two containers to the network:
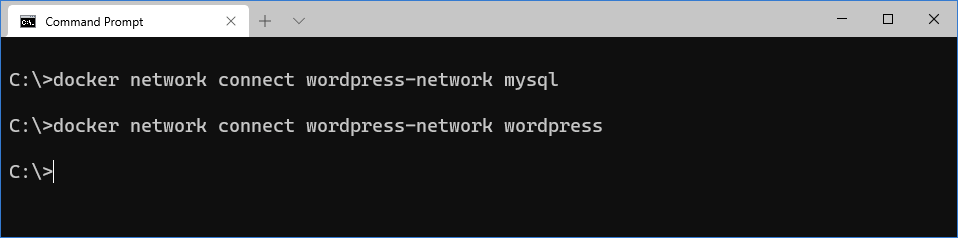
Completing WordPress configuration is now possible, as we can connect from WordPress to MySQL:
And WordPress is up and running!
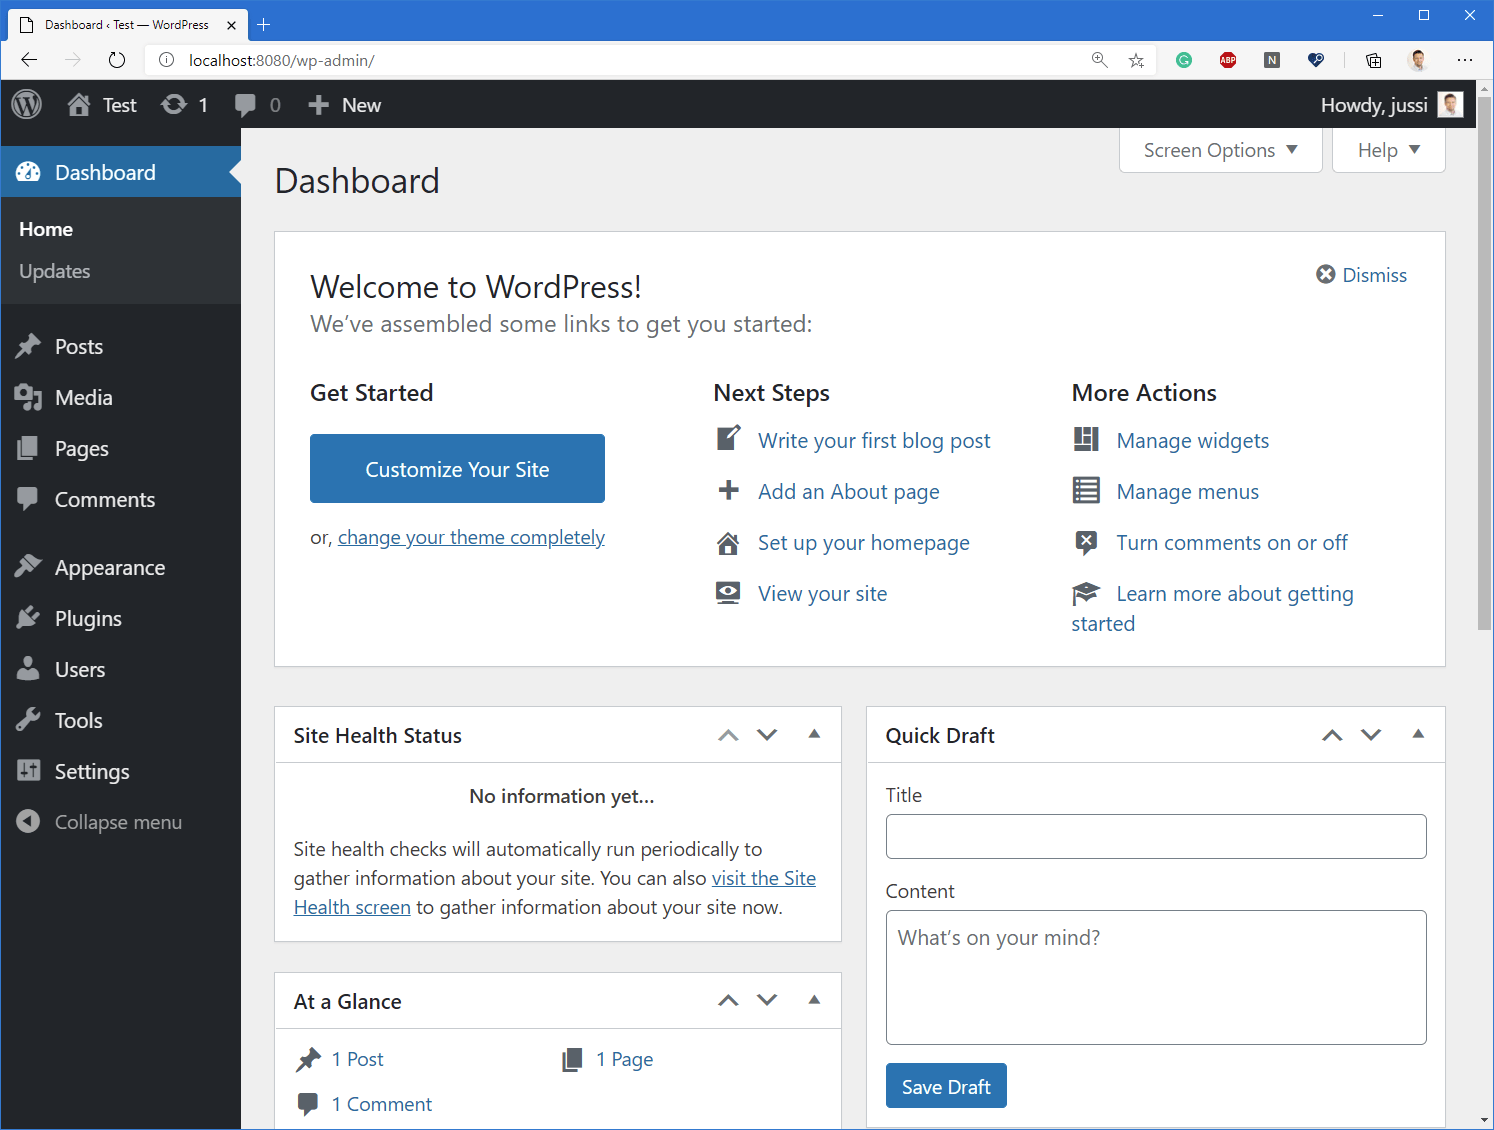
MySQL is consuming 375 MB of RAM, while WordPress is consuming only 62 MB of RAM. Very efficient!
In conclusion
It turns out, running WordPress and MySQL in containers is very efficient, and with WSL 2, it is quite easy. There are still aspects I’d like to automate, such as running the containers after a reboot of the host. Beyond this, the setup is elegant and surprisingly lightweight.