Building a custom chat tool with Azure Communication Services

During Ignite, Microsoft announced the public preview of Azure Communication Services. It’s a Platform-as-a-Service service that provides you with a robust back-end and services for building communications services in your apps and solutions. It’s also marketed as “the service that powers Microsoft Teams,” but I couldn’t verify this independently.
The service allows for you to utilize and leverage the following capabilities:
- Chat – think WhatsApp, or a Teams chat.
- Telephony and SMS – initiate calls, send and reply to SMS text messages.
- Voice and video calling – including group calls.
It’s quite comprehensive, but not all features are available during the public preview. Let’s see how it works then!
Provisioning the service
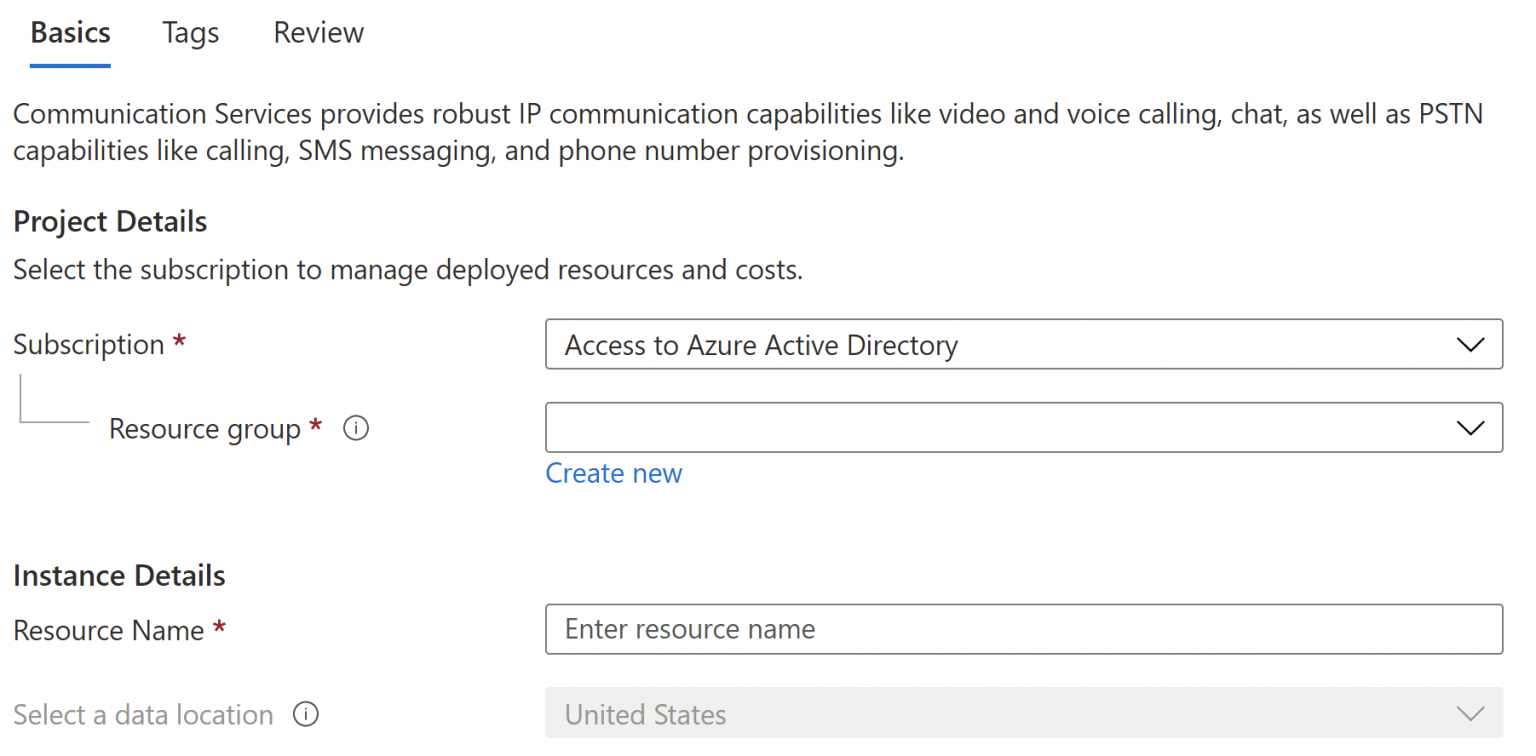
In Azure Portal, you can provision the service through Azure Marketplace – click the + Create a resource in the navbar, and search for ‘_communication service_s’:

Provisioning the service follows the usual design pattern, but with only a few options to choose from. You’ll only need to choose a subscription, the resource group, and the instance’s resource name. Note that during the preview, your data will be stored in the United States.
Once it’s provisioned, you’ll need to pick up some information from the Azure Communication Service.
Limitations during the preview
I initially wanted to try out the SMS feature, as it’s often a relatively simple way to see if something works or not. I would call it relative to turning on a LED light on an IoT device – “it works!” and it also gives you more confidence to push forward.
For the SMS feature, you’ll need to provision a phone number. This is done through Phone Numbers view. Unfortunately, I received this error:
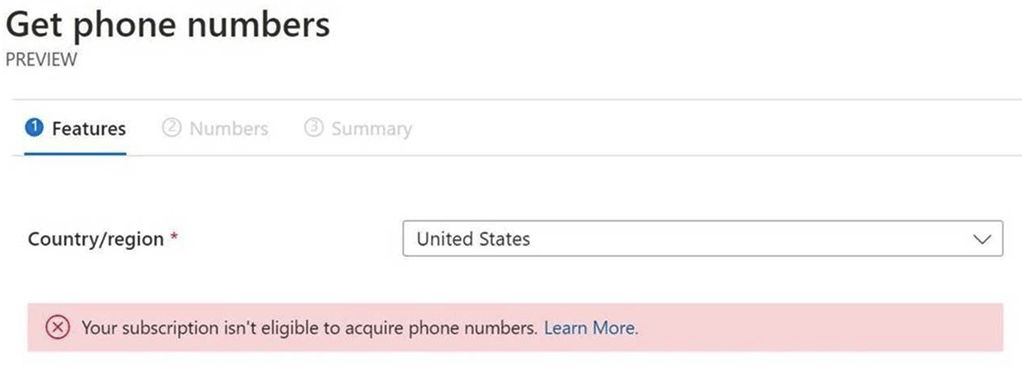
I was using a regular MSDN subscription. Learn More takes you here, but at the time, I couldn’t find any useful information. I provisioned another subscription, a regular Pay-as-you-Go, and put in my credit card. Still, the same error.
I then opened a support ticket and got a reaction in just two hours. After a few courtesy emails, I got the explanation. Phone numbers only work in US-based tenants during the preview. This was then also added to the docs:
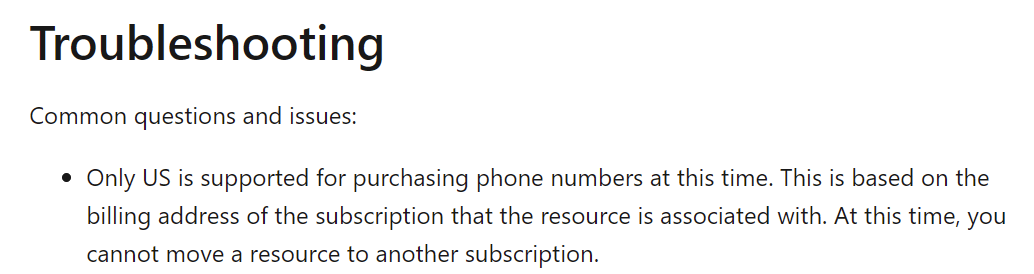
So, if, like me, you’re outside the US, you cannot – at least right now – use any Azure Communication Services capabilities that require a phone number. This means that SMS, calling, video calling, and telephony are out of the question.
Therefore I chose to build a chat app!
Planning for the chat app
As I’m just getting started with Azure Communication Services, I chose to build something relatively simple to understand how the SDK and APIs work. For me, a great way to learn is to build a simple command-line tool as it removes most of the complexity between me and the backend service.
My need was to be able to:
- Authenticate with the service
- Create users
- Create chat threads (“rooms” or “groups,” you might call them in other apps)
- Send and receive messages
Building the chat app
Note: All source code that I’ll show here is available on GitHub.
Loading up Visual Studio 2019, I first needed to get the necessary libraries. These are:
- Azure.Communication.Administration (v1.0.0-beta.1)
- Azure.Communication.Chat (v1.0.0-beta1)
I used Visual Studio’s NuGet Package Manager to install these:
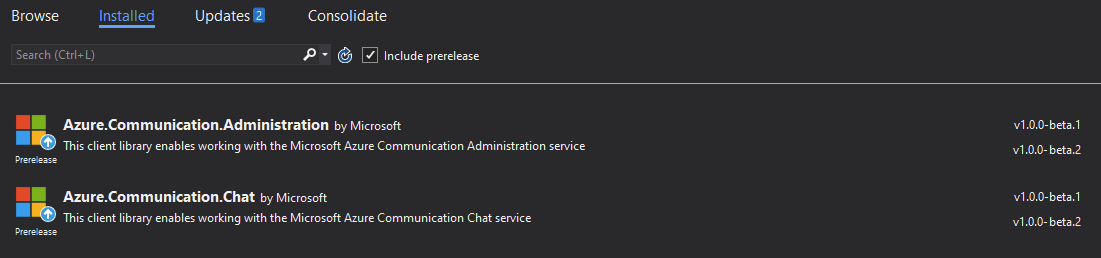
By the time of writing this post, v1.0.0-beta2 has been made available also. See further information on these packages here.
I fleshed out a simple interface for my CLI tool. I know that great libraries exist to manage these more fancily, but I wanted to avoid any external libraries that were not strictly needed to keep this simple. This is the code for the ShowMenu() method that.. shows a menu:
Console.WriteLine("\n# Azure Communication Services - Demo\n");

Console.WriteLine($"# Token: {tokenset}");
Console.WriteLine($"# User: {userid}");
Console.WriteLine($"# Display name: {displayname}");

Console.WriteLine("\nSelect option: ");
Console.WriteLine(" 0) Set token");
Console.WriteLine(" 1) Set user");
Console.WriteLine(" 2) Create new user and token");
Console.WriteLine(" 3) Create new chat thread");
Console.WriteLine(" 4) Add user to an existing chat thread");
Console.WriteLine(" 5) Send message to a thread");
Console.WriteLine(" 6) View messages in a thread");
Console.WriteLine(" 7) View members in a thread");
Console.WriteLine(" 8) View all threads");
Console.WriteLine(" 9) Exit");
As ACS requires a token and a user, I print those out to verify that all is good. I then added 9 options from setting these to managing the service. Each one calls a method, so this is really 1985-style coding on purpose.
To connect with the service instance of ACS, I’ll need the connection string (which you can copy from the Azure Portal within the Overview page) and a CommunicationIdentityClient:
private static string ConnectionString = "endpoint=https://<INSTANCE-NAME>.communication.azure.com/;accesskey=<ACCESS-KEY-HERE>";

private static CommunicationIdentityClient client = new CommunicationIdentityClient(ConnectionString);
First, I’ll need to create a new user and retrieve a token for subsequent calls. ACS exposes a lightweight user management system that is not mapped to Azure Active Directory. This translates to the fact you must manage your users somehow. I used Notepad for this.
This is CreateNewUser():
private static async Task<string> CreateNewUser()
{
	Console.WriteLine("\n# Provisioning a user");
	Console.Write("Enter user name: ");
	var username = Console.ReadLine();

	var userResponse = await client.CreateUserAsync();
	var user = userResponse.Value;
	Console.WriteLine($"\nCreated a {username} user with ID: {user.Id}");

	userid = user.Id;
	displayname = username;

	Console.WriteLine("Getting the authentication token");
	//// get token
	var tokenResponse = await client.IssueTokenAsync(user, scopes: new[] { CommunicationTokenScope.Chat });
	token = tokenResponse.Value.Token;
	var expiresOn = tokenResponse.Value.ExpiresOn;
	Console.WriteLine($"\nIssued a token with 'chat' scope that expires at {expiresOn}:");

	return token;

}
How does this look now, then? Let’s run the tool quickly in a Windows Terminal session to view the token:
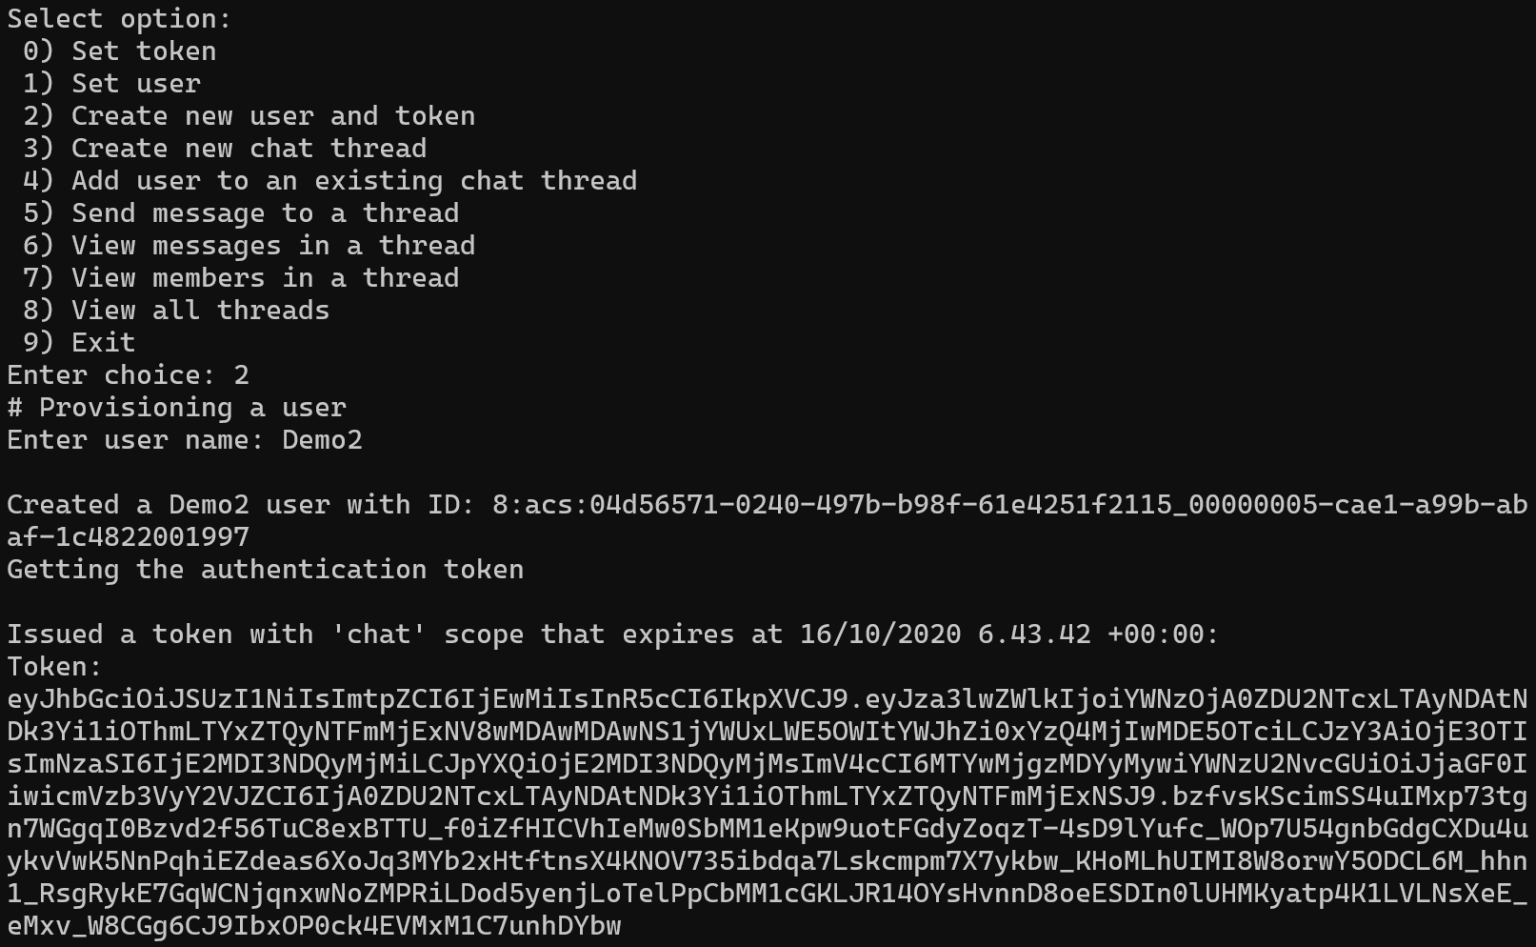
We now have a user ID and a token. These can be used to resume existing chat threads later and read messages.
Next, we’ll need to create a new chat thread, this happens in CreateNewChatThread():
private static async Task<string> CreateNewChatThread()
{
Console.WriteLine("\n# Creating a new chat thread");
Console.WriteLine("Enter thread topic: ");
var topic = Console.ReadLine();
Uri endpoint = new Uri("https://ACS-INSTANCE.communication.azure.com/");
CommunicationUserCredential communicationUserCredential = new CommunicationUserCredential(token);
ChatClient chatClient = new ChatClient(endpoint, communicationUserCredential);
var chatThreadMember = new ChatThreadMember(new CommunicationUser(userid))
{
DisplayName = displayname
};
ChatThreadClient chatThreadClient = await chatClient.CreateChatThreadAsync(topic: topic, members: new[] { chatThreadMember });
Console.WriteLine($"Chat thread ID: {chatThreadClient.Id}");
return chatThreadClient.Id;
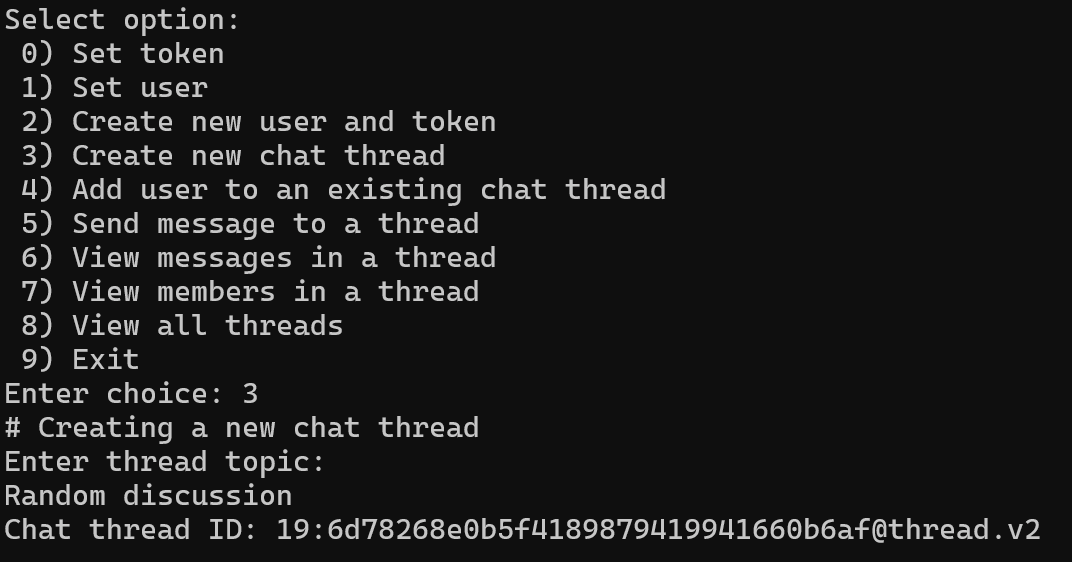
}As we already have a token, we can create a new chat thread and give it a topic. The chat thread ID can then be captured. Let’s see how this looks in real life:
Now we can finally send a message to our thread using our user! This happens in SendMessageToChatThreadAsync():
private static async Task SendMessageToChatThreadAsync()
{
	Console.WriteLine("\n# Sending a new message to a thread");

	Console.Write("Enter thread id: ");
	var threadId = Console.ReadLine();

	Console.Write("Enter message: ");
	var message = Console.ReadLine();

	Uri endpoint = new Uri("https://ACS-INSTANCE.communication.azure.com/");

	CommunicationUserCredential communicationUserCredential = new CommunicationUserCredential(token);
	ChatClient chatClient = new ChatClient(endpoint, communicationUserCredential);

	ChatThreadClient chatThreadClient = chatClient.GetChatThreadClient(threadId);

	var priority = ChatMessagePriority.Normal;

	SendChatMessageResult sendChatMessageResult = await chatThreadClient.SendMessageAsync(message, priority, displayname);
	string messageId = sendChatMessageResult.Id;

	Console.WriteLine($"Message sent: { messageId}");

}
It’s relatively simple, and looks like this:
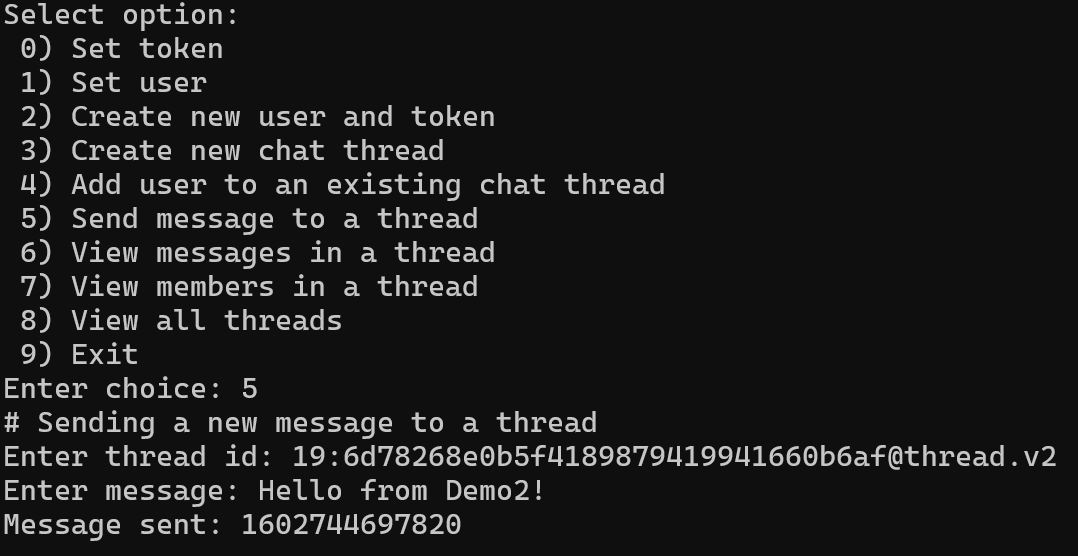
The message ID is also a Unix (Epoch) timestamp. Let’s then view messages within the thread; this happens in ViewMessagesInAThread():
private static async Task ViewMessagesInAThread()
{
	Console.WriteLine("\n# Viewing messages in a thread");

	Console.Write("Enter thread id: ");
	var threadId = Console.ReadLine();

	Uri endpoint = new Uri("https://ACS-INSTANCE.communication.azure.com/");

	CommunicationUserCredential communicationUserCredential = new CommunicationUserCredential(token);
	ChatClient chatClient = new ChatClient(endpoint, communicationUserCredential);

	ChatThreadClient chatThreadClient = chatClient.GetChatThreadClient(threadId);

	AsyncPageable<ChatMessage> allMessages = chatThreadClient.GetMessagesAsync();
	await foreach (ChatMessage message in allMessages)
	{
		Console.WriteLine($"{message.Id}: {message.Sender.Id}: {message.Content}");
	}

}
What’s interesting is that we get the thread, and then get all messages as AsyncPageable. And again, this looks like as follows:
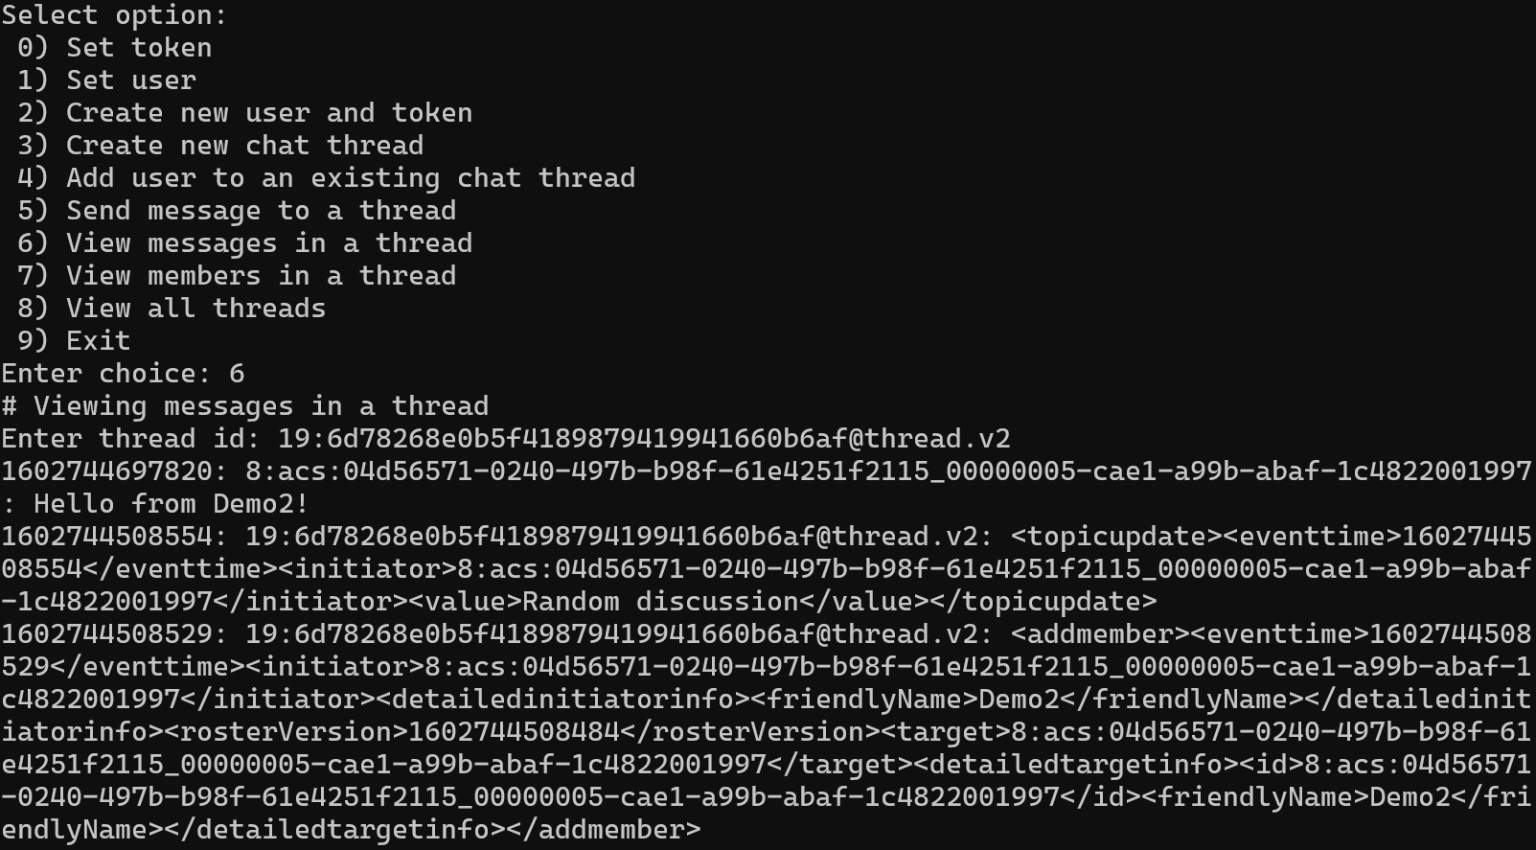
You can see the message sent previously and some system messages from when the thread was created.
In summary
This was a fun and enjoyable little exercise to get something rudimentary running that utilizes the Azure Communication Services capabilities. Admittedly, it’s pretty simple – but now it’s easy to build more sophisticated features around this when one understands how ACS works.
Additional reading
Jussi Roine
Microsoft MVP and consultancy founder with 30+ years of experience, passionate about Microsoft security, AI governance, and sharing what I learn along the way.