Building a custom Twitter Analytics tool using .NET Core, Azure Storage, and Power BI

This week has been very productive for me. I’ve been running and thinking, and in the mornings I’ve written about my thoughts. Today is no different!
I’ve been a Twitter user for 10 years now – I joined in May 2009. At first, I was a passive user, but in recent years I’ve given it more effort and I’ve found Twitter quite useful and valuable for myself.

One thing that’s kept me awake all these years is statistics on Twitter. A simple analytics page is provided at https://analytics.twitter.com, but that’s about it. I get core metrics through this page, such as how actively I’m tweeting and how many times I’m mentioned.

Unfortunately, this is a rolling 28-day summary, and it’s hard to make historical analysis or further statistics from this. Unless I scrape this data semi-manually every day, but that would be primitive. I need to build something for myself! After all, how hard can it be?
Figuring out the tech
I began this project by researching how to get data from Twitter. I’ve used Logic Apps’ Twitter connector in Azure. So I began looking there, as I was hoping to simply pull data from Twitter, store it somewhere and do some inventive analytics in Power BI.
I quickly created a prototype Logic App that pulls all my followers from Twitter. It allows for setting a parameter for a maximum amount of results. I put 10,000 there – never hurts to aim high, right?
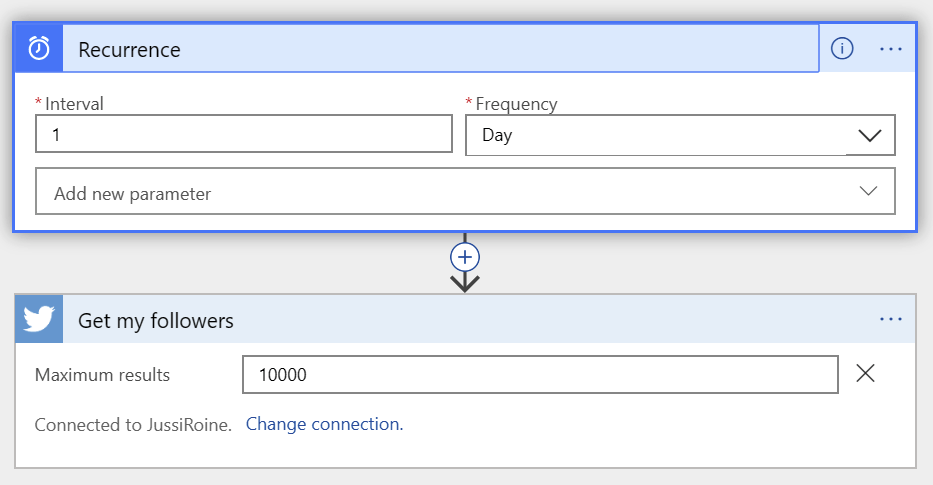
I ran this once, and it failed. Of course, because there’s an opportunity to learn something here.

I tried with a maximum result of 500, and it also failed. The connector uses Twitter’s API, which is heavily rate-limited for many reasons. I found the following list of rate limits from Microsoft’s documentation:
- Maximum number of connections per user: 2
- API call rate limit for POST operation: 12 per hour
- API call rate limit for other operations: 600 per hour
- Frequency of trigger polls: 60 seconds
- Maximum size of image upload: 5 MB
- Maximum size of video upload: 15 MB
- Maximum number of search results: 100
Perhaps requesting a list of my followers hits the maximum number of search results, which is 100.
Using other mechanisms to access data via Twitter API created a dilemma. If I was only able to get 100 entries per request, some entries would take a long time to retrieve. And as such, Logic App might not be best suited for my needs.
I considered creating an Azure Function — a small serverless piece of code that runs on lightweight resources — but I didn’t want to fight with timeouts and scaling.
I went to make more coffee at this point, and while waiting for it to brew I googled a bit. Turns out there’s great guidance from Microsoft on when to use what for background jobs in Azure! Briefly skimming through I found I’d already forgot. Azure WebJobs, the small background jobs that run as part of a Web App, would be optimal for this task!
Let’s get to work, as I’m already on my second cup of coffee and I don’t have all day to build this.
Provisioning services on Azure
I’m going to need a Web App (for hosting my WebJob), and some storage for holding my data. This is pretty simple.
I used Azure CLI (see my guide on Mastering Azure CLI here) to provision these. For the WebApp I also need to provision the App Plan for actually hosting the service.
First, setting the correct Azure subscription as I have several of them:
az account set --subscription "My Azure Subscription"Next, I’ll need a new resource group to organize my services. I’ll call it twitter-analytics and place it in West Europe:
az group create --name twitter-analytics --location westeurope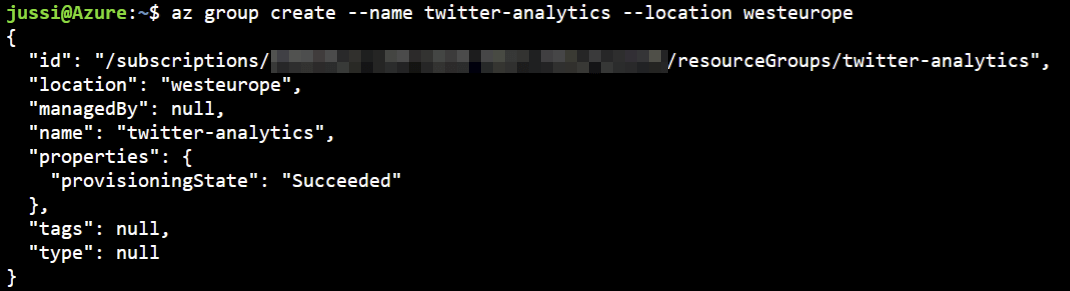
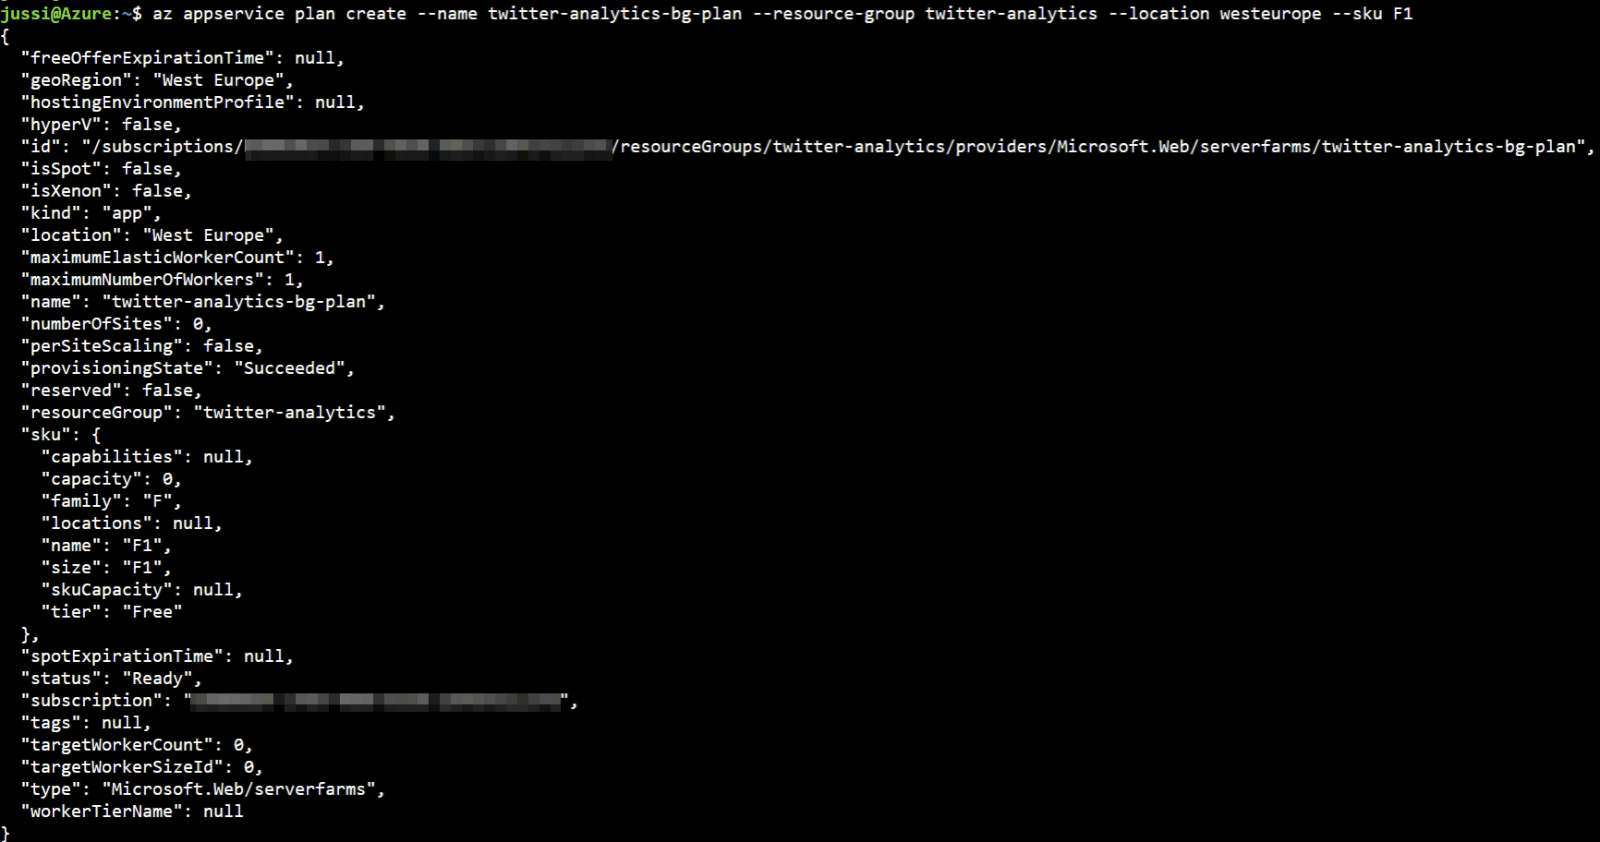
Before creating the Web App I need the App Plan:
az appservice plan create --name twitter-analytics-bg-plan --resource-group twitter-analytics --location westeurope --sku F1I chose the F1 (Free) SKU, as it’s — well, free.
I can now create the Web App:
az webapp create --resource-group twitter-analytics --plan twitter-analytics-bg-plan --name twitter-analytics-bg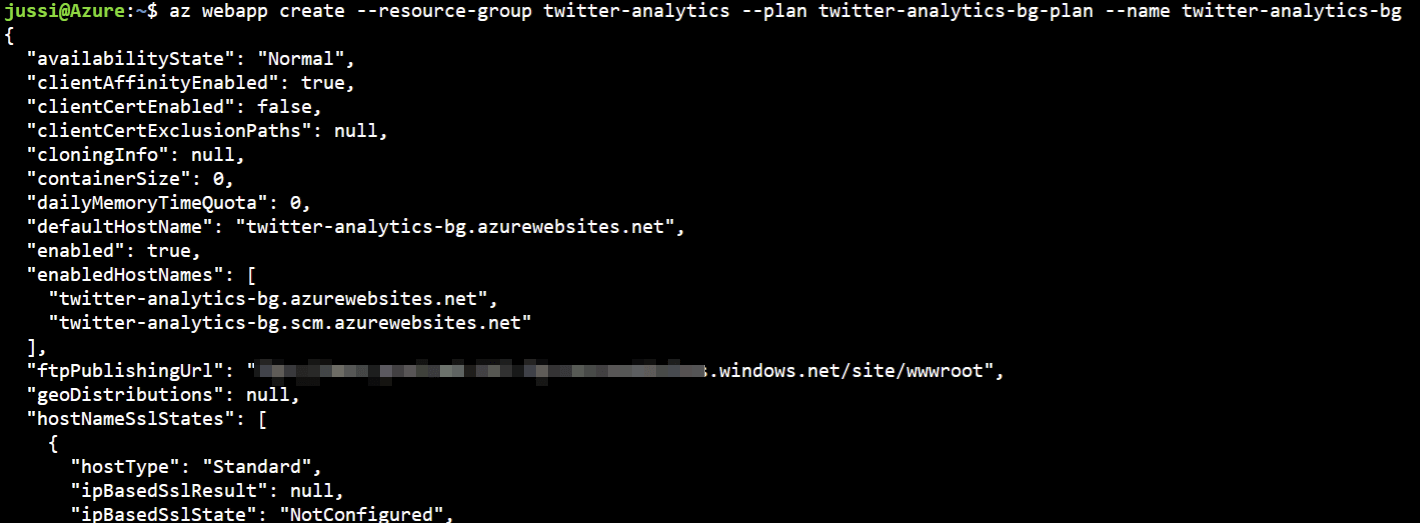
Just to verify I’m doing OK at this point, I’m querying for the site in a few different ways:
az webapp show --resource-group twitter-analytics --name twitter-analytics-bg
az webapp list --resource-group twitter-analytics
I’m going to use Azure Table Storage to hold my data. It’s very simple to use, and costs almost nothing (about 0.0380 €/GB/month). I need to create a new Azure Storage Account first:
az storage account create --name twitteranalyticsstg --resource-group twitter-analytics --location westeurope --access-tier hot --kind storagev2 --sku standard_lrs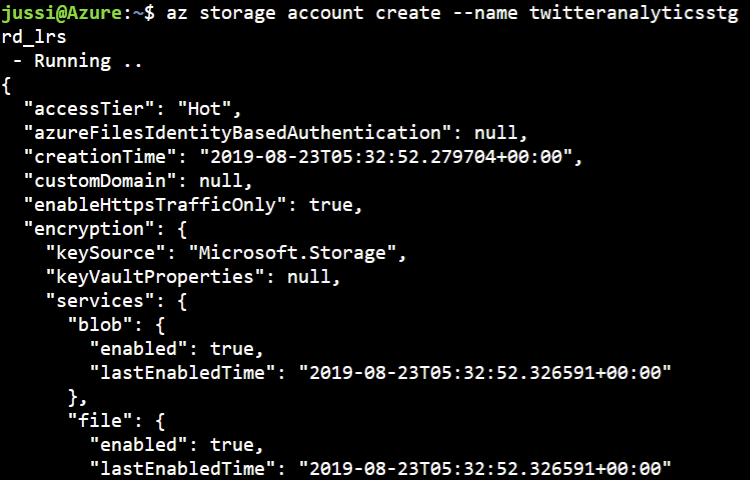
I chose the Standard performance tier with local replication, which is more than enough for my needs. Within this Storage Account I’ll create a new table called twitteranalytics:
az storage table create --name twitteranalytics --account-name twitteranalyticsstg
And just to verify the table exists, I’ll query for it:
az storage table list --account-name twitteranalyticsstg
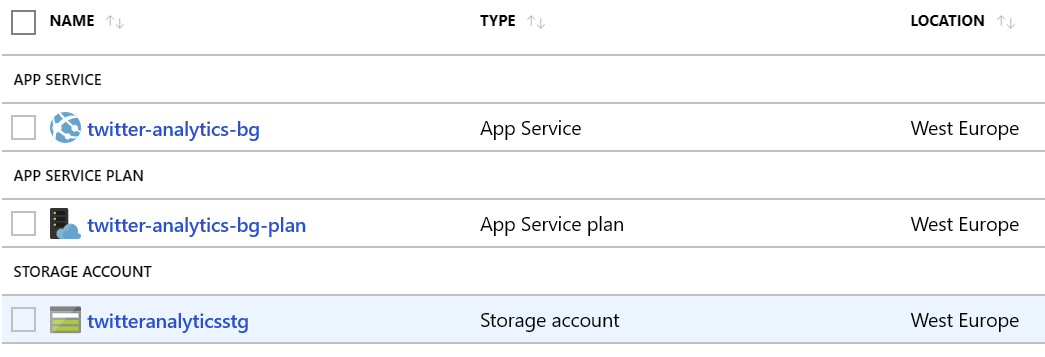
Everything is awesome now! Within Azure Portal, my resource group looks like this now:
Creating the solution logic
I need to create a WebJob, and it needs to connect with Twitter’s API to read data and store it in my Azure Table Storage. Twitter API is well documented here. I had a brief look at it, but I’m anxious to start coding I mostly tried to figure out how to authenticate with the API. The API documentation also notes that several third-party wrappers have been built, and one looked especially interesting – the TweetInvi project.
It’s a C# implementation, that supports .NET Core, among other platforms. Great! Just what I needed.
I created a new .NET Core Console App Project in Visual Studio 2019, and added the NuGet Package for TweetInvi:
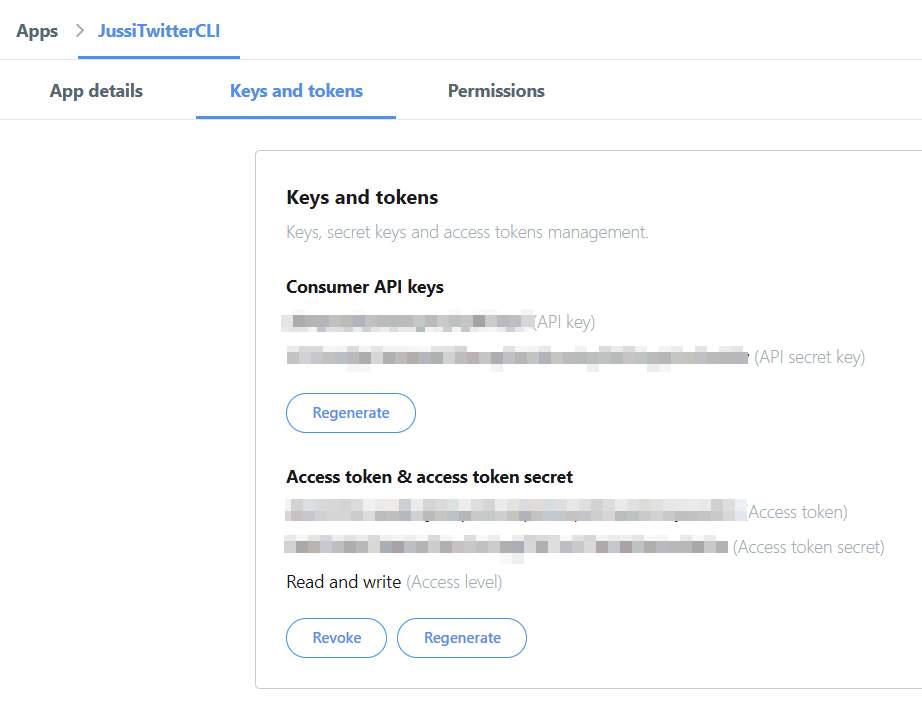
Install-Package TweetinviAPII first need to authenticate with Twitter API. This requires me to pass a consumer key, consumer secret, access token and access token secret using the Auth.SetUserCredentials() method. This is documented neatly here.
I generated a new Twitter App at https://developer.twitter.com and got these values.
Now it’s time to spit out some code! First, I need to authenticate:
Auth.SetUserCredentials(CONSUMERKEY, CONSUMERSECRET, ACCESSTOKEN, ACCESSTOKENSECRET);Obviously, you’ll want to store these elsewhere than your code. For instructive purposes, I’m leaving these here, for now.
Next, I’ll need to set a rate limit. The wrapper is clever enough to track Twitter’s API rate limits and creates new tokens when necessary. For this to happen I can just set rate limit tracking to autopilot:
RateLimit.RateLimitTrackerMode = RateLimitTrackerMode.TrackAndAwait;The downside is that when I do hit the rate limit, my code will freeze the thread until a new token is granted. Not a big problem for such a small project. And it frees my thinking for more clever things.
Time to call the API next. I’ll pick up all my followers first:
var followerIds = User.GetFollowerIds("jussiroine");What I’m interested in is some usual (and public) data from my followers, such as their location, Twitter screen name, and full name. I’ll prep my upcoming logic by defining these:
IUser follower;

int followersCount;
string screenName;
string fullName;
string location;
string description;
long twitterID;
Next, I’ll loop through each follower and pick up their details:
foreach (var followerId in followerIds)
            {
                follower = User.GetUserFromId(followerId);
                try
                {
                    // follower metadata
                    followersCount = follower.FollowersCount;
                    location = follower.Location;
                    fullName = follower.Name;
                    screenName = follower.ScreenName;
                    description = follower.Description;
                    twitterID = follower.Id;
At this point, I’d be happy to just store the details in Table Storage. For this, I’ll need to construct a quick entity to hold my data in storage:
public class twitterEntity : TableEntity
{
	public twitterEntity(string twitterID, string key)
	{
		this.RowKey = twitterID;
		this.PartitionKey = key;
	}

	public twitterEntity() { }
	public string fullName { get; set; }
	public int followersCount { get; set; }
	public string screenName { get; set; }
	public string description { get; set; }
	public string location { get; set; }
}
Azure Table Storage requires a partition key and a row key. The latter is highly useful for future queries against my data. I’m using the Twitter user ID as a row key, and a fixed partition key.
Next, before returning to my loop that stores the data, I need to create a method for storing the data to Azure Table Storage. There’s a NuGet package for Azure Storage, that greatly helps in this called Microsoft.WindowsAzure.Storage.Table. In my method, I take a TableEntity (that I’ve created above), and commit that asynchronously:
private static bool updateTable(twitterEntity entry)
{
	try
	{
		CloudStorageAccount storageAccount = new CloudStorageAccount(
											 new Microsoft.WindowsAzure.Storage.Auth.StorageCredentials(
											 "STORAGEACCOUNTNAME", "STORAGEACCOUNTKEY"), true);

		CloudTableClient tableClient = storageAccount.CreateCloudTableClient();
		CloudTable twitterAnalyticsTable = tableClient.GetTableReference("twitteranalytics");

		TableOperation insertOperation = TableOperation.Insert(entry);
		twitterAnalyticsTable.ExecuteAsync(insertOperation);

		return true;
	}
	catch (Exception ex)
	{
		return false;
	}
}
Once again, I’ve stored the storage account details within the code but obviously, you’ll want to store this data more securely elsewhere.
Finally, and this is the easy bit, I call my method with my new entry:
twitterEntity newEntry = new twitterEntity();

	newEntry.followersCount = followersCount;
	newEntry.location = location;
	newEntry.fullName = fullName;
	newEntry.screenName = screenName;
	newEntry.description = description;
	newEntry.RowKey = twitterID.ToString();
	newEntry.PartitionKey = "twitteranalytics";

	Console.WriteLine("Inserting to table storage: ({0}) {1}", newEntry.RowKey, newEntry.screenName);

	// commit to azure table storage
	bool commit = updateTable(newEntry);

	if (!commit)
	{
		Console.WriteLine("Unable to write entry to table storage: {0}", fullName);
	}

}

catch (Exception ex)
{
}
I didn’t bother to check for errors, as my code mostly works every time on the first try. Or that’s what I like to tell myself.
Testing the solution
I unceremoniously ran my code using F5 in Visual Studio. And it worked!
Looking at my Storage Account, I can see some being ingested:
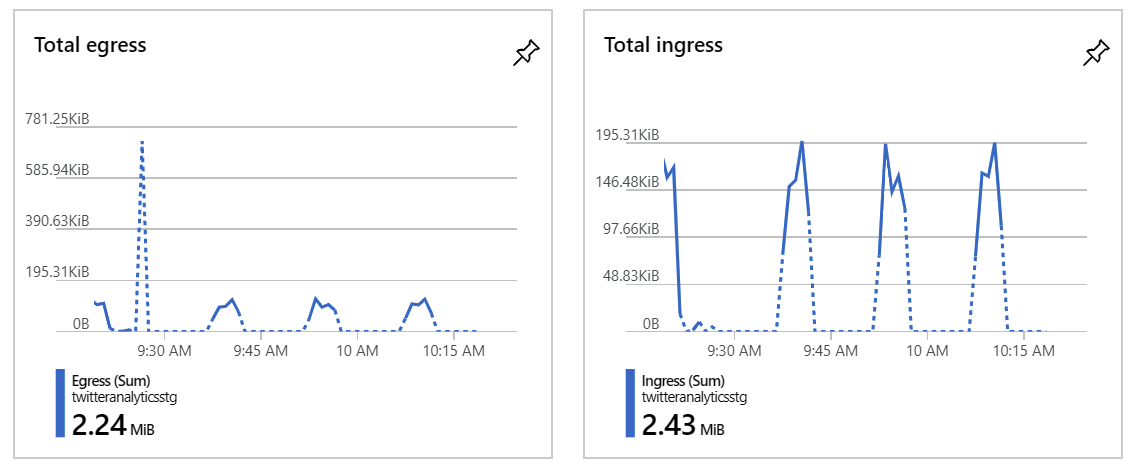
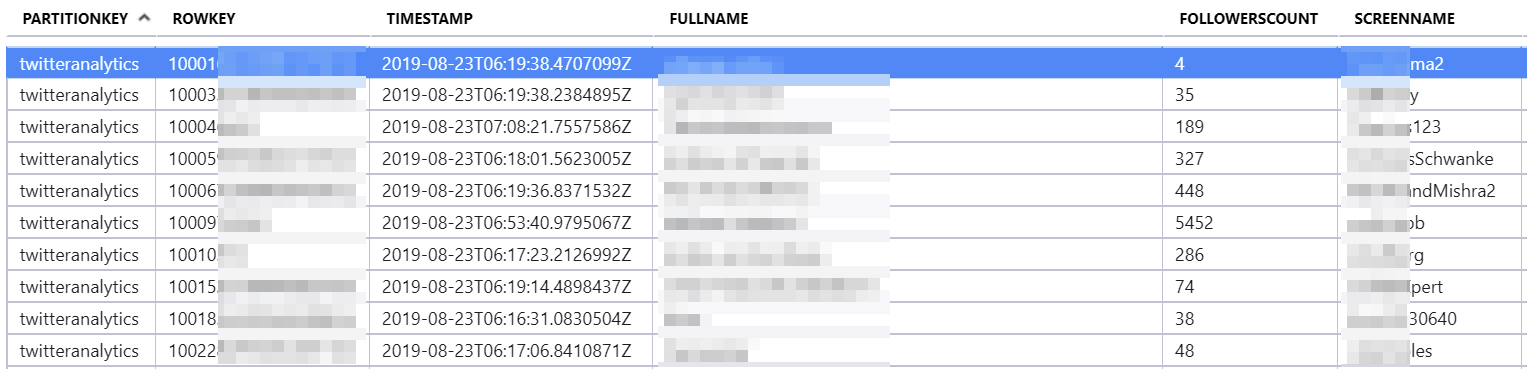
Querying the table using Azure Portal’s Storage Explorer I can verify that it’s being populated:
Publishing and configuring the WebJob
To have my solution running in the cloud, as opposed to on my machine, I need to publish the .NET Core console app as an Azure WebJob. There’s a comprehensive guide for this here, but it looked a bit too complex for my taste. I just want to run code in the cloud! Thankfully, Visual Studio supports right-click > Publish directly from a console app project and simply packages everything neatly.

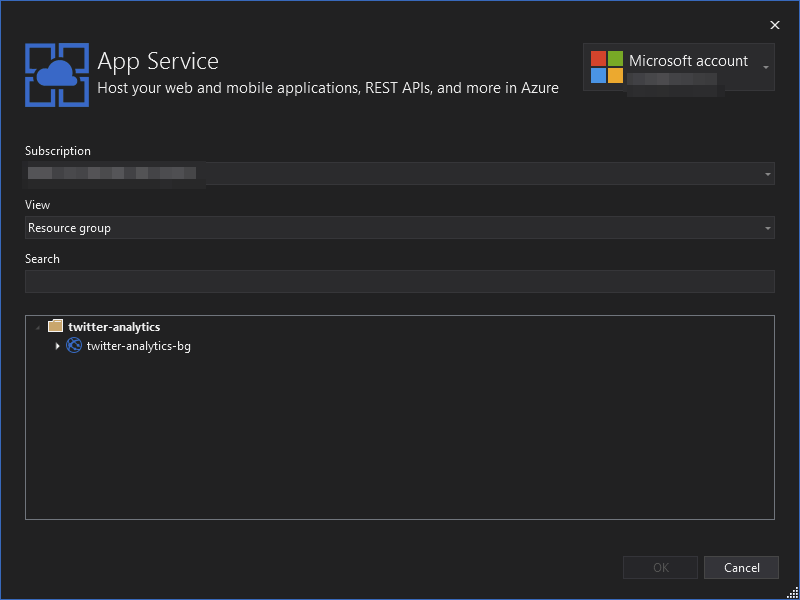
It’s enough to point the publish wizard to my newly-provisioned Web App:
The publishing wizard actually goes even further and creates the crontab-entry for scheduling in a file named Settings.job within the project. There is no schedule by default, so I simply uncommented the last entry and modified it to my needs.
{
// Runs at 3:30 AM every day
"schedule": "0 30 3 * * *"
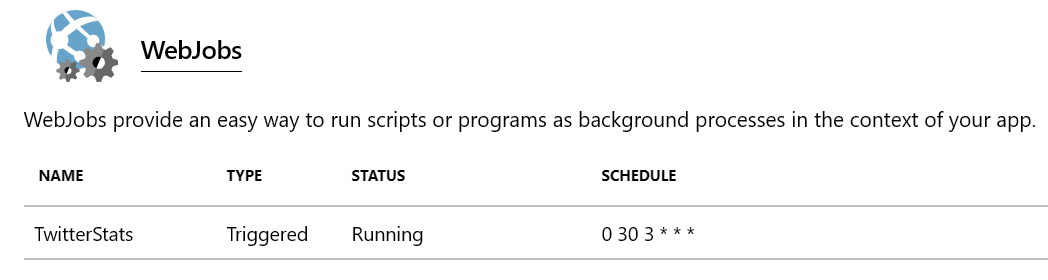
}A re-publish is required to update the schedule. On Azure Portal it’s easy to now run the WebJob manually to verify it’s (still) working:
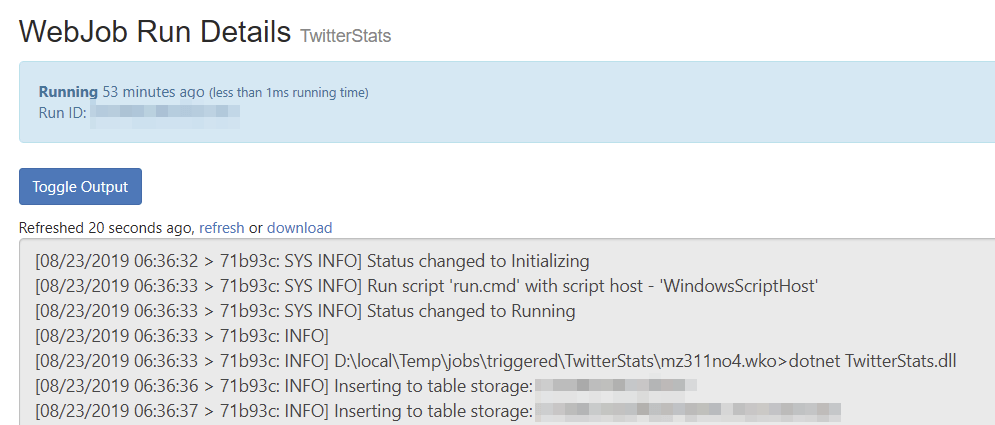
And logs are readily available as well:
Visualizing the data using Power BI
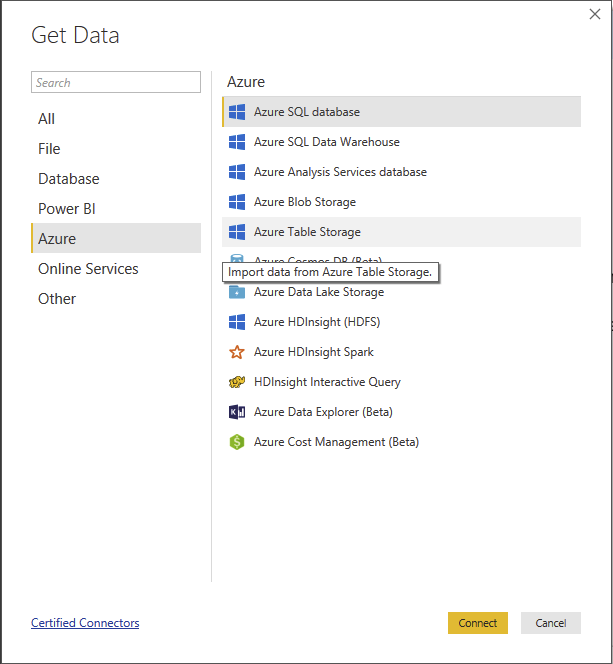
Using Power BI Desktop it’s now trivial to connect with the data:
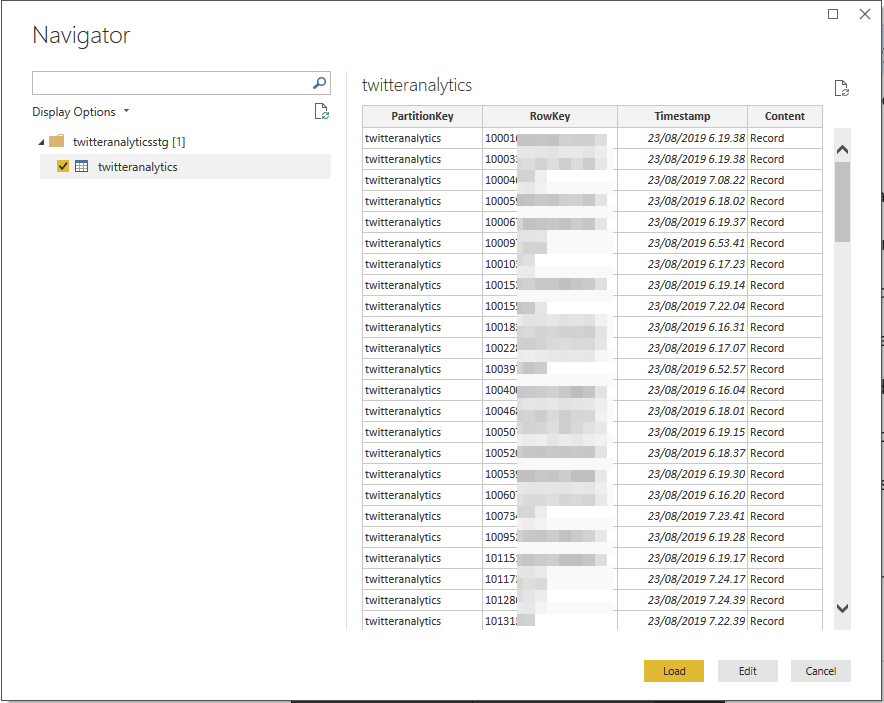
It’s even easier to then use Power Query Editor to transform the data to something more usable for visualization.

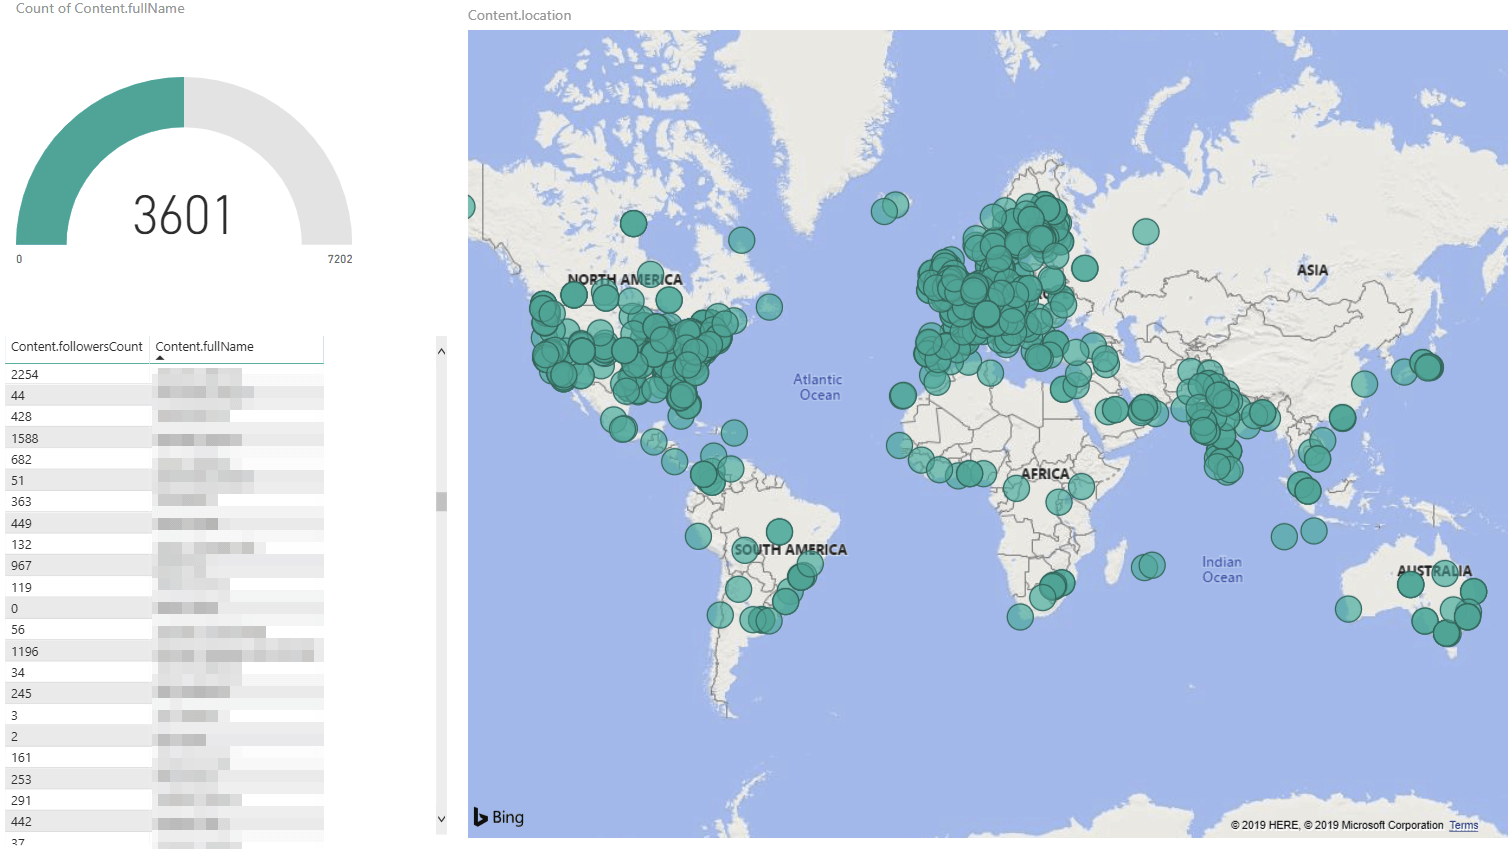
And once I have all data now, it’s a fun task to plot everyone’s location on a map!
In summary
This was a quick, but very educating project to build. I’m flabbergasted how easy it is to run code in Azure, and especially how easy it is to re-use data and resources between different services, including Power BI.
The total cost for my solution remains very low. The WebJob, in essence, is free as I’m hosting it on a free tier App Plan. Azure Storage Account will cost me a few cents, mostly due to transactions. The cost for this is €0.000304 / 10,000 transactions. I’m incurring about this amount each day, so this accrues to 0,00912 € per month. Over the next year, this will be about 3 € and 32 cents for transactions + 0,45 cents for storage. Pretty affordable for a highly useful and flexible solution that only took a few hours to build!