Building a simple and secure DNS updater for Azure DNS using Raspberry Pi and Azure Functions

Almost exactly a year ago I blogged about building a simple and secure DNS updater for Azure DNS using PowerShell. If you didn’t read that post, it’s a solution for keeping my dynamic IP updated with a static DNS name using a little bit of automation from PowerShell. This tool is useful for when I VPN back home, the dynamic IP has often changed and without a pointer (with DNS) it’s impossible to know where to connect.
I hinted in the summary of that previous post that I already had more ideas on how to make this, even more, simpler and lightweight. It took a year but here I finally am – building this very same solution using Raspberry Pi (as opposed to having a PC running PowerShell at home) and Azure Functions.

The new solution
My new solution is aimed to remove reliance on PowerShell and have something more lightweight. I chose to use Raspberry Pi for two reasons — one, I already had a few spare ones lying around at home, and two, I wanted to build a solution using Windows 10 IoT Core.
I intend to use a Raspberry Pi 3B, with an 8 GB MicroSD card for the operating system. Network connectivity is via Ethernet, although Wifi is supported also. I was hoping to take my existing PowerShell script (see the previous post) and simply run it as a scheduled task in my Raspberry. This would allow me to remove one virtual machine from my home server and have one less thing to worry about.
[Update July 1st, 2019: I replaced the device with a Raspberry Zero WH — see the bottom of this blog post for details]
Build it! And run it!
Getting started with Windows 10 IoT Core is trivial. I used the IoT Core Dashboard to flash the OS on the memory card and boot the device.

The first boot takes about an hour. I was certain it froze but I kept working on something else during boot and finally, it finished. These days you can use Remote PowerShell for easily managing and running code in Raspberry, so I opened a session from my workstation to the device.
Initially, I thought I’d need to code an UWP-based app with a clever loop (Sleep(10000) style) to run my PowerShell. I found out that Windows 10 IoT Core supports scheduled tasks but only through the 1997 style SCHTASKS.EXE command-line tool. Thankfully it wasn’t an even older variant named AT we had with Windows NT!
I created a .BAT file to run through the scheduled task and a PowerShell file to run my logic. The .BAT file is simple:
@echo off
cd c:\IPUpdater
powershell -command c:\IPUPdater\IoTIPUpdater.ps1
The PowerShell script is intended to be simple – as lightweight as possible on the Raspberry Pi:
Set-Location -Path C:\IPUpdater

$dynamicIP = Invoke-WebRequest 'http://showip.gratisdns.de' | select Content
$functionAPI = "https://<AZURE.FUNCTION.YET.TO.BE.CREATED>&remoteip=" + $dynamicIP.Content

$ProgressPreference = 'SilentlyContinue'
Invoke-RestMethod -Uri $functionAPI -Method GET
This was through trial and error. By default, SCHTASKS.EXE runs all tasks in %SYSTEMROOT%\System32, so usually C:\Windows\System32. Thus, I copied my PowerShell script to System32 to have it run. Not neat but it works, sort of.
The script resolves current public IP using an available endpoint, and then calls an Azure Function and passes the remote IP as the parameter. The Function doesn’t exist yet at this point but once everything works on the device, it’s easy easy to create the logic within the Function.
I was quite pleased with myself once this worked. One final test – unattended reboot! This is something we did back in the day when setting up new servers – disconnect keyboard and display, and verify the machine can be brought online from a reboot.
Except, my Windows 10 IoT Core failed with a 0xc0000014C or some such error code. Apparently doing a controlled reboot corrupted something within the system files, and my carefully crafted scripts were toast. I forcefully rebooted a few times without success.
By this time it was Saturday evening and I had a choice to make – re-deploy Windows and wait an hour for a reboot or try another approach. I didn’t want to wait so I looked into replacing Windows 10 IoT Core with Linux.
Hello, Noobs and Raspbian
I’m a bit rusty on Noobs and Raspbian, so I spent 10 minutes brushing up on what I need to know. Noobs is the operating system easy installer, which allowed me to install Raspbian with just a few clicks. I then rebooted my Raspberry to install Raspbian, which took about 20 minutes. First boot, this time around, took about 5 minutes and I had Linux up and running in my Raspberry Pi! SSH-daemon wasn’t enabled by default but since Raspbian has a neat graphical interface it was easy to enable.

Instead of running PowerShell on Linux (as I was instead hoping to run my code in Azure Functions) I re-did my simple PowerShell script from Windows 10 IoT Core to a Linux shell script:
#!/bin/sh

date
REMOTEIP=`curl http://showip.gratisdns.de`
FUNCTIONAPI="https://<MY-FUNCTION-URL>&remoteip=$REMOTEIP"

curl $FUNCTIONAPI
It doesn’t get much simpler than this! And then in Crontab I can set scheduling:
# m h  dom mon dow   command
0 */4 * * * /home/pi/update-remote-ip.sh >> /home/pi/update-remote-ip-log.txt
I wanted my script to run every 4 hours, and I’m outputting a bit of simple log to a local text file.
The unattended reboot test was also a success – the Raspberry side of things works smoothly now. Time to build the other side – Azure Functions!
Updating DNS zones using an Azure Function
As I had a polling logic from Raspberry to Azure, it was relatively simple to build the Azure Function. I already have a working PowerShell script but as I wasn’t constrained to PowerShell anymore I opted to refactor my code to C#. Just because that’s what I like most and the task felt quite simple in the end.
I provisioned a new Azure Function, using consumption plan, as my usage of the Function will be very small — every 4 hours, with 744 hours in a typical month, is 186 executions for the Function. The purpose of the Function is to update an Azure DNS hosted A record to point to my dynamic IP.
I’m using my existing DNS zone in Azure, but added a TXT record also for simple logging:

Code for my Function begins with a few variables:
string dnsZone = "jussiroine.com"
string hostname = "vpn";
string resourceGroupName = "DNS";

string appID = "18<snip>";
string appSecret = "ffa<snip>";
string subscriptionID = "4ad3<snip>";
string tenantID = "593<snip>";
appID and appSecret are the same I used previously, using a Service Principal to authenticate against Azure, with permissions only for managing a DNS zone. This way I don’t have to hard-code credentials in my Function – just access tokens and secrets (which, admittedly, should be elsewhere – such as in a Key Vault – but that’s a task for a future blog post!).
Next, we’ll authenticate Azure:
Microsoft.Rest.ServiceClientCredentials serviceCreds = await ApplicationTokenProvider.LoginSilentAsync(tenantID, appID, appSecret);
DnsManagementClient dnsClient = new DnsManagementClient(serviceCreds)
{
    SubscriptionId = subscriptionID
};
And then we’ll simply update the DNS A record within our zone:
var recordSet = dnsClient.RecordSets.Get(resourceGroupName, dnsZone, hostname, RecordType.A);

// clean up older records
if (recordSet.ARecords.Count > 0)
{
    recordSet.ARecords.Clear();
}

recordSet.ARecords.Add(new ARecord(remoteip));
recordSet = await dnsClient.RecordSets.CreateOrUpdateAsync(resourceGroupName, dnsZone, hostname, RecordType.A, recordSet, recordSet.Etag);
As A records in DNS zones can have multiple IPs it makes sense to just clean any previous values with Clear() before adding a new IP. The one we add is the parameter from our Function, remoteip. And this parameter is populated by the Raspberry-hosted script that runs every 4 hours.
I also realized I can write metadata to the same record using DNS TXT field – so a timestamp is a nice addition:
recordSet = dnsClient.RecordSets.Get(resourceGroupName, dnsZone, hostname, RecordType.TXT);

recordSet.TxtRecords[0].Value.Clear();
recordSet.TxtRecords[0].Value.Add(DateTime.Now.ToString());
This way I can query my DNS zone to verify when an update was last executed:

And the only thing left was to update the Linux shell script to reflect my new Azure Function. As Application Insights is enabled by default when provisioning a new Azure Function I also get amazing data and details automatically.


In summary
With a few hours of work, including installing Raspbian on the Raspberry Pi device, I was able to refactor my working PowerShell script to an Azure Function running C# code in a serverless approach, and also eliminating one dedicated virtual machine in the process (the one I used to keep running just to run my PowerShell script with a schedule). Admittedly running a device (the Raspberry Pi) is additional hardware in my office, but it’s so small and lightweight it isn’t really a worry.
Without HDMI output, Raspberry Pi 3 consumes about 1 kWh per month when running 24/7. At my current electricity prices (~7,97 c/kWh excluding tariffs) this is about 8 cents a month! Azure Functions are essentially free with such low usage, and the DNS zone is about 42 cents a month. Including electricity, my solution’s operational expenses are less than 1 € per month! This is assuming nothing breaks and I don’t have to spend another Saturday evening fixing this 😉
[Update: Jun 18] Several people reached out to me and asked for the source code. I somehow forgot to add the repo earlier, so I’ve now made the source codes available on Github here.
Update: Switching to Raspberry Pi Zero WH
I’ve had this solution running reliably for almost two weeks. I realized some of the other projects I’m building with Raspberry might not fit on the same device, so I ordered a simpler device to dedicate for DNS updates. It’s called the Raspberry Pi Zero WH:
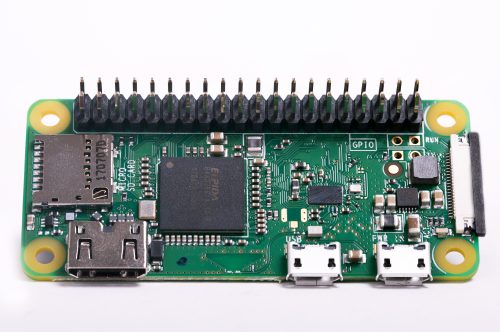
Compared to RPi 3, this is really bare bones – no full-size USB ports, only miniHDMI (Type C) for display and wireless for connectivity. But it suits my needs perfectly.
I installed Raspbian and reconfigured my scripts to run as they were.
The device cost me 25 €, and the official case was about 10 €.

For energy consumption, this less capable version requires only 120-160 mA, or about 50% less than the Model 3B.