Mapping out Wi-Fi coverage at home with UniFi InnerSpace

I’m pretty satisfied with the Wi-Fi setup I have at home. It’s based on UniFi access points, mostly powered via PoE, and “it just works.” But could it work… better? That was the question I asked myself when I set out to map the coverage and range at home.
UniFi InnerSpace is a ‘free’ solution that gives you a graphical view of your floor plans combined with the deployed access points. It requires that you’re all in with UniFi hardware, but once you have that, InnerSpace doesn’t add any extra licensing cost.
An alternative would be something like Hamina Wireless’ enterprise-grade solutions. I’ll try my best to compare UniFi InnerSpace with Hamina Wireless later in this post.
InnerSpace
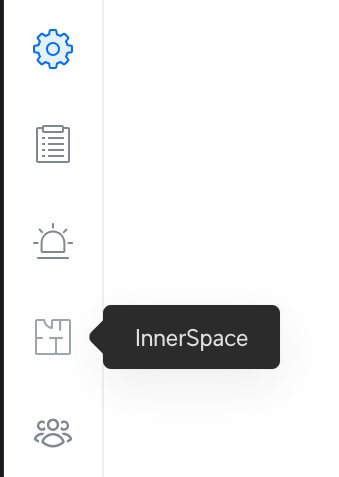
Well, it isn’t too exciting. Once you log in to the UniFi Portal, you’ll need to go to Settings > Control Plane and deploy InnerSpace.
This adds the InnerSpace icon on the left nav bar, which then opens InnerSpace. If you’re familiar with UniFi, you realize this replaces the Maps feature.
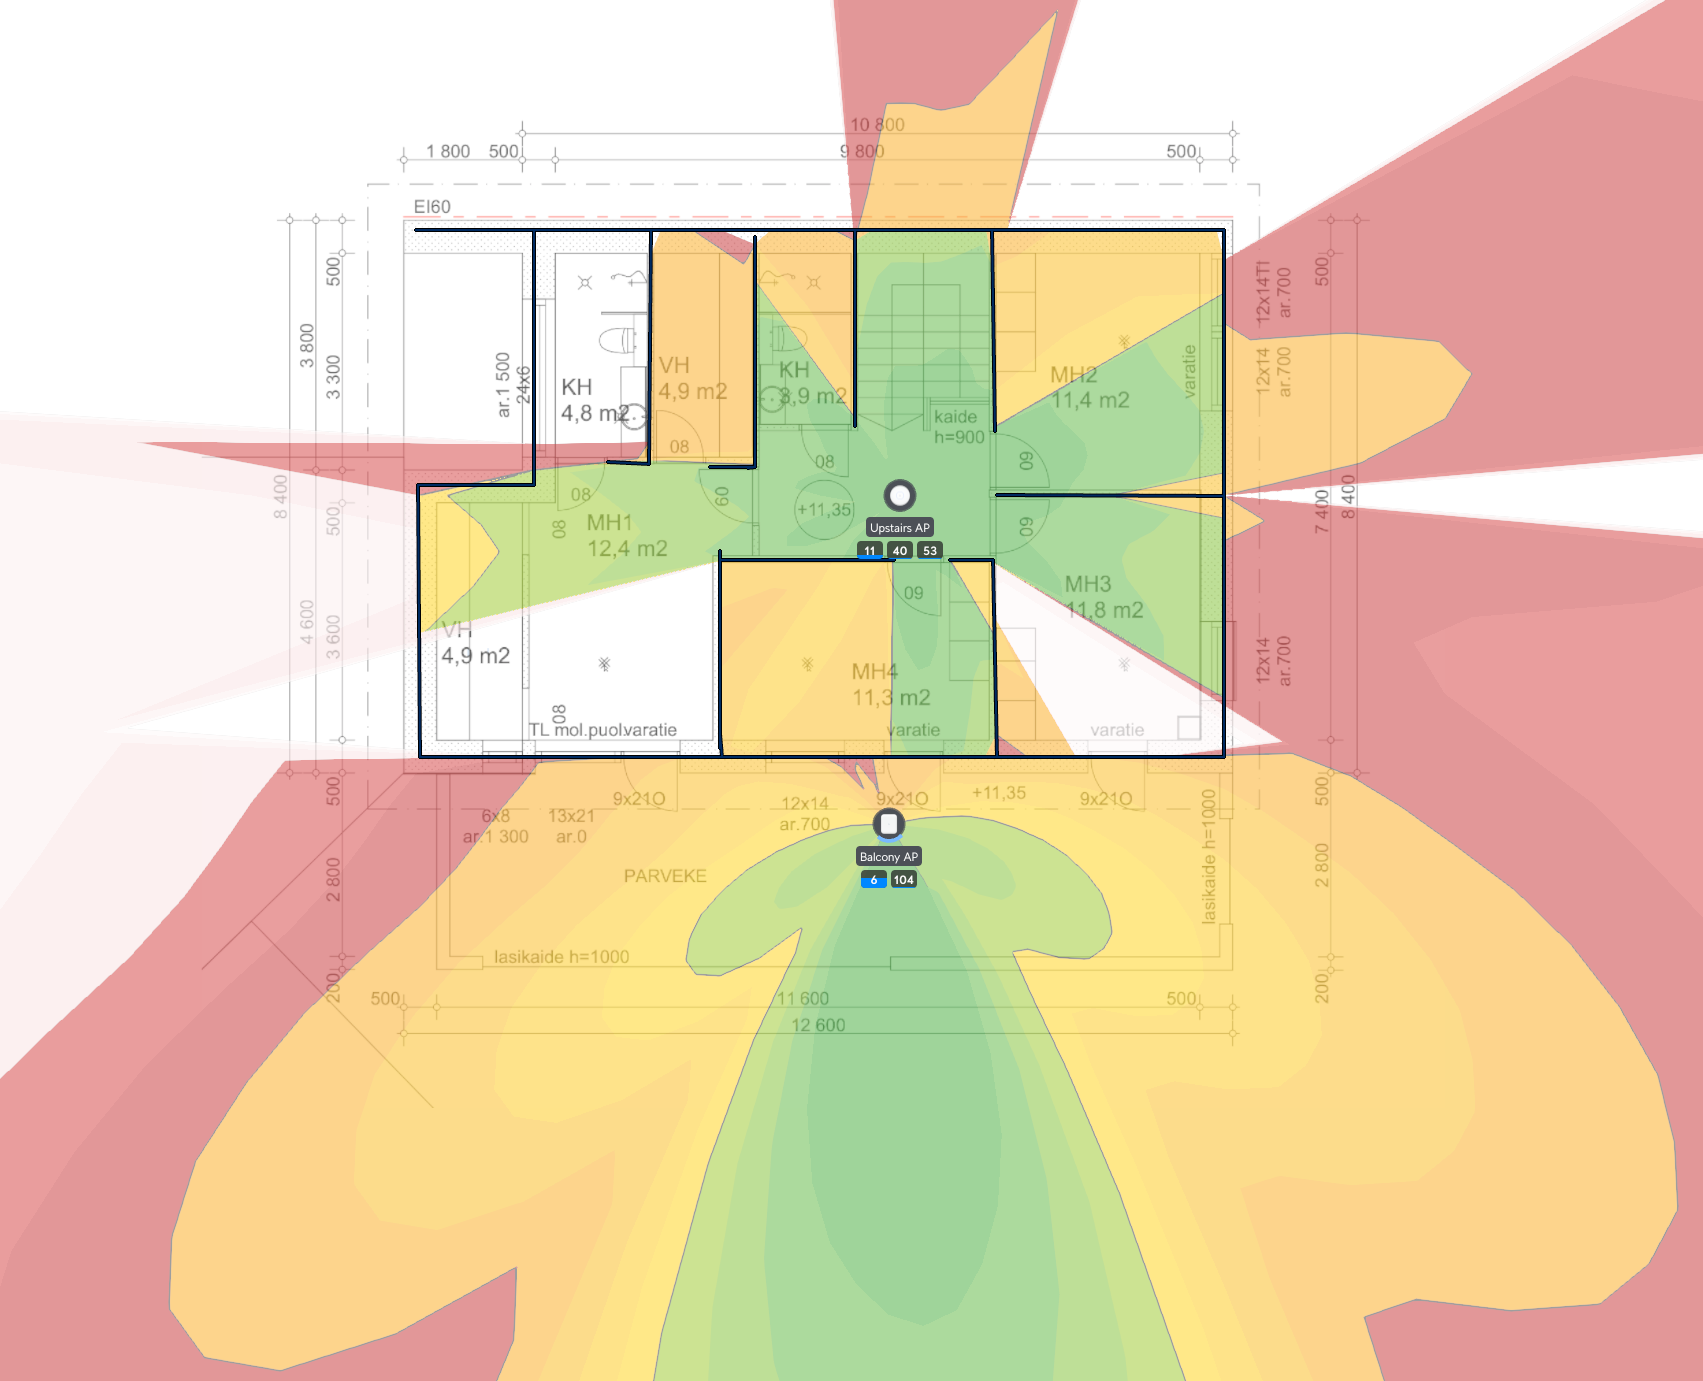
You can now upload your floor plans. I opted to take the top floor of my house, where the bedrooms and bathrooms are. You can draw walls, as it doesn’t detect them from the drawings, which is a bit of a bummer.
I’ve added the inner and outer walls, but left the room doors as ‘open’.
You can then add the equipment you’ve got installed in the floor plan.

From the image, you can see that the U7 Pro access point in the center is giving decent coverage across the top floor. I’ve got another access point, the U7 Outdoor on the balcony, to cover the yard.
However, this indicates that the small bathroom and half of the left-most bedroom have no Wi-Fi coverage. Yikes.
Thankfully, this is not the case. I’m using the WifiMan app on my phone to check for coverage, and I’m getting pretty good signals across the top floor.
The discrepancy might be that InnerSpace doesn’t understand the difference between outer walls (concrete with rebar) and inner doors (typically made of drywall). I did ask ChatGPT to provide me with a quick analysis of the difference:
- Concrete wall: Expect signal strength to be cut by half or more per wall, often needing additional access points or mesh Wi-Fi to compensate.
- Drywall wall: Minor effect, usually not enough to warrant extra hardware unless multiple walls are in between.
Currently, InnerSpace appears to treat the inner walls as equivalent to the outer walls.
Does this render InnerSpace entirely useless? No, I don’t think so. However, it provides visibility into potential Wi-Fi coverage gaps, and you’ll then need to use an app for verification. I doubt I need a second access point on the upper floor, as I’ve had zero issues with Wi-Fi in the past two years in that area.
A look at Hamina Wireless
Hamina’s solution is much more comprehensive than InnerSpace. They offer a free (and limited) version for you to try out. For starters, when you upload a floor plan, Hamina allows you to automatically detect the walls, thus allowing you to skip the tedious process of retracing the walls.
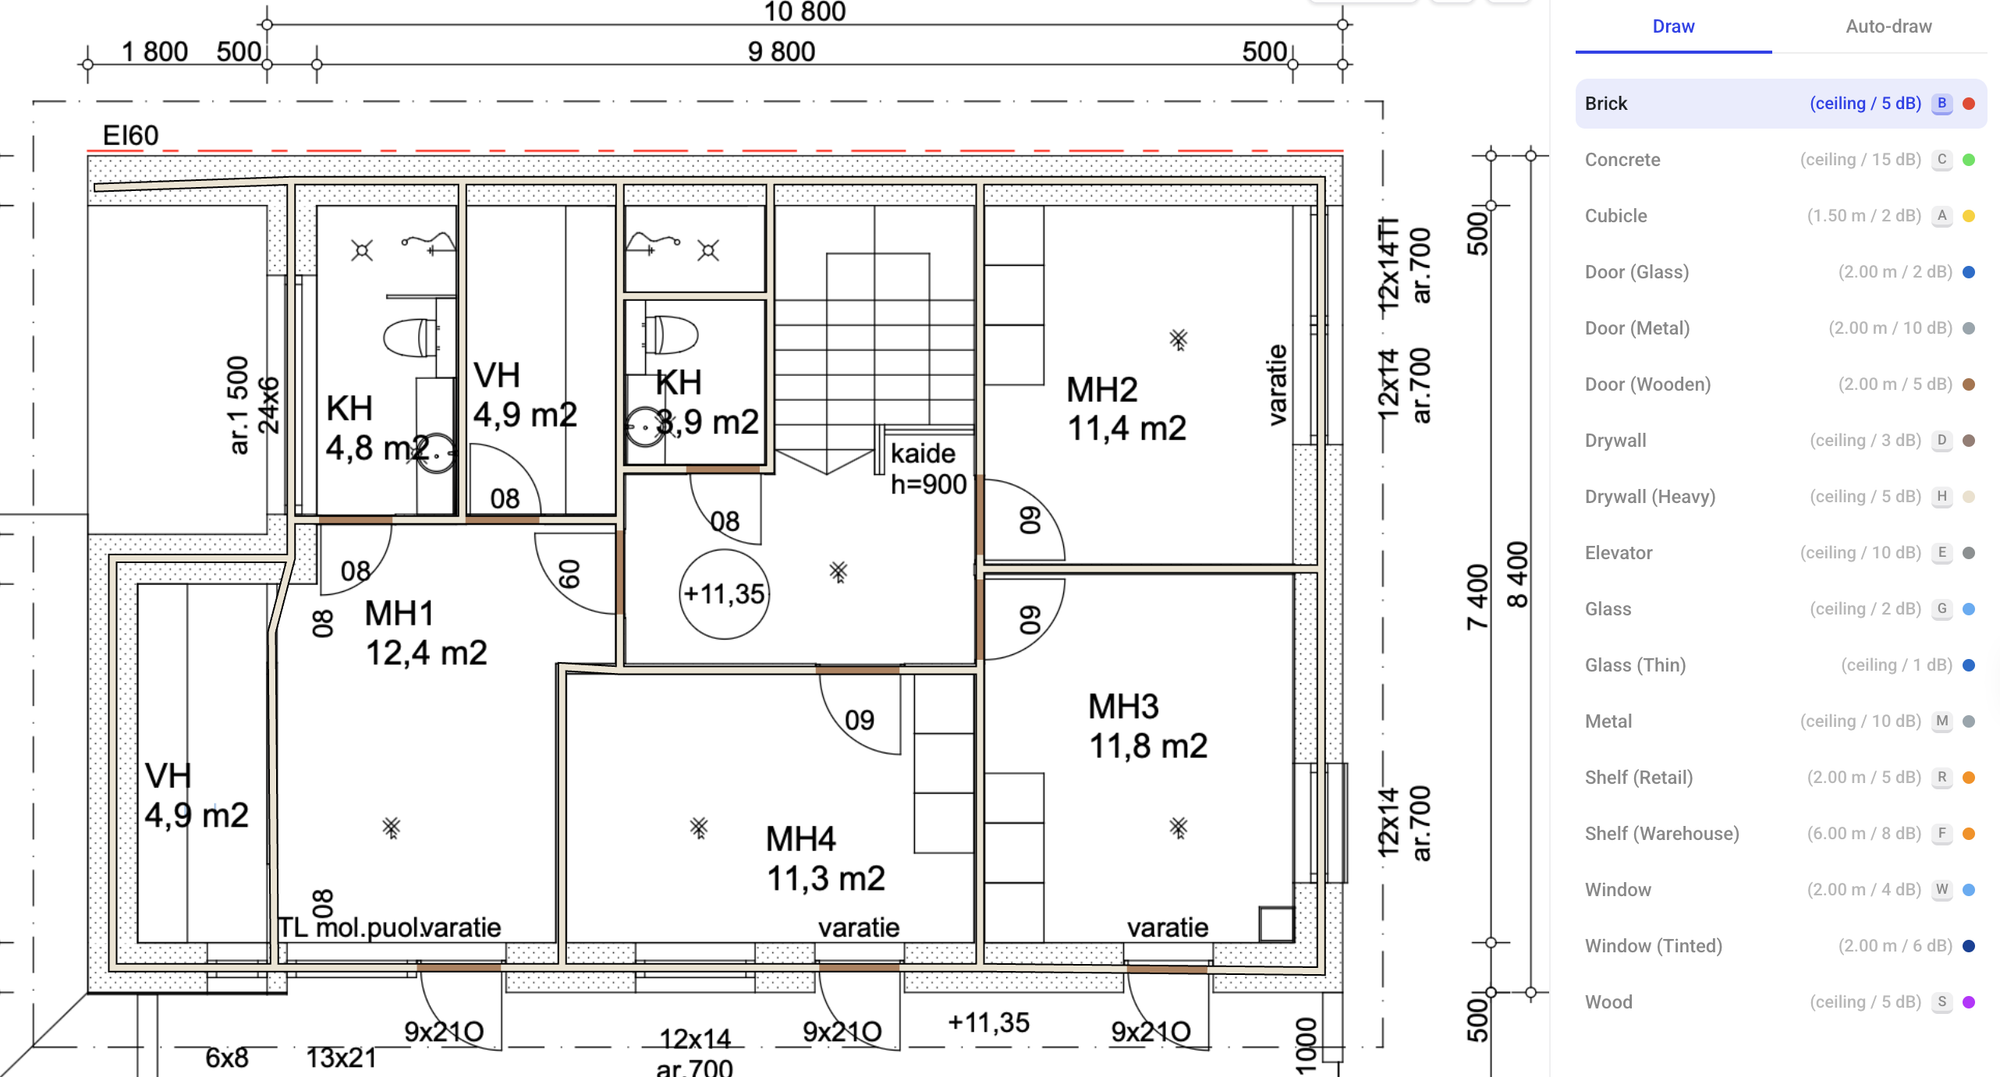
As you might have guessed, Hamina’s solution also allows for different types of walls, such as brick, concrete, and glass.
Adding the same two access points in the same floor plan, but with ‘actual’ walls, reveals a better picture of the coverage.
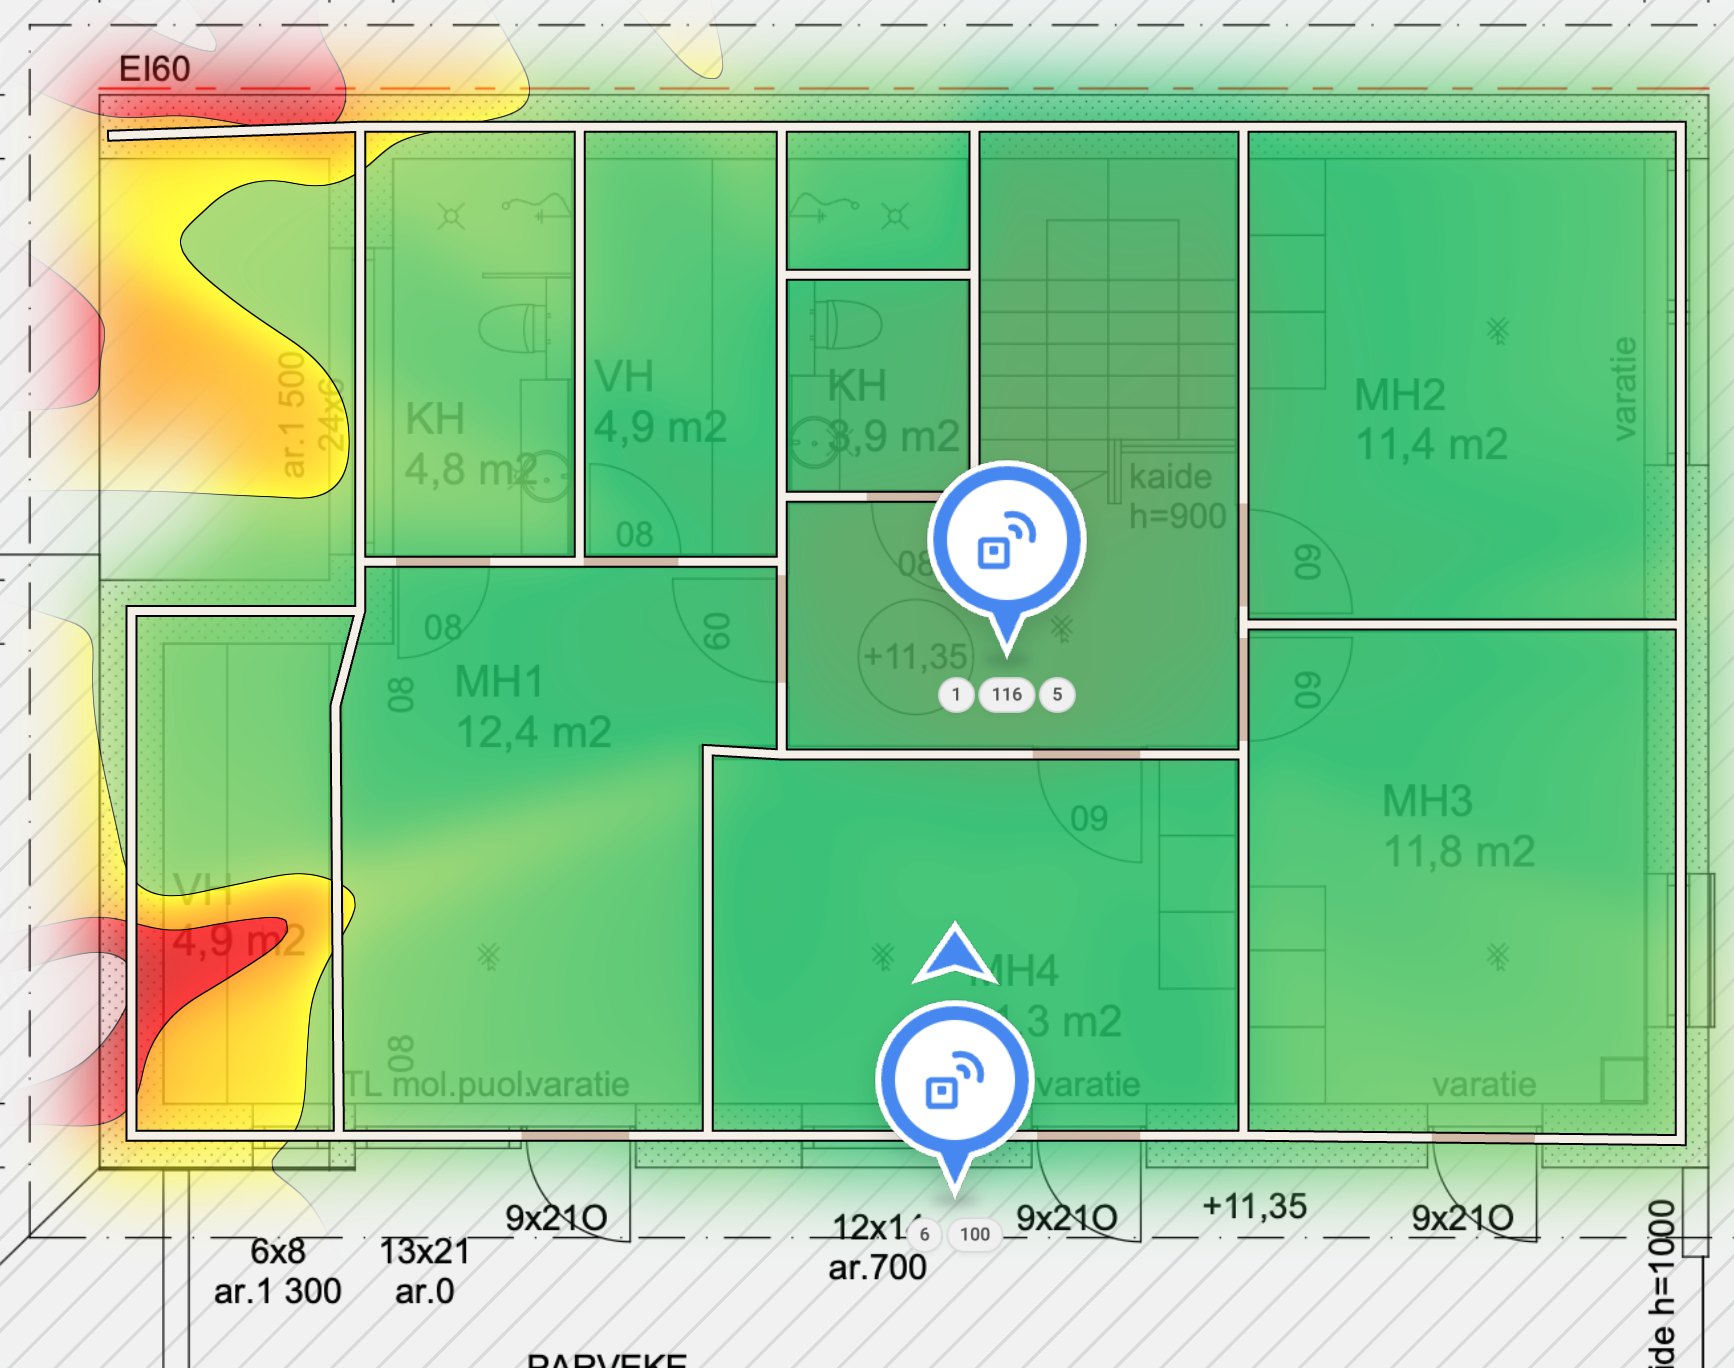
It’s almost all green! Let’s compare again to the UniFi InnerSpace coverage, with the same access points:
Yep.
In conclusion
It’s fun designing Wi-Fi for residential buildings. I don’t do this in any professional capacity, and one reason is that commercial software is a bit cost-prohibitive. Hamina’s system appears to be significantly more advanced than UniFi InnerSpace, not just in terms of defining wall types, but also in its overall capabilities during the design phase. It also supports most commercial brands for access points, while UniFi InnerSpace only supports UniFi.
The lesson for me here is that it probably makes sense to spend an hour or two considering these aspects when setting up a new installation.
Jussi Roine
Microsoft MVP and consultancy founder with 30+ years of experience, passionate about Microsoft security, AI governance, and sharing what I learn along the way.