An in-depth look at Microsoft Power Automate Desktop and building Robotic Process Automations
I’ve spent a considerable time during my career automating and scripting things. I started with plain old MS-DOS .BAT files moved to Unix shell scripts and evolved via Perl to a collection of “hey, let’s use awk/sed/grep/find” VBScript. Eventually, I started with PowerShell and continued working on Linux shell scripts on the side.
Many things can be scripted and thus automated. A relatively new phenomenon is Robotic Process Automation (RPA), where solutions such as UiPath have been market leaders. To put it shortly, you need to build an RPA-solution when you might need to mimic mouse clicks, window drags-n-drops, repetitive tasks in Excel and Outlook, and similar use cases. In a way, you resort to using RPA when you need to “replace the human” while not rewriting the software or building custom integrations.
Another aspect to consider is that many automation and “just insert magic here” requests are not the result of thoughtful consideration but rather a quick hack or fix by someone who grows tired of doing manual and repetitive work.
What is Microsoft Power Automate Desktop?
To begin our journey into all things automation within the Microsoft universe, we look at Power Automate Desktop. It’s a free tool, as long as you possess a valid Windows 10 license. You will need one instance of this tool to design and run your automation.
Power Automate Desktop is a Windows desktop tool that allows the designing, creation, and running of automated processes. It was previously known as WinAutomation, by a company called Softomotive that Microsoft acquired in 2020. Since then, the software was refreshed and renamed Power Automate Desktop.
Once you download and install Power Automate Desktop (PAD, for short), you’re ready to start building your automation. We’ll look at more advanced scenarios later (including licensing), don’t worry.
Upon the first run, you’ll need to log in – use your primary corporate account, which is tied to your Office 365 use. For me, that’s [email protected], for example. PAD opens and looks like this:
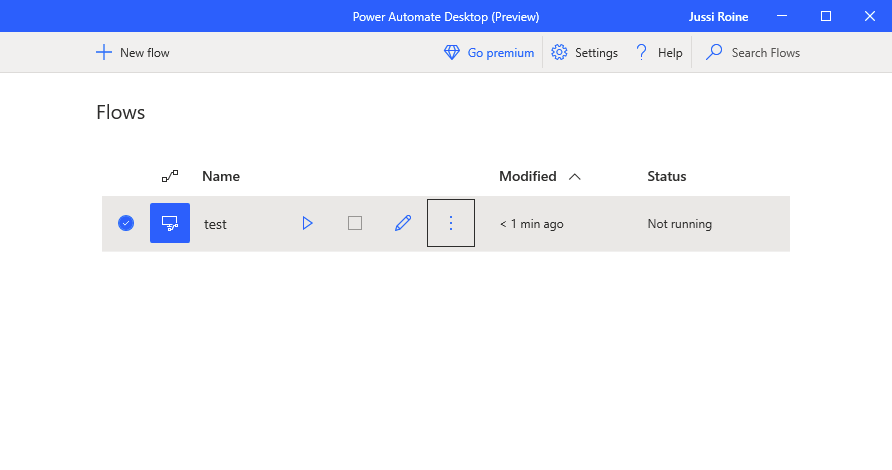
You can then start creating automation, and they will be called flows. To run your flows (automation), Power Automate Desktop has to be running. We’ll look at other ways to run your flows later in this post.
If you want to run automation that does not require local resources, you should resort to using either Power Automate (in the cloud), Logic Apps (in Microsoft Azure), or some other scheduled or triggered integration engine. Power Automate Desktop is intended to interact with the Windows desktop.
Building your first automation
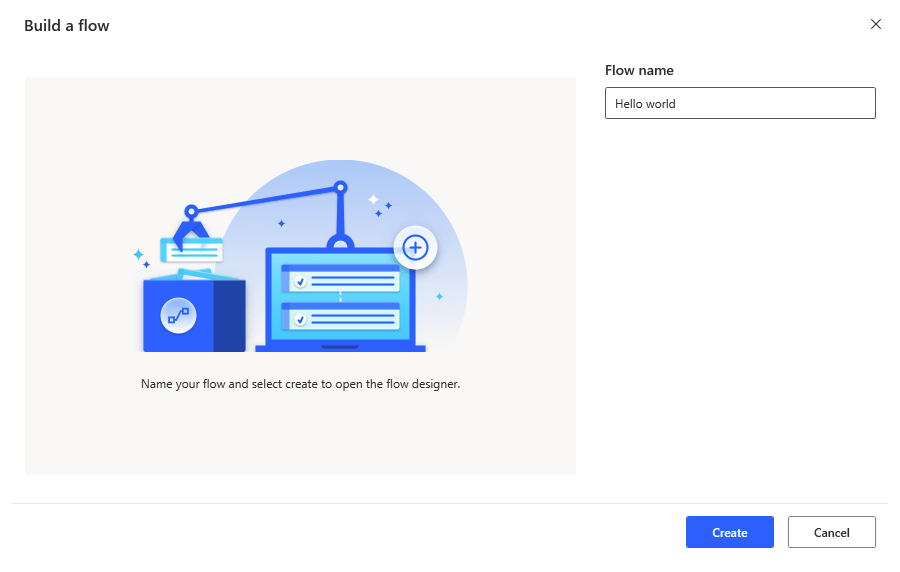
Time to build something! I’ll start with the simplest “Hello world” automation I can think of, and let’s push the envelope in more complex scenarios as we move forward. I click + New Flow and in the popup, name it Hello world.
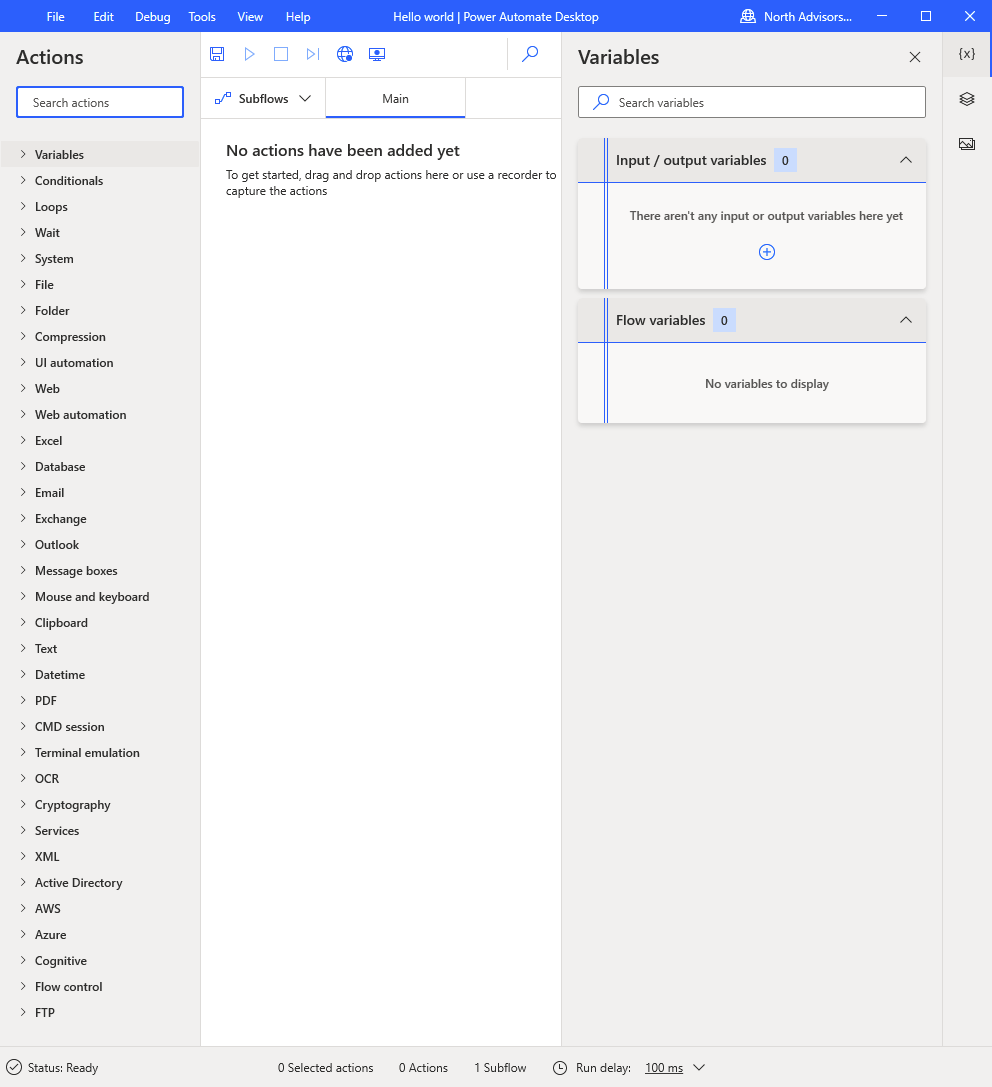
The Power Automate Desktop designer opens. It’s quite packed with features:
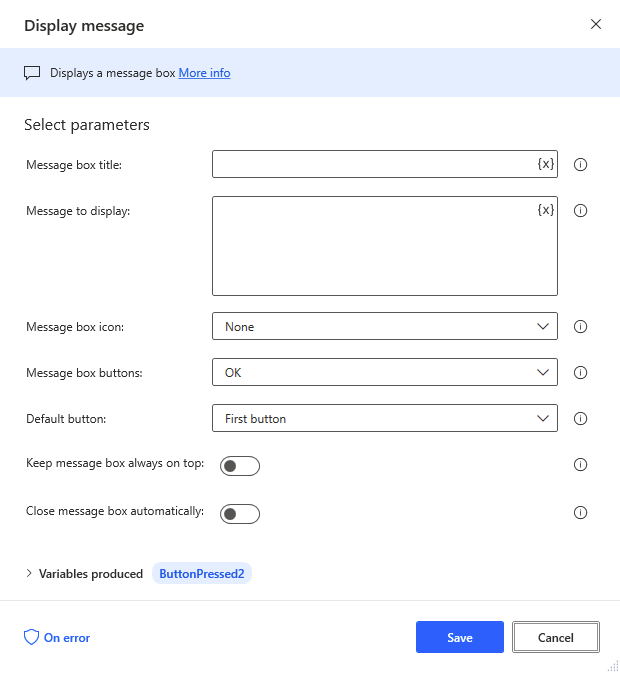
On the left treenavi, I’ll drag Display message under Message boxes to the main flow. It prompts for settings for this action – that will eventually display a message:
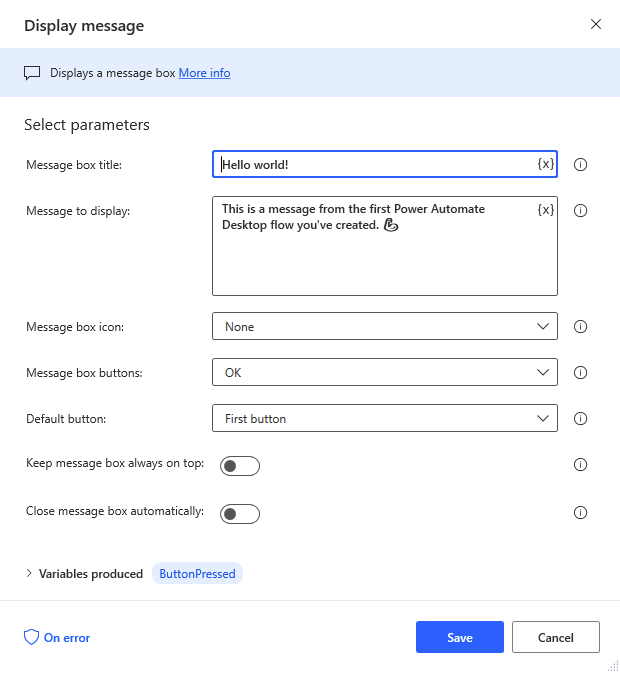
Let’s just fill the title and message to display:
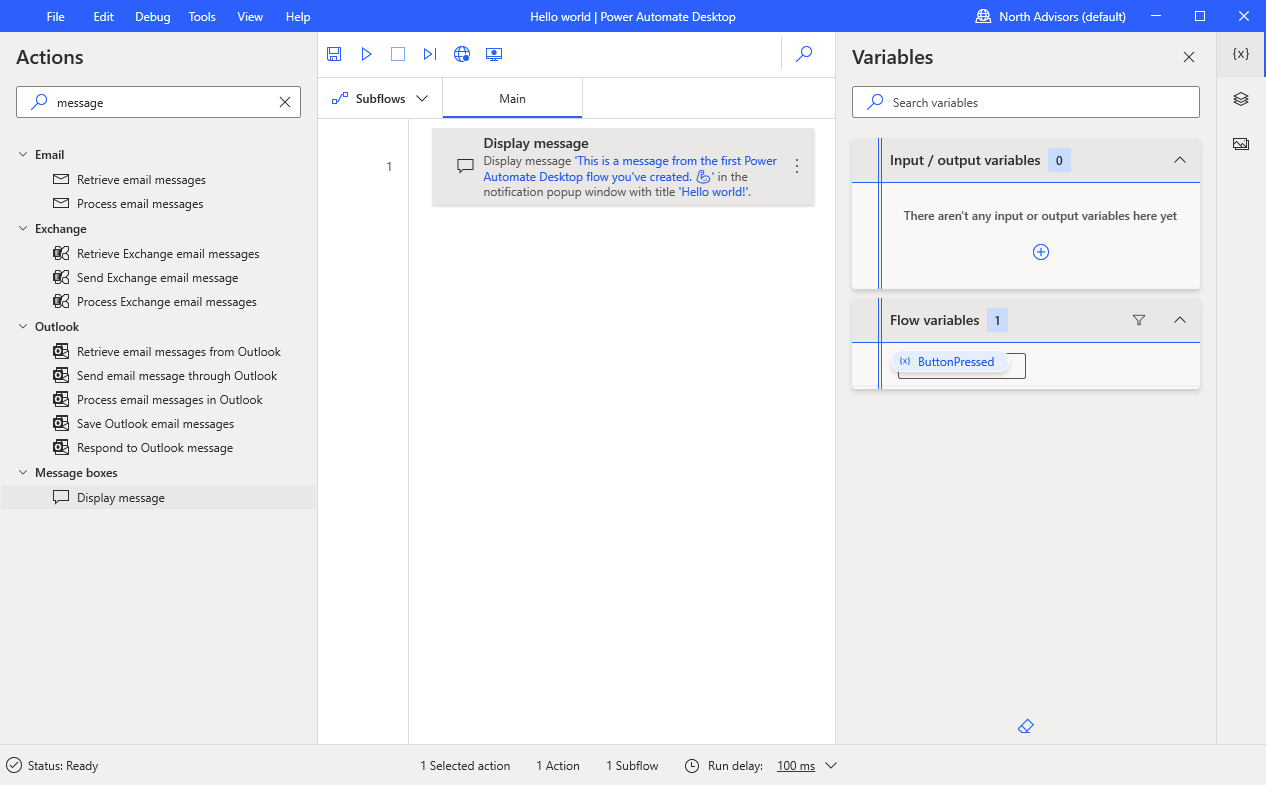
After saving, our flow looks super simple. I promised, it will be a ‘Hello world’:
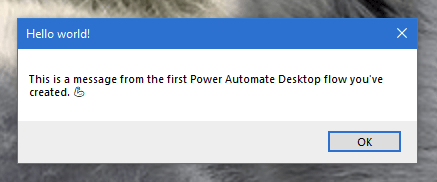
Let’s try running it! Press F5 – and you should see a popup:
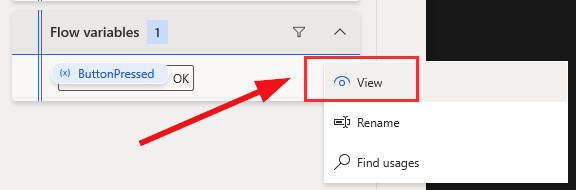
Once you click the OK button, you get to inspect the results. Sure, we saw the message box immediately but how about afterward? On the right-hand side of PAD, you can see a variable called ButtonPressed with a value of OK. Click the three dots on that line, and select View:
We can see a recap of the value of the variable:
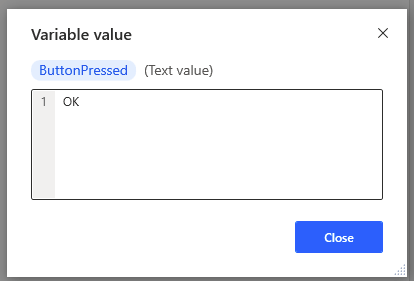
Now we know the rudimentary basics of how to build a (super) simple flow, how to run it, and how to view the values after it completes. We defined the variable ButtonPressed upon adding the Display message-action previously.
Beyond Hello world
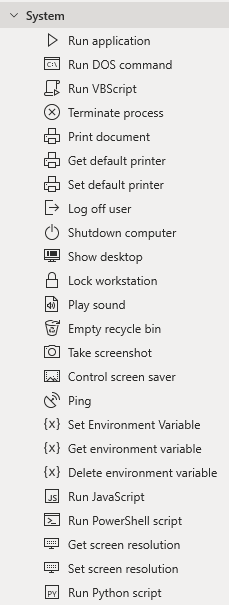
What else can we do with Power Automate Desktop? A lot! It has quite a bit of actions you can chain together. Under System you can find a lot of useful capabilities such as running an application, playing a sound, taking a screenshot, running JavaScript and similar.
File and folder capabilities are also there. Manipulating files, writing entries to a text file, processing CSV files – all the useful bits are here also.
Under UI Automation you can find more advanced capabilities for managing elements on the desktop. One example is to extract data from a given window. It’s quite rough, meaning that you get text out – but perhaps you need to verify that something exists within a specific app running on the desktop.
Note: Many aspects of the UI Automation and Web Automation break if you have multiple displays. I resolved this by spinning up PDA in a Virtual Machine, that exposes only a single display for the VM.
You can also instruct PAD to click on a specific UI element on the screen. Depending on the type of application, there might be built-in controls for this.
Here’s an example. I automated my browser (Firefox) to open a new tab, navigate to Google, search for something, and finally taking a screenshot of the results. These results could then be parsed later.
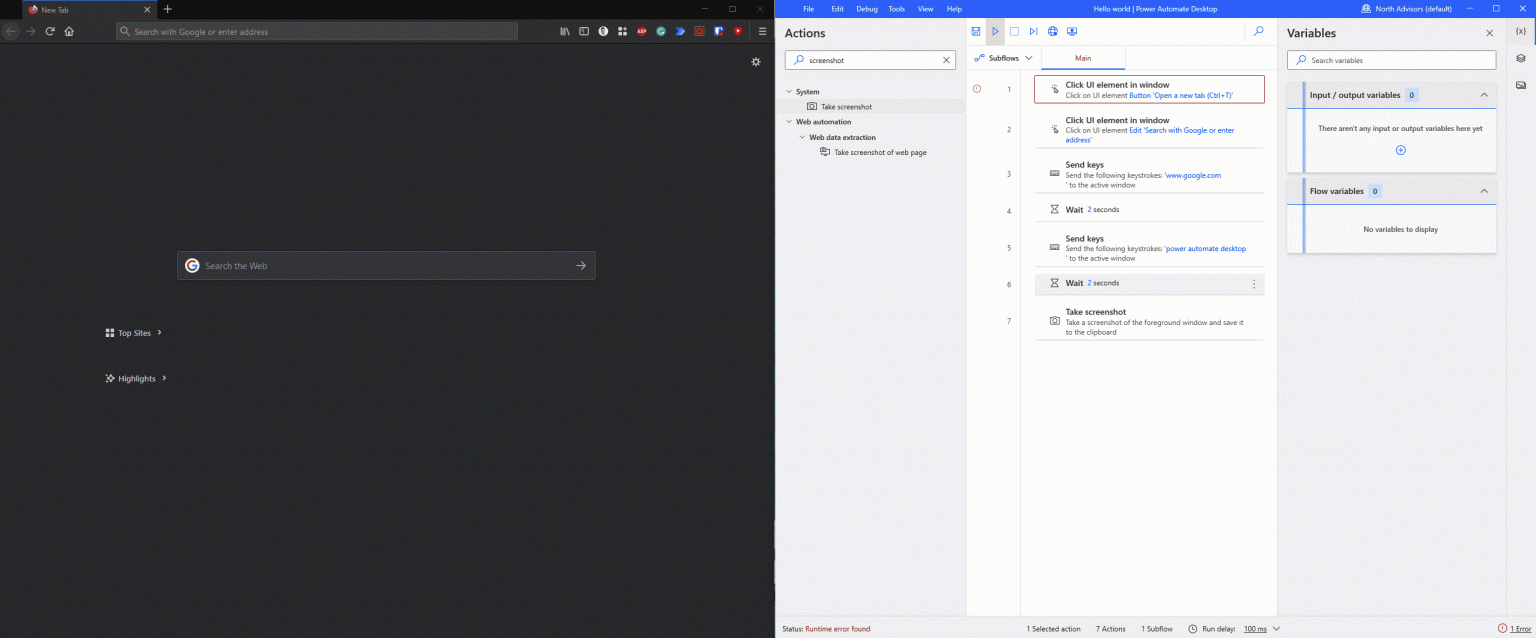
You can see the browser on the left, and PAD running on the right. The specific actions are:
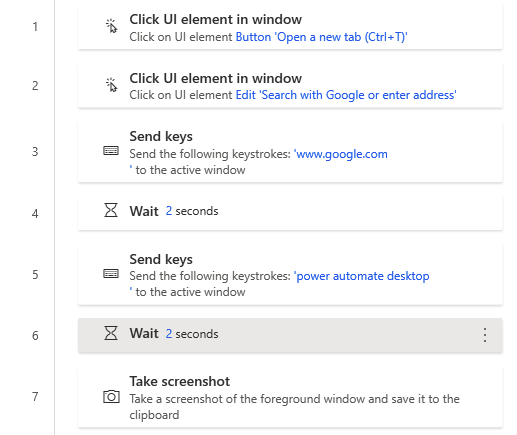
But wait, why am I using those Wait actions? Mostly to ensure that content is painted properly before taking the screenshot in the end. Of course, there are better to do this – like utilizing the built-in browser controls instead of clicking on specific elements of a browser. Yet, sometimes apps require this – it holds painfully true for Line of Business apps that most definitely do not have any automation support built-in.
I’ve learned that utilizing built-in capabilities is the fastest way to build solid automation. There are also two recorder features – the desktop recorder and the web recorder. They aim to capture your mouse and keyboard activities and build the flow from that. It “sort of” works. One limitation is that if you’re using multiple displays, it fails to record and capture your tasks properly. Thus, I often resort to just using the specific mouse clicks or keyboard combinations directly.
A combination of clicking on specific X, Y-coordinates, finding elements within a window, finding a checkbox/radio button, creating very intrinsic flows is possible.
You can use a terminal emulation, a Command Prompt, Windows Terminal, or a simulated Command Prompt session for working within a command line. Each one has its advantages. Yet, rarely do I need to actually do anything beyond running a single command or a script.
More advanced scenarios
Other and perhaps more advanced scenarios involve conditionals – such as if, else if, and switch statements. Very familiar if you’ve ever done programming. There also specific built-in conditionals, such as “if {a file exists} do X.” These all avoid you manually build a script that you then execute via PAD – for that, you already have Task Scheduler in Windows.
Working with variables is perhaps less needed in basic PAD automation, but it’s still useful to have. You can set values to variables and then utilize those variables within your actions. It’s very close to classic MS-DOS .BAT files, where you would define a %VARIABLE% and then later utilize it. Furthermore, with variables, you can also perform simple operations like truncating numbers, sorting a list-based variable content, and fiddling with JSON-based content.
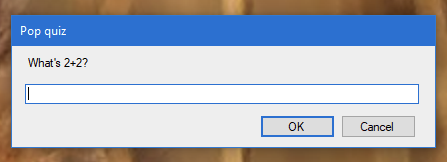
Getting input from the user is made possible with the Display input dialog that stores the input into a variable. It looks like this:
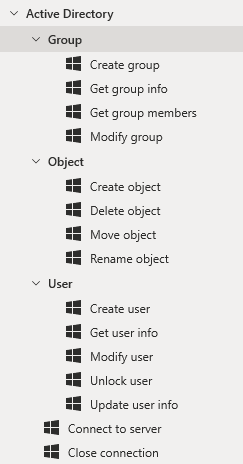
Specific IT Pro-focused actions are available for Active Directory, AWS, Azure and FTP.
I found myself many times thinking, “gee, I think I could pull this off with a clever PowerShell script” – and that’s essential to realize when using Power Automate Desktop. Instead of using it as a fancy tool to kick off your scripts, utilize it for things that are tough or time-consuming to script.
A word on licenses
Now that we are familiar with PAD, its capabilities, and features, it’s perhaps useful to talk a little about licensing. It’s a tough subject. I wrote the comprehensive guide to Power Apps and Power Automate licensing a few years ago, and it’s still a massive chunk of complex licensing options. I’ve since let go of keeping track of those changes.
With Power Automate Desktop, on the surface, it’s pretty clear. It’s free! If you have a valid Windows 10 license. Such a license would be Windows 10 Pro or almost any of the Microsoft 365 licensing bundles.
But, if you want to run your automation automatically and triggered from the cloud – you’ll need a paid (per user) license. By default, your automation will only run if you execute them manually by clicking the Play icon:
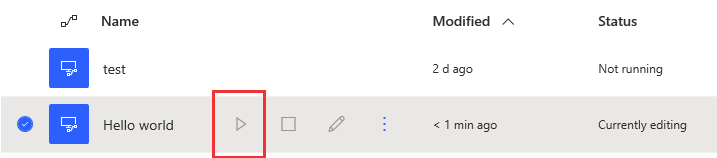
Yet, the point of all of the work you plan on doing with PAD is to somehow automate it. Perhaps you could have another tool click the Play button? 😉 For this, Microsoft has implemented support from Power Automate – the one that lives in the cloud.
You can trigger (= run) your local Power Automate Desktop-based flows from Power Automate. It looks like this in Power Automate:
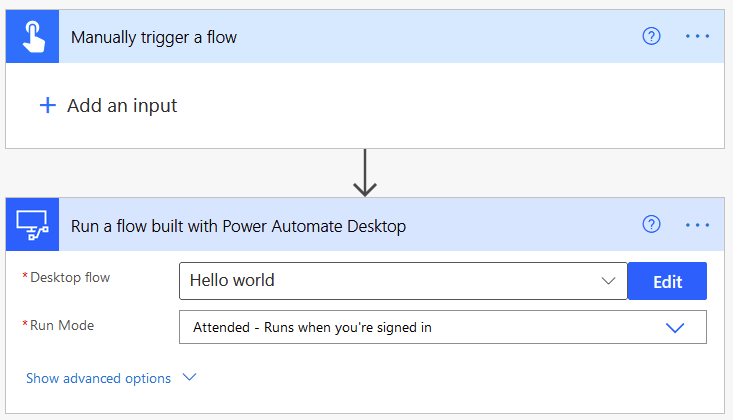
Hold on! Why does is the triggering action saying “Manually trigger a flow“? Well, this when you want to run your Power Automate Desktop-based flow from the cloud. Manually.
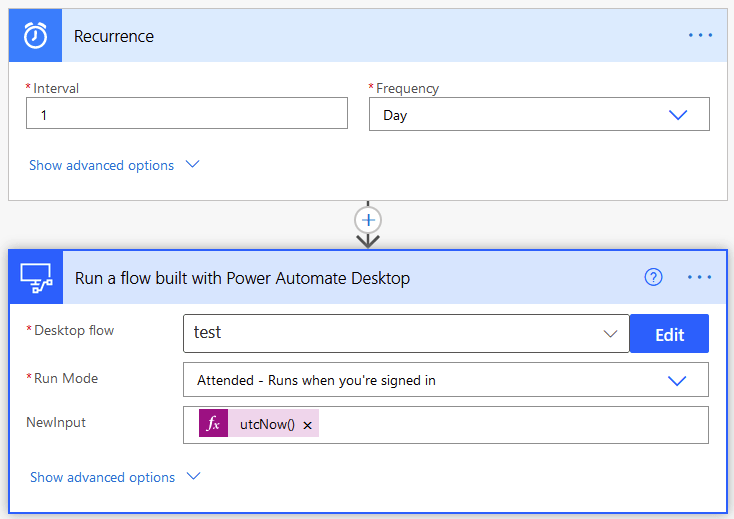
To run your PAD-based flows automatically – perhaps in a scheduled fashion – you can simply build a Power Automate flow that utilizes the Recurrence trigger:
But what does this have to do with licensing? Well, to reach back to your local Power Automate Desktop-based flows, you are going to need the more expensive license called Power Automate per user with attended RPA plan:
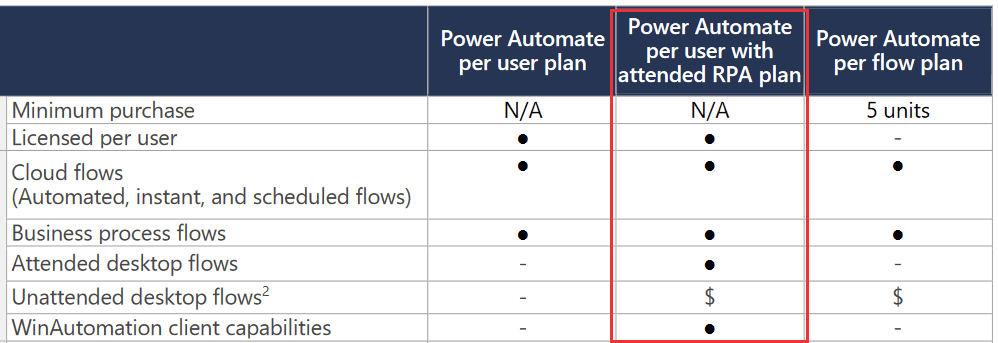
List price is $40/user/month. See details here.
If you need unattended RPA, you will need two licenses: the Power Automate per user with attended RPA plan (for at least one user, of course) and the Unattended RPA add-on, which is $150/bot/month.
I did try to figure out a way for having my flows run automatically. An easy way was to add a loop that checks for given parameters and then sleeps. This way, I didn’t have to trigger the flow from the cloud, but I could run it locally and leave it running. Surprisingly, this also did not waste CPU cycles on my workstation as much as I feared.
In conclusion
I have really enjoyed working with Power Automate Desktop. It’s a technical tool, intended to automate many aspects of someone’s work. Yet, it has limitations also. I feel many of these are from the possible legacy codebase from WinAutomation – and this brings back memories from Microsoft’s first Virtual PC all the way in 2007.
I hope Microsoft will continue evolving PAD. For now, it’s very static – you cannot expand or extend it, and also the somewhat artificial connection with Power Automate and Power Automate Desktop is slightly awkward. We had scheduled tasks already in ~2010 with System Center Orchestrator, so it would be fitting to have the same capabilities after more than a decade.