Building an automated monitoring tool to track how many people are at the office by using Unifi network gear and Azure Logic Apps

This time it’s something a little bit different. Back in 2015 I ordered a bunch of ultrasonic sensors, with hopes that I’d be able to automate the detection of when people arrived at the office. We had limited seats, so people could check how many seats are taken at any given time. And those ultrasonic sensors I would place under each desk, so upon detecting movement, it would trigger as positive.
I couldn’t get the sensors to work reliably, and wiring each desk proved to be too much of a hassle. So I built a simple mobile app, using Microsoft Power Automate (then: Microsoft Flow), that people could use to ‘check in’ at the office. I documented this in detail for the Petri blog about 3 years ago.
I’ve since seen, especially now with COVID-19, many people build something similar, often with Power Apps: solutions that people use to check-in, or reserve a resource – such as parking space, a hot desk or a laptop. I wanted to build something more automated, so yesterday evening I got to work.
The solution
I set out to think about how I could detect if a person is at the office. I used my home office as an example. Instead of asking people to install an app, open the app, and push a button every day, I wanted to simply do this automatically. I opted not to use the fantastic Ruuvitag Bluetooth Beacons, even if they can be repurposed to snoop for Bluetooth IDs automatically. The Helsinki Regional Transport Authority actually does this, you can read the documentation on how they use Bluetooth beacons here (in Finnish, sorry!).
I then realized that the one thing that I could use to detect if someone is in a given location, is their mobile phone. And whether or not they are connected to Wi-Fi at the office. Many modern phones automatically enable W-Fi when a trusted network is found, so it’s already an automated process if you’ve joined the corporate Wi-Fi at least once.
I use Unifi network gear at home (see here for background), and the mobile devices I use are all connected to local Wi-Fi Access Points. So I set out to build a solution that does the following:
- Ping the local network to see all wireless devices
- Identify when they were last connected
- Record this connection info
- Build a simple app/solution to verify which devices are connected, to identify the people at the office
If the last seen time of a device is more than, say, 15 minutes, it’s a fairly reasonable piece of information to define that the user has left the building. And if they later pop up, they’ve entered the building again.
Figuring out the building blocks
First, I set out to find how the Unifi API works. I knew it’s a REST API from my previous projects, but I hadn’t really played with it too much. I quickly found out that it’s a typical REST API, and authentication is cookie-based.
I played around a bit cURL, which is built-in to Windows 10, to figure out the correct format. First, to authenticate with the Unifi API, I need to resolve where the API resides. For Unifi, that would be your Cloud Key – a physical (or virtual) device, that acts as the controller for the network. For me, that’s hosted at https://192.168.1.7:8443:
Querying the REST API directly with cURL is easy. I found out that in order to authenticate, I need to call /api/login:
curl --cookie-jar ./unificookie.txt --insecure -H "Content-Type: application/json" -X POST -d "{\"password\":\"PASSWORD\",\"username\":\"USERNAME\"}" https://192.168.1.7:8443/api/loginLet’s dissect this first. –cookie-jar writes any cookies received to a file. For me, that’s unificookie.txt. I also accept that the SSL-certificate will be –insecure. Content-Type is set to JSON, and I’ll be doing a POST method (with -X). As for data, I pass on -d with a JSON payload for username and password to my Unifi network.
The response is simple:
{"meta":{"rc":"ok"},"data":[]}Now, unificookie.txt holds the authentication cookie:
# Netscape HTTP Cookie File
# https://curl.haxx.se/docs/http-cookies.html
# This file was generated by libcurl! Edit at your own risk.

192.168.1.7     FALSE   /       TRUE    0       csrf_token      Oxd<SNIP>
#HttpOnly_192.168.1.7   FALSE   /       TRUE    0       unifises        hht<SNIP>
Next, I need to pass this cookie and query for all active Wi-Fi devices. This is done under /api/<site>/stat/sta. Again, using cURL I can simply run:
curl -b ./unificookie.txt --insecure -H "Content-Type: application/json" -X POST https://192.168.1.7:8443/api/s/default/stat/sta > devices.json<site> can be shorthanded with /s/default, and it selects the default site you’ve defined in your Unifi network structure. This gives out a neat JSON-formatted list of all devices. It looks like this:
{
    "meta": {
        "rc": "ok"
    },
    "data": [
        {
            "site_id": "id",
            "assoc_time": 1588177447,
            "latest_assoc_time": 1591186140,
            "oui": "SonyInte",
            "user_id": "id",
            "_id": "id",
            "mac": "mac",
            "is_guest": false,
            "first_seen": 1561739468,
            "last_seen": 1591186184,
            "is_wired": true,
            "usergroup_id": "",
            "name": "PlayStation 4",
            "noted": true,
            "_uptime_by_usw": 72058,
            "_last_seen_by_usw": 1591186184,
            "_is_guest_by_usw": false,
            "sw_mac": "mac",
            "sw_depth": 2,
            "sw_port": 3,
            "network": "LAN",
            "network_id": "id",
            "ip": "192.168.1.19",
            "satisfaction": 100,
            "uptime": 3008737,
            "_uptime_by_ugw": 5,
            "_last_seen_by_ugw": 1591186145,
            "_is_guest_by_ugw": false,
            "gw_mac": "mac",
            "tx_bytes": 1428471661,
            "rx_bytes": 300975702,
            "tx_packets": 1037209,
            "tx_retries": 0,
            "wifi_tx_attempts": 0,
            "rx_packets": 3933341,
            "bytes-r": 0,
            "tx_bytes-r": 0,
            "rx_bytes-r": 0,
            "authorized": true,
            "qos_policy_applied": true,
            "dev_cat": 17,
            "dev_family": 2,
            "dev_id": 369,
            "os_class": 1,
            "os_name": 1,
            "dev_vendor": 99
        },
That’s the whole dataset for my PlayStation 4, which has wired connectivity. So I am receiving both wired and wireless clients. I don’t mind!
I now have access to my data. Let’s move on and automate this.
Automating data retrieval from Unifi API
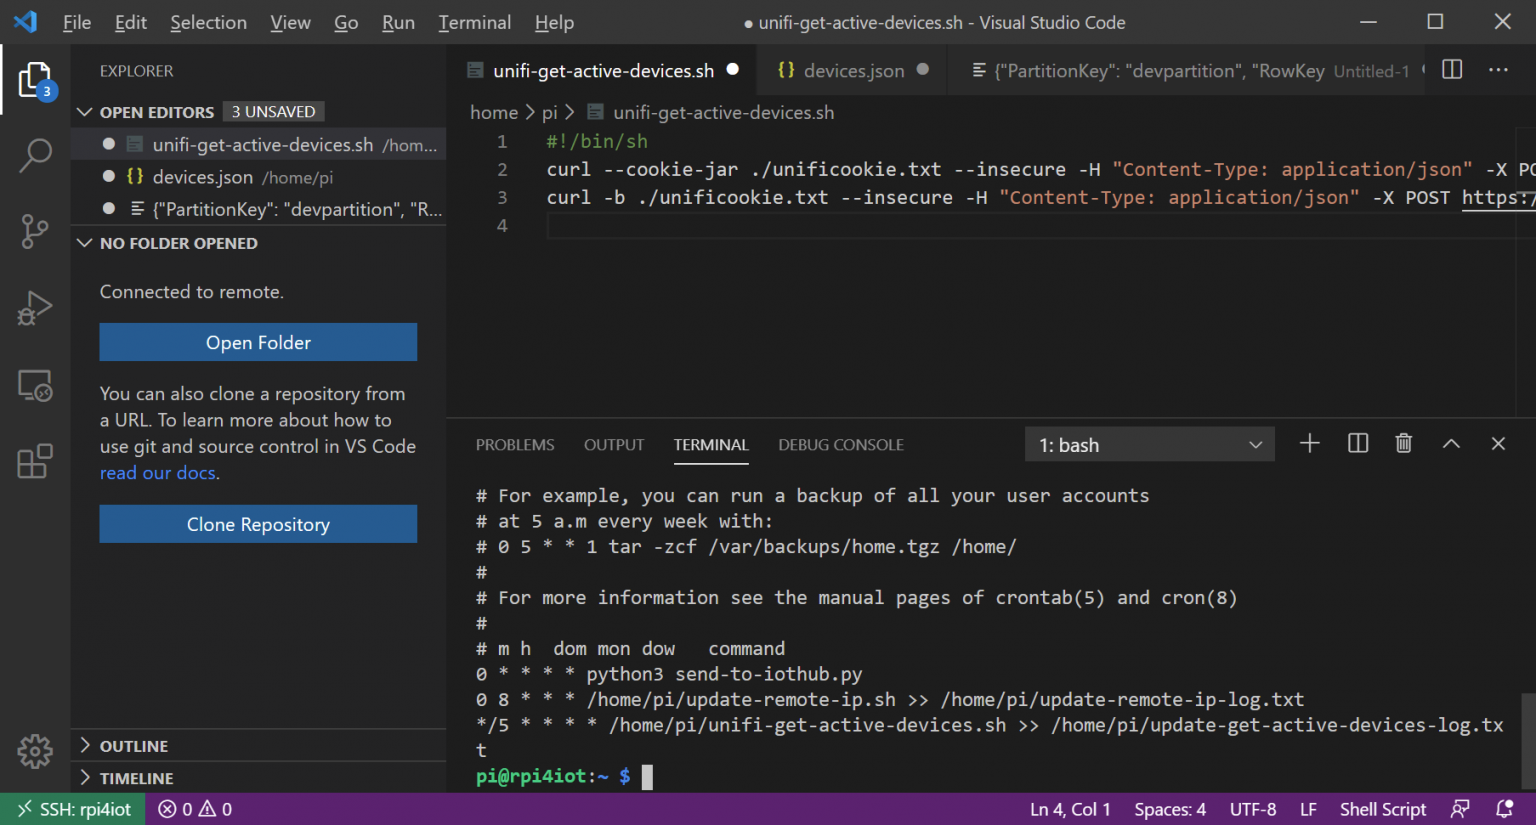
I briefly considered converting my simple 2-liner script to a .NET Core binary. But as it is only 2 lines, why bother? I chose to run this script from my Raspberry Pi 4, that I also use for monitoring temperatures at home and for updating my public IP address to Azure DNS.
The script is a simple shell script, and looks like this:
#!/bin/sh
curl --cookie-jar ./unificookie.txt --insecure -H "Content-Type: application/json" -X POST -d "{\"password\":\"PASSWORD\",\"username\":\"USERNAME\"}" https://192.168.1.7:8443/api/login
curl -b ./unificookie.txt --insecure -H "Content-Type: application/json" -X POST https://192.168.1.7:8443/api/s/default/stat/sta > devices.json
I scheduled this with Crontab to run every 5 minutes:
*/5 * * * * /home/pi/unifi-get-active-devices.sh >> /home/pi/update-get-active-devices-log.txtModernizing the management of Raspberry Pi scripts
I’ve grown tired with SSH’ing to my Raspberry Pi, and editing files with the poor editors that Linux has by default. Thankfully, Visual Studio Code now has remote file editing support! And it’s beyond amazing.
By installing Remote Development extension for Visual Studio Code, I can leverage the SSH server on the Raspberry Pi to remotely access the files and shell. It looks like this, when I edit files on my Windows 10 that reside on the Raspberry Pi:
It provides a shell, and a real code editor with all the benefits of Visual Studio Code.
Building data storage and integration on Azure
And only one task to do – delivering the JSON payload with all device data to Azure, for further processing. I opted not to use Azure IoT Hub, as the amount of messages I’m sending is limited – about 288 per day. I chose to use Azure Logic Apps, as it is so flexible and agile for building solutions like this.
The Logic App needs to trigger when it receives a HTTP request. This also exposes a nice endpoint that my script can then call from the Raspberry Pi.
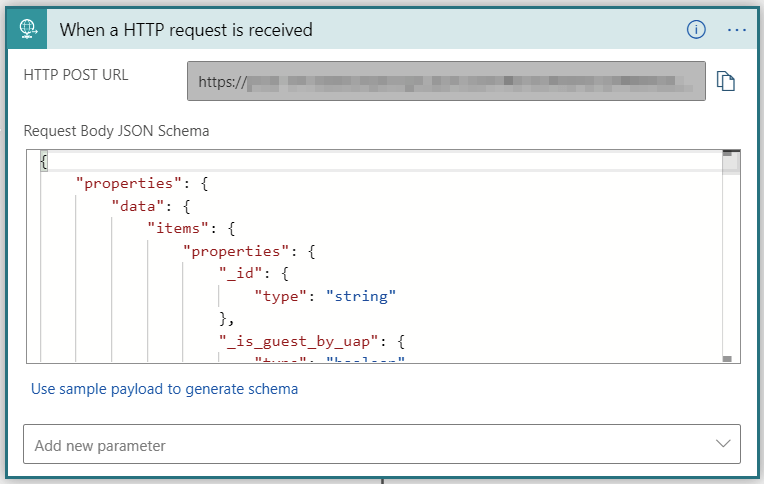
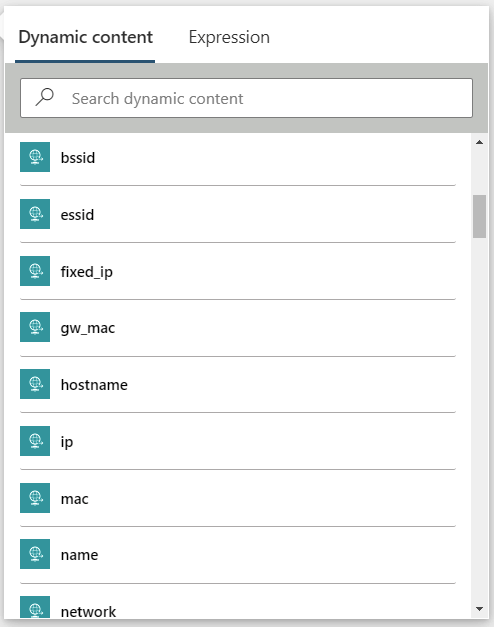
In order to serialize the JSON data I’m sending (with my devices info), I offered a sample payload based on real data – and Logic Apps simply creates a JSON schema from that!
Next, I decided to store my findings on Azure Table Storage. It’s fast, nimble and cheap. As I wasn’t sure what data I’m storing, I just went with a minimal set that I can later modify if I need to expose more. A For-Each loop is needed, where I loop through all the data, and pick the ones I want – and push those to Azure Table Storage.
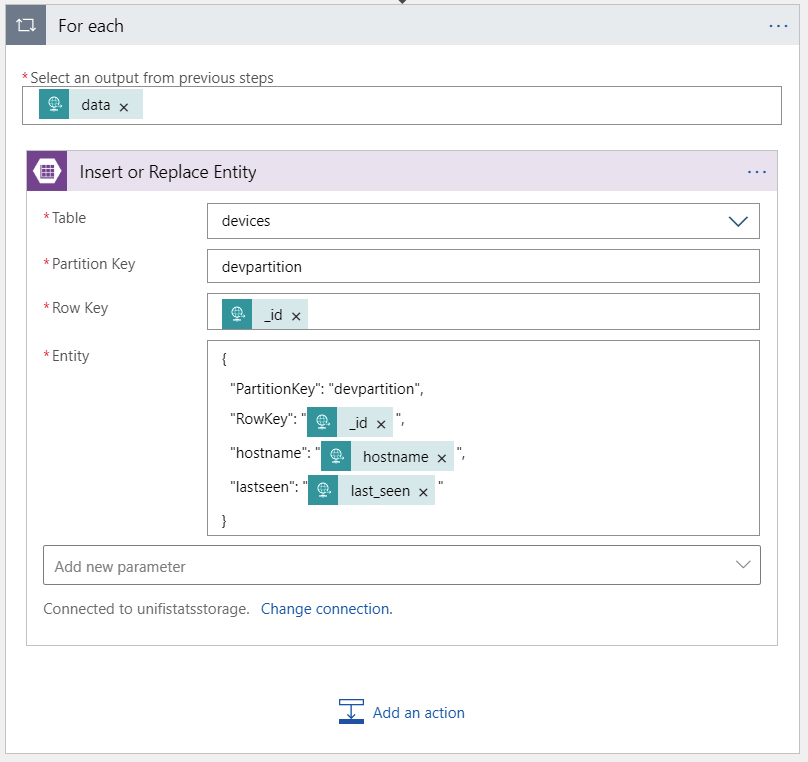
You can see that I have typed values, such as last_seen, hostname and _id – and these are automatically generated from the JSON schema. If at a later time I want to enhance the table with more data, it’s easy:
And the final step is to wire up the original Raspberry Pi-based shell script so that it calls the Logic App. I added this line in the script:
curl -H "Content-Type: application/json" --request POST --data @devices.json "https://URL-TO-LOGIC-APPS-ENDPOINT"Verifying that the data is flowing, I first check the table storage:
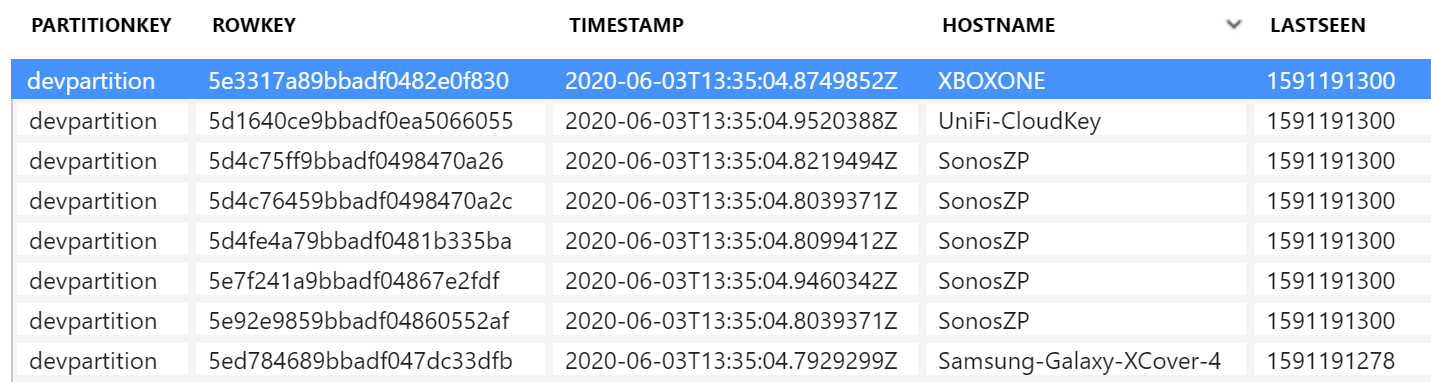
Plenty of data there! What’s important is the hostname and last seen value. I don’t really care for the timestamp. The last seen is in Epoch time, or Unix time, meaning seconds since January 1, 1970.
Building a simple interface on.. Excel
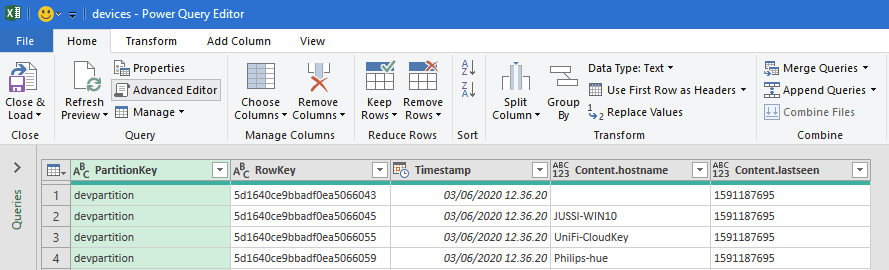
I was thinking of using Power BI, but before I do that, I wanted to verify that I can use the data. I built a simple worksheet in Excel, that first pulls all the rows from the Table Storage:
And then I added a few simple TIME comparison formulas to see how long devices have been gone:
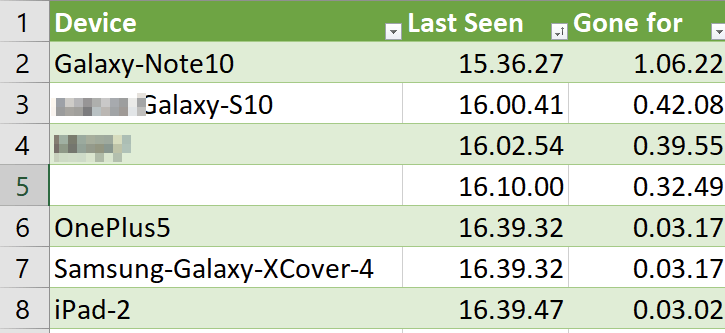
My own phone, a Galaxy Note 10 (first on the list), has been disconnected for a little over an hour. I did this on purpose, as Wi-Fi is normally turned on when I’m at home. So it seems to work! The other Galaxy S10, which belongs to my wife, has been gone for 42 minutes. Safe to assume she’s not at home then!
In conclusion
This little project was slightly different, as I relied on the data I was able to pull from the Unifi REST API. Obviously, if you’re not using Unifi network gear, you’d have to figure out another way to pull this same data from your network.
The interface still requires something more solid – perhaps a simple web page, that lists all devices that haven’t been seen in >15 minutes, and maps those to people. Since I can pull the MAC addresses of each device, I can also easily identify which phone or mobile device belongs to which person.
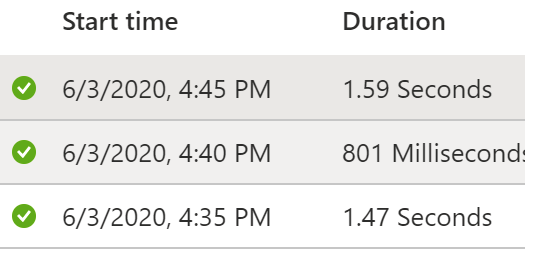
On the Logic App side, the process is very fast – taking only about 1.5 seconds to process about 30 devices from the JSON file:
I might pick up on this at a later date, to perhaps cross-reference with the Bluetooth Beacon, or alternatively expose a nicer interface to view remotely who is at home, or at the office.