Adding a free SSL certificate to an Azure Web App

One of the many announcements Microsoft made during Ignite 2019 was the capability to add free SSL certificates to Web Apps on Azure. You can read the announcement here. “Wow, that’s beyond great!”, I remember thinking on my way to Orlando for Ignite at the time. I can finally secure all my web apps without paying hundreds of dollars to third-parties for SSL certificates.
So, I went on to try this new capability. Let’s see how this turns out.
Setting up a test web app using Azure CLI
In order to test this capability, I will need a web app. And the web app requires a resource group, to begin with. Opening Azure Cloud Shell from Azure Portal, I can provision this easily. If you’re not familiar with Azure CLI, see my guide for getting started with Azure CLI here.
First, I’ll create a new resource group:
az group create --name free-ssl --location westeurope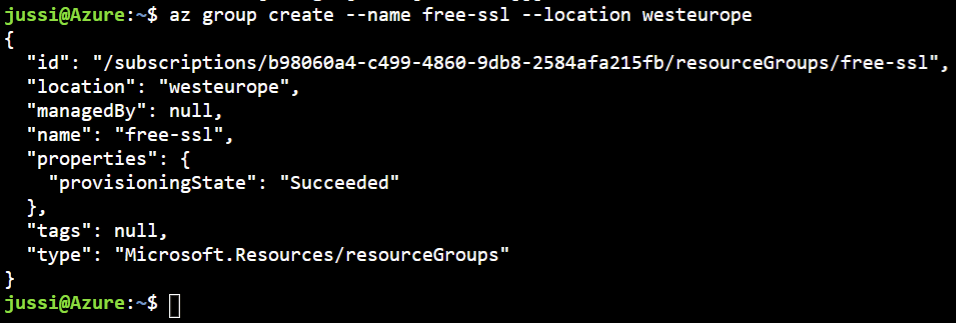
This creates a new resource group named free-ssl. Next, I’ll need to provision an app plan for the web app. This is needed for the compute resources of the web app, as well as for defining the capabilities of my web app. To create my app plan, I need to type the following in Azure Cloud Shell:
az appservice plan create --name free-ssl-app-plan --is-linux --location westeurope --sku B1 --resource-group free-ssl
I chose to provision a Linux-hosted app plan, and the SKU is B1. This is the minimum pricing tier, that still allows SSL to be enabled.
And finally, all I need to do is provision the actual web app:
az webapp create --name free-ssl-webapp --plan free-ssl-app-plan --resource-group free-ssl --runtime "DOTNETCORE|Latest"
Note, that I need to specify the runtime for the web app. This differs depending on if you’re provisioning the web app on a Linux-based app plan, or a Windows-based app plan. To see which app plans are supported, run:
az webapp list-runtimes [--linux]I now have a web app, and a corresponding app plan provisioned:

To verify my web app works, I can simply call it with curl.exe from a Windows 10 command line:

Preparing DNS for the web app and free SSL certificate
In order to try out the free SSL certificate capability, I need to create a custom domain and a sub-domain for the web app. The current DNS entry for the site is free-ssl-webapp.azurewebsites.net. Obviously, I cannot request an SSL certificate for something.azurewebsites.net.
Thankfully I have a ‘few’ spare domain names parked somewhere, so now it’s only a matter of picking one up, and adding two entries in DNS. Usually this would be www., and the actual domain.
I chose to add a new sub-domain called freessl under my existing jussiroine.com domain. I have this zone hosted in Azure DNS already, so it’s only a matter of adding a new record set via Azure Portal. I could use Azure CLI for this, but since it’s a one-time change, I see little value in scripting this.
First, I need to go to Web App > Custom domains, where I can add my custom domain for the web app:
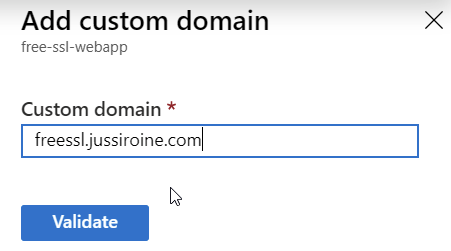
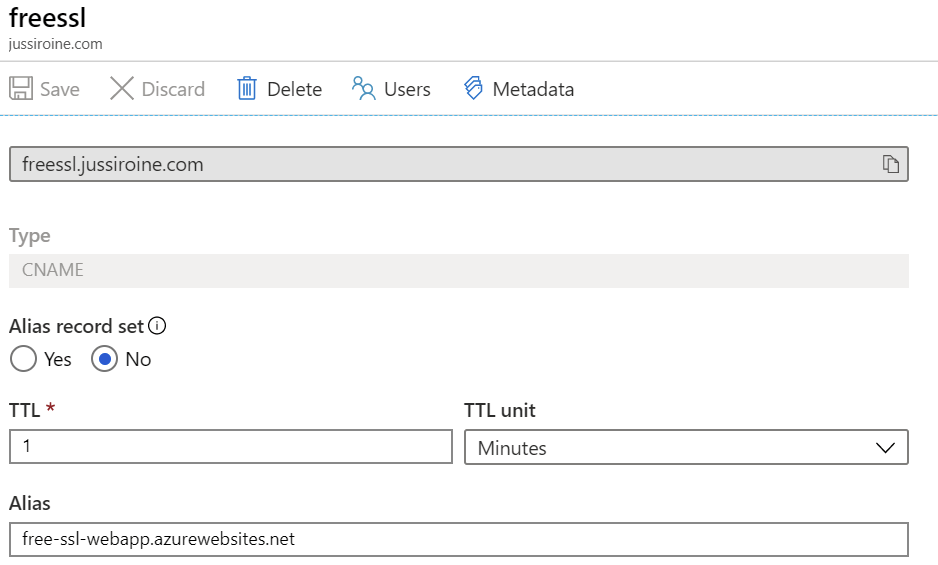
This needs to be validated, either via a CNAME record in my jussiroine.com zone, or a regular A record. I chose to use the default, a CNAME entry, and added the proposed entry to my freessl.jussiroine.com record set:
Switching back to the Custom domains view for the web app, I can click on Validate to verify when the change is visible for Azure:
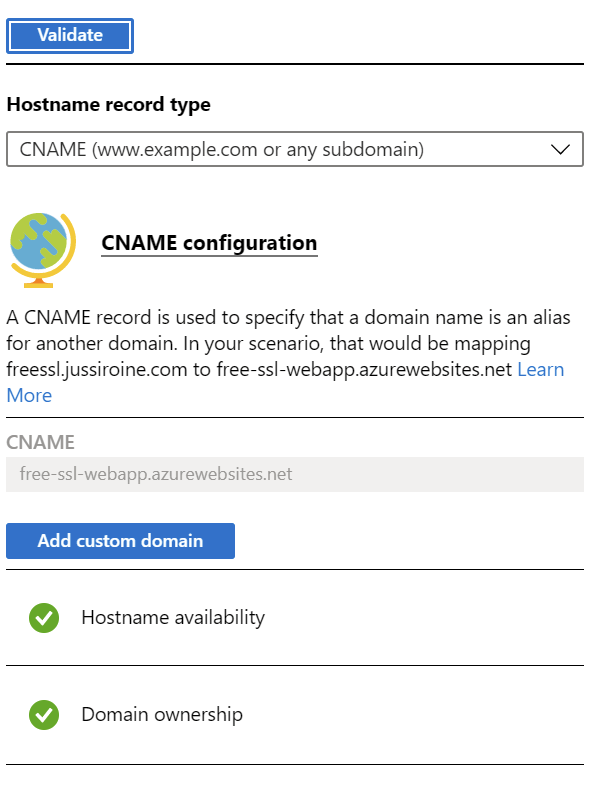
Once Hostname availability and Domain ownership turn green, you’re good. Click Add custom domain to complete the change.
Azure Portal kindly suggests now would be a great time to add those missing SSL certificates:

Adding a free SSL certificate for the web app
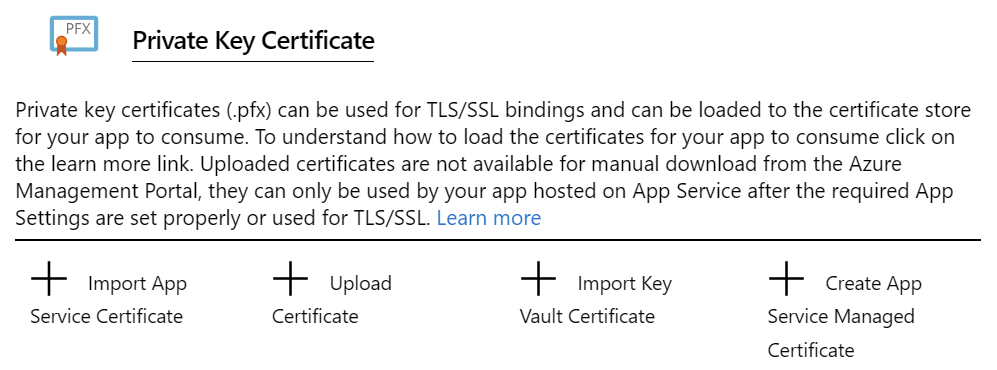
The final step now is to add the SSL certificate. Click Web App > TLS/SSL settings. From the top nav, click Private Key Certificates (.pfx):

And from this new view, click Create App Service Managed Certificate:
Almost there! Choose the custom sub-domain from the dropdown:
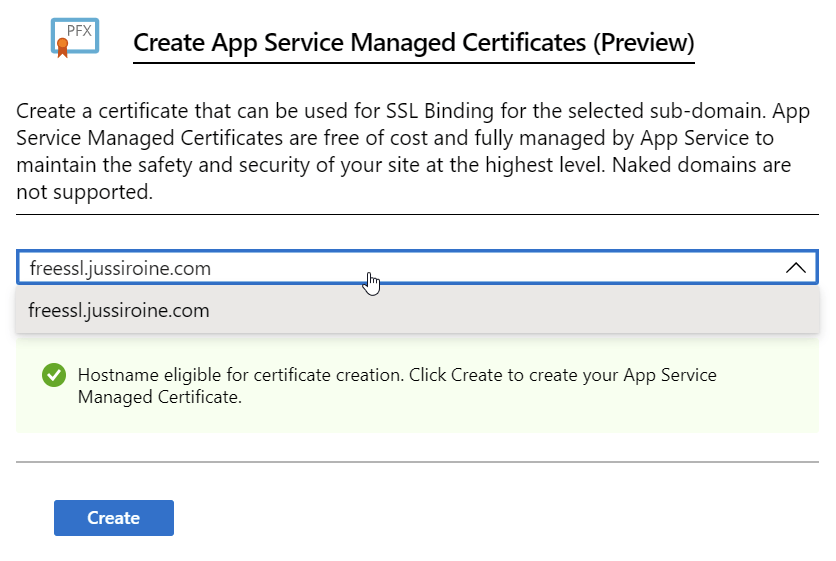
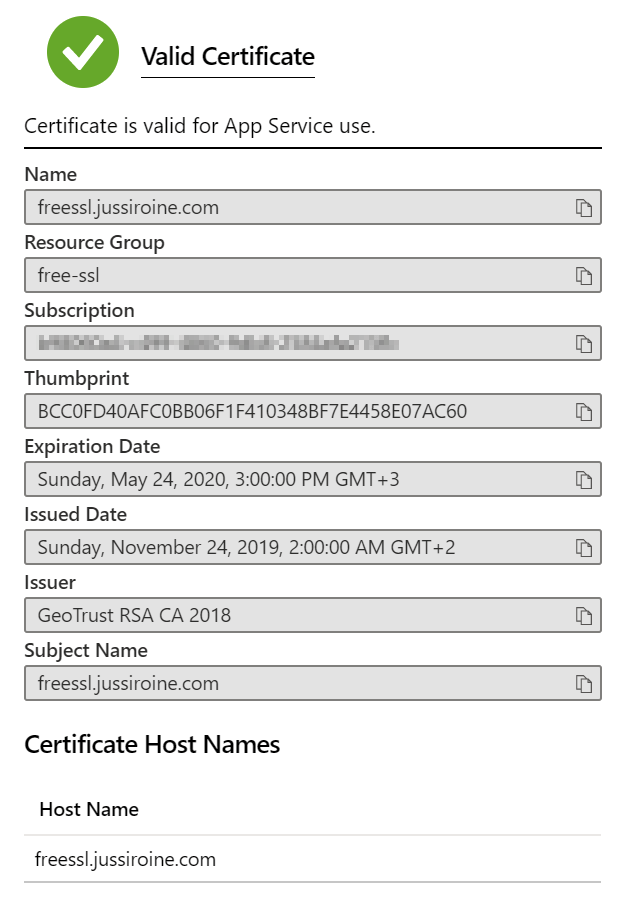
And click Create. This takes a while to process, so be patient. Once completed, you’ll see a new private key certificate:

Under details, you can verify the certificate is legit:
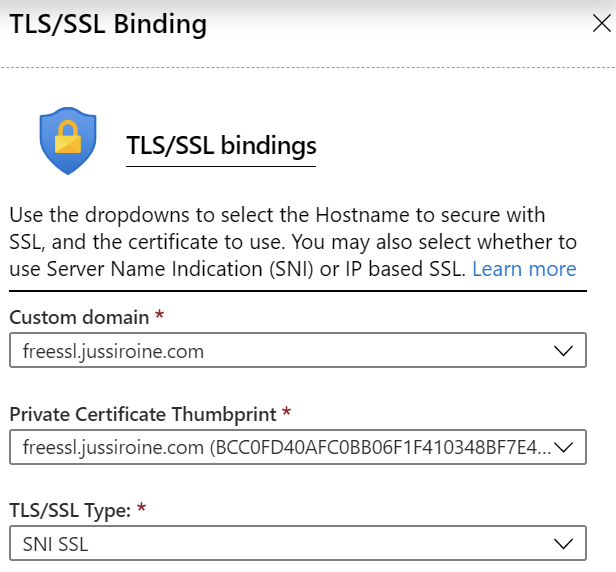
Next, under Web App > TLS/SSL Settings, select Add TLS/SSL Binding, and choose your custom domain, and private certificate thumbprint:
Testing the new SSL certificate
To test out your website with the new SSL certificate, open an InPrivate/Incognito browser session. I noticed that if I simply open a new tab, and I’ve previously opened the site before the certificate is applied, the old certificate (*.azurewebsites.net) is cached quite persistently.
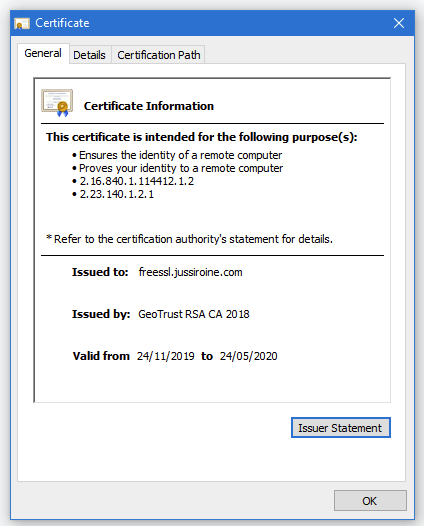
Once the site loads, click on the padlock and verify the new SSL certificate is, in fact, applied and correct:
In conclusion
Free SSL certificates is a great new capability in Azure. It’s also very easy to configure, and the certificates have auto-renew enabled, which is a nice little bonus.
Unfortunately, as of now, the certificates do not support naked domains. These are also sometimes called apex domains. As such, I cannot secure https://jussiroine.com, but I can secure https://[subdomain].jussiroine.com. Therefore, if I were to secure my own blog, I would be able to apply the free SSL certificate for https://jussiroine.com/, but all visitors to https://jussiroine.com would receive a warning that the site is not secured with a correct certificate.
As I cannot specify a Subject Alternate Name (SAN) for the certificate, I also cannot use one certificate to secure multiple identities of a given web app. Wildcard certificates are also not supported.
Hopefully, these omissions will be added at a later time. For now, the capability is great if you have subdomains primarily in use, but are not planning to use apex/naked domains as such.