Understanding and getting started with Azure Sentinel

Today, Microsoft announced that Azure Sentinel is now Generally Available (GA). What this means, is that Azure Sentinel can be used in production, the pricing has been revealed and it’s stable for enterprise-grade usage.
In this post, I’ll have a look at what Azure Sentinel is, how to get started and what to keep an eye for in the future.
What is Azure Sentinel?
Azure Sentinel is Microsoft’s vision of a cloud-based SIEM – which stands for Security Information and Event Management. The intention of a SIEM is usually to provide real-time analysis for security alerts throughout the enterprise. I hear consultants often referring to SIEM when they mean a centralized place to process logs, generate alerts and react to security events. Obviously, there’s much more to security than flipping on service and having a longer lunch than usual. Microsoft likes to mention that Azure Sentinel is also a SOAR, or Security Orchestration Automated Response solution. This translates to the fact that Azure Sentinel can orchestrate workflows based on alerts and incidents – think Logic Apps, for example.
Azure Sentinel runs in Azure, Microsoft’s public cloud platform. It will help you collect, detect, investigate and respond to security threats and incidents.
Why couldn’t use something like Splunk, then? You can, and many organizations do use Splunk. Azure Sentinel is – to put it simply – Microsoft’s modern implementation of something akin to Splunk. I’m not sure if you’d need both, or multiple different SIEMs, as integrating and building one is a major effort.
Azure Sentinel has been in Preview since February 2019.
In order to use Azure Sentinel, you’ll need to provision the service, connect to your data sources (Office 365, Azure AD, etc.) and configure your dashboards. From here, you can then do all sorts of things like investigating and drilling down on data, hunting for security threats in your organization and analyzing your findings.
What does it cost?
I’m glad (again) that you asked! While Azure Sentinel has been in preview for the better part of 2019, pricing was based on Azure Monitor pricing. This roughly means that you’d pay per gigabyte (GB) for data ingested. The first 5 GB is free, then per GB you’d pay 2.522 € ($2.99). When you keep data for longer periods, data retention is 0.110 € ($0.13) per month. The first 31 days are free for data retention.
Now, with GA of Azure Sentinel announced, pricing is also modified slightly. You have two options for pricing in Azure Sentinel:
- Capacity Reservation based pricing
- Pay-As-You-Go
Capacity Reservation is a fixed-fee license, where you pay for capacity (and receive discounts based on the amount of capacity you purchase). This is the amount of data you plan to ingest per day. Purchasing capacity for 100 GB per day will cost you 109.63 € ($130)/day, and this includes a 50 % discount. Purchasing 500 GB of capacity per day would cost 438.52 € ($520)/day, and it includes a 60 % discount.
Pay-As-You-Go is based on Log Analytics pricing, and it’s set at 2.20 € ($2.60)/GB.
Based on this pricing approach, smaller organizations will benefit from the Pay-As-You-Go model, as you can keep an eye for cost while scaling the security operations up safely. Larger organizations and enterprises should factor in the major discounts that incur when using Capacity Reservations, and should probably select that model for their production environments.
You can review the pricing model here.
What about Azure Security Center? I love that service!
Azure Security Center is a service aimed for protection server and service workloads. Azure Sentinel is used to analyzing real-time event data and detecting attacks. While Azure Security Center has certain capabilities that Azure Sentinel also has, they do not overlap. In fact, Azure Sentinel can pull data from Azure Security Center using the built-in data connectors. This requires a Standard (paid) Tier subscription in ASC, though.
For instruction on how to configure ASC to feed data to Azure Sentinel, see here.
ASC is more about getting and understanding how to best configure your Azure assets, while Azure Sentinel is all about detecting bad actors from accessing your data.
I run syslog and that’s the best!
Okay. You can and probably should continue using syslog. But you can also leverage Azure Sentinel to pull data from your syslogd or other syslog-based infrastructure and benefit from Azure Sentinel’s capabilities as well.
For instructions on how to do this, see here.
Getting started with Azure Sentinel: Onboarding
One of the many things I love in Azure is Microsoft’s capability to unify the user experience behind a single, smooth experience. The same applies to Azure Sentinel – instead of trawling through weird XML-based config files, you can easily provision and onboard Azure Sentinel through Azure Portal.
To onboard Azure Sentinel, you’ll need to create a new Log Analytics-based workspace. If you have any existing ones, you can choose to use one of those, or just create a new empty one.
In Azure Portal, click the + icon and type Sentinel. Select Azure Sentinel.
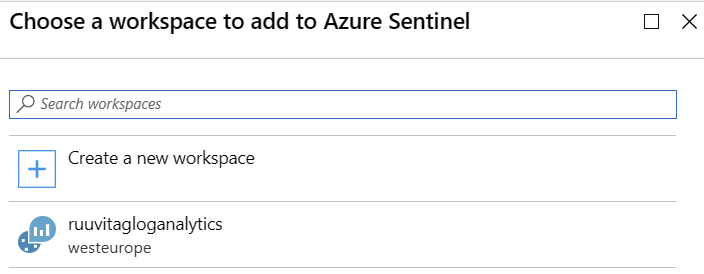
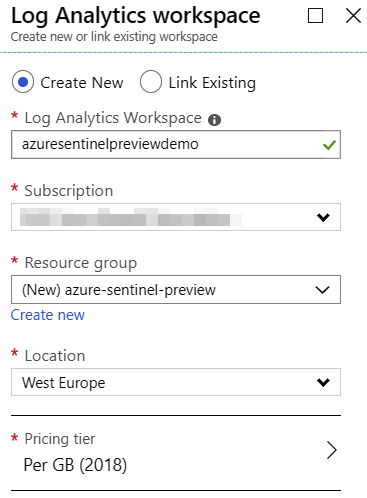
Click + Add to add a new Azure Sentinel workspace. I have one existing Log Analytics workspace, so it’s listed also. Choose Create a new workspace.
And simply fill in the details in the provisioning blade.
Once provisioning of the new Log Analytics workspace is completed – and it usually takes only a minute – you can finish onboarding by clicking on Add Azure Sentinel in the list of workspace. This also takes only a minute to complete usually.
You are then introduced with Azure Sentinel and a few tasks to continue onboarding:

Getting started with Azure Sentinel: Collecting data
From the welcome page of Azure Sentinel, click Connect under Collect data. You are presented with a list of connectors. For me, while in Preview, it shows 25 connectors, and 2 more connectors are coming soon.
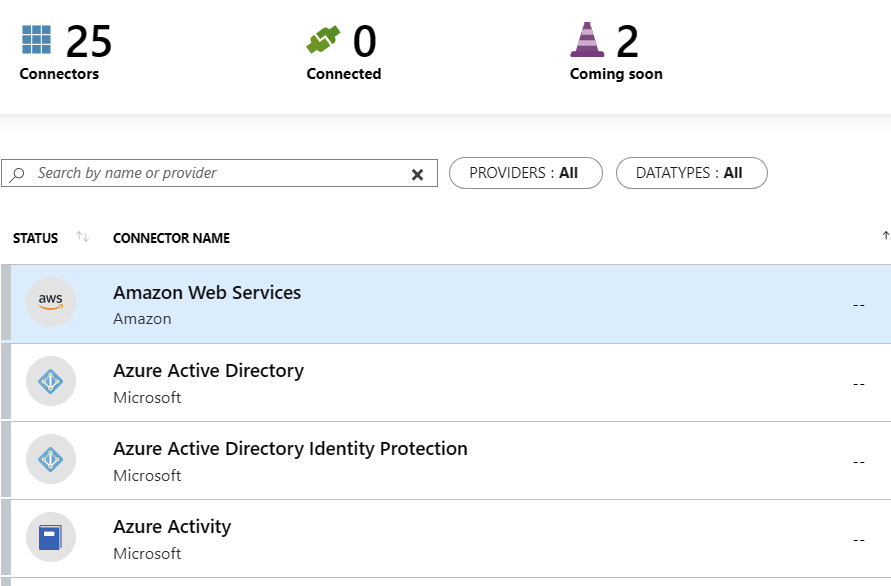
You can now click through the connectors you need to receive data from. The obvious choices would include Azure Active Directory, Azure Activity, and Office 365. If you have Standard Tier Azure Security Center, choose that also to begin with.
Once you click on a connector, depending on the connector type, you’ll need to perform additional configuration. For Azure Active Directory, it looks like this:
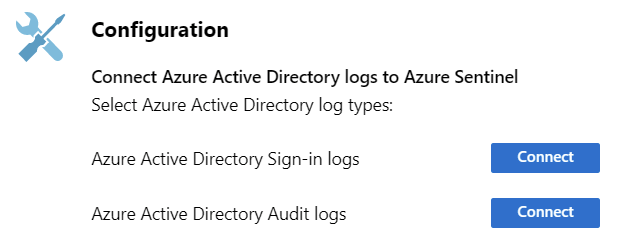
And for Azure Active Directory specifically, you’d also need a P1 or P2 license.
You can review all connector details here.
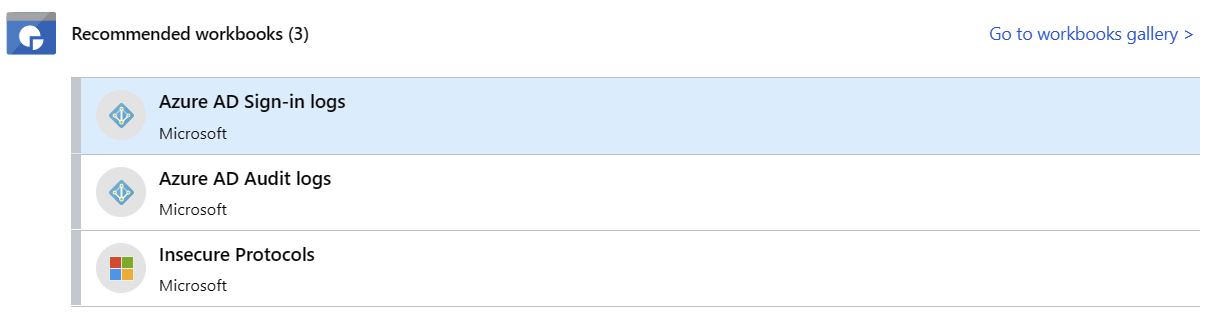
Once a connector has been configured, you can click on Next steps to see additional guidance on how to best utilize the connector. For Azure Active Directory, the options include additional workbooks, and a few query samples using Log Analytics’ query language, KQL (also sometimes known as Kusto).
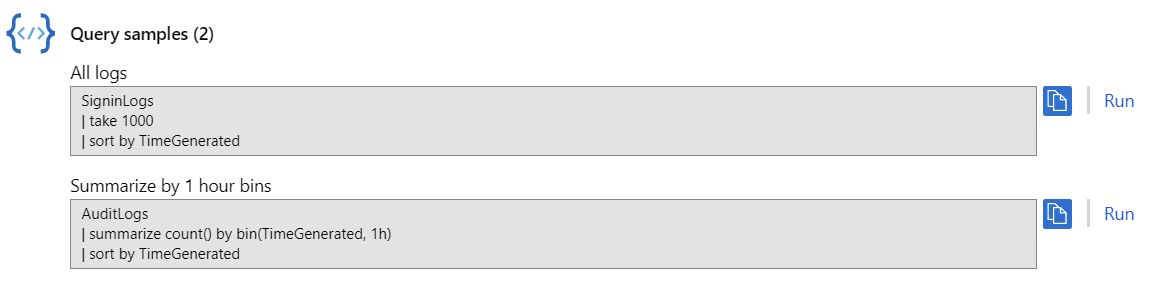
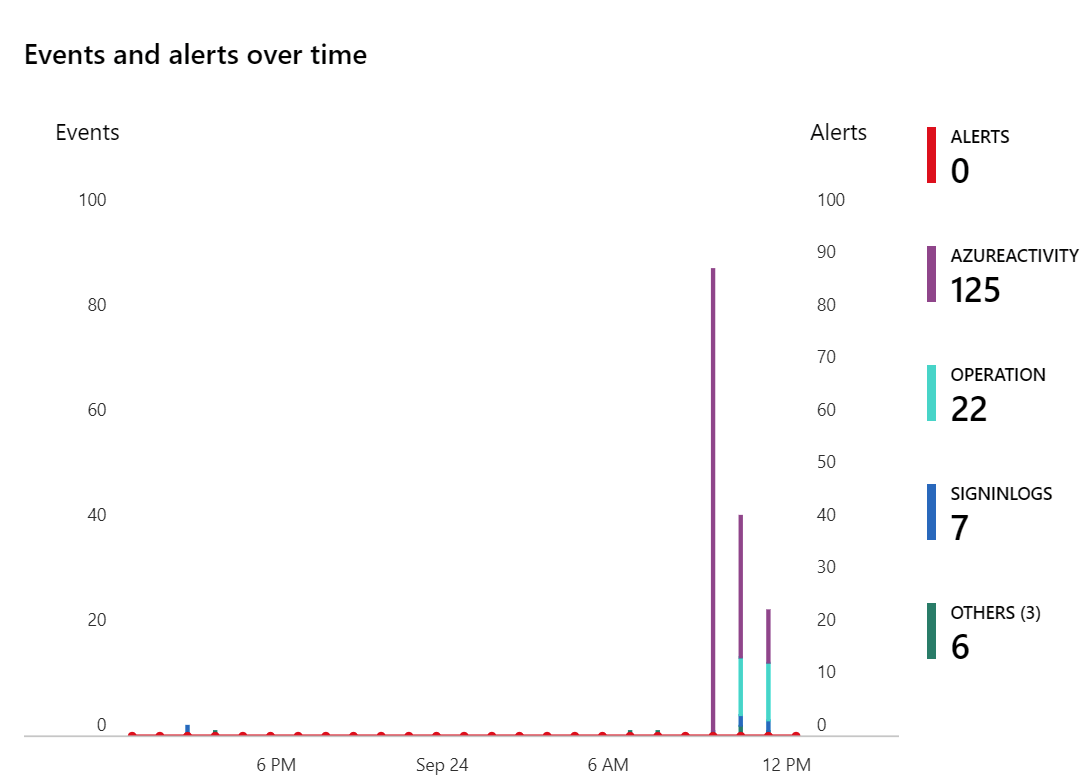
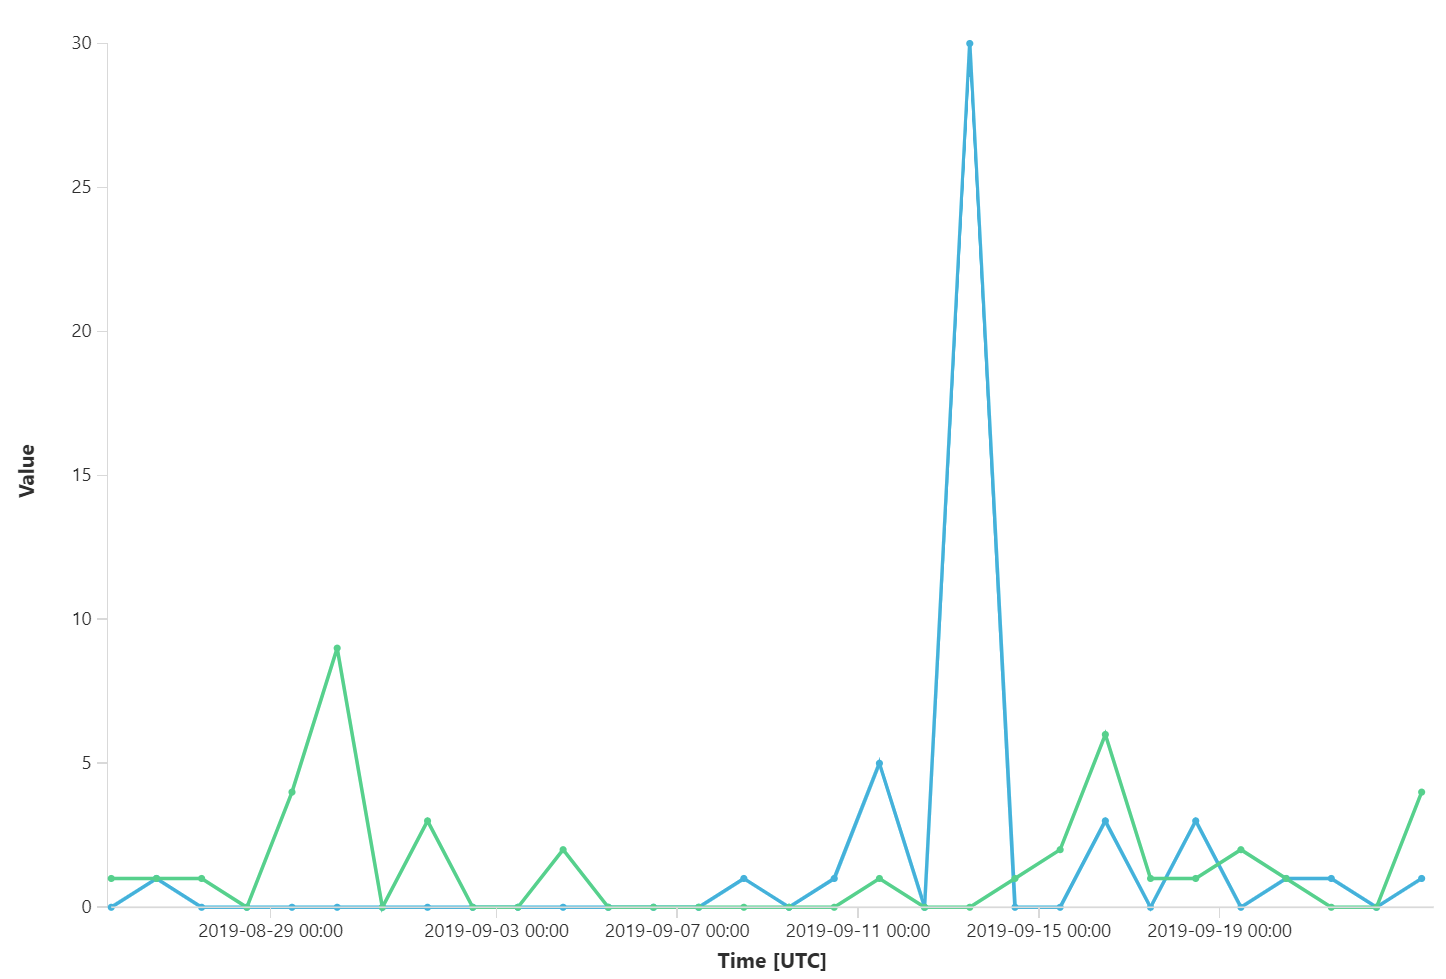
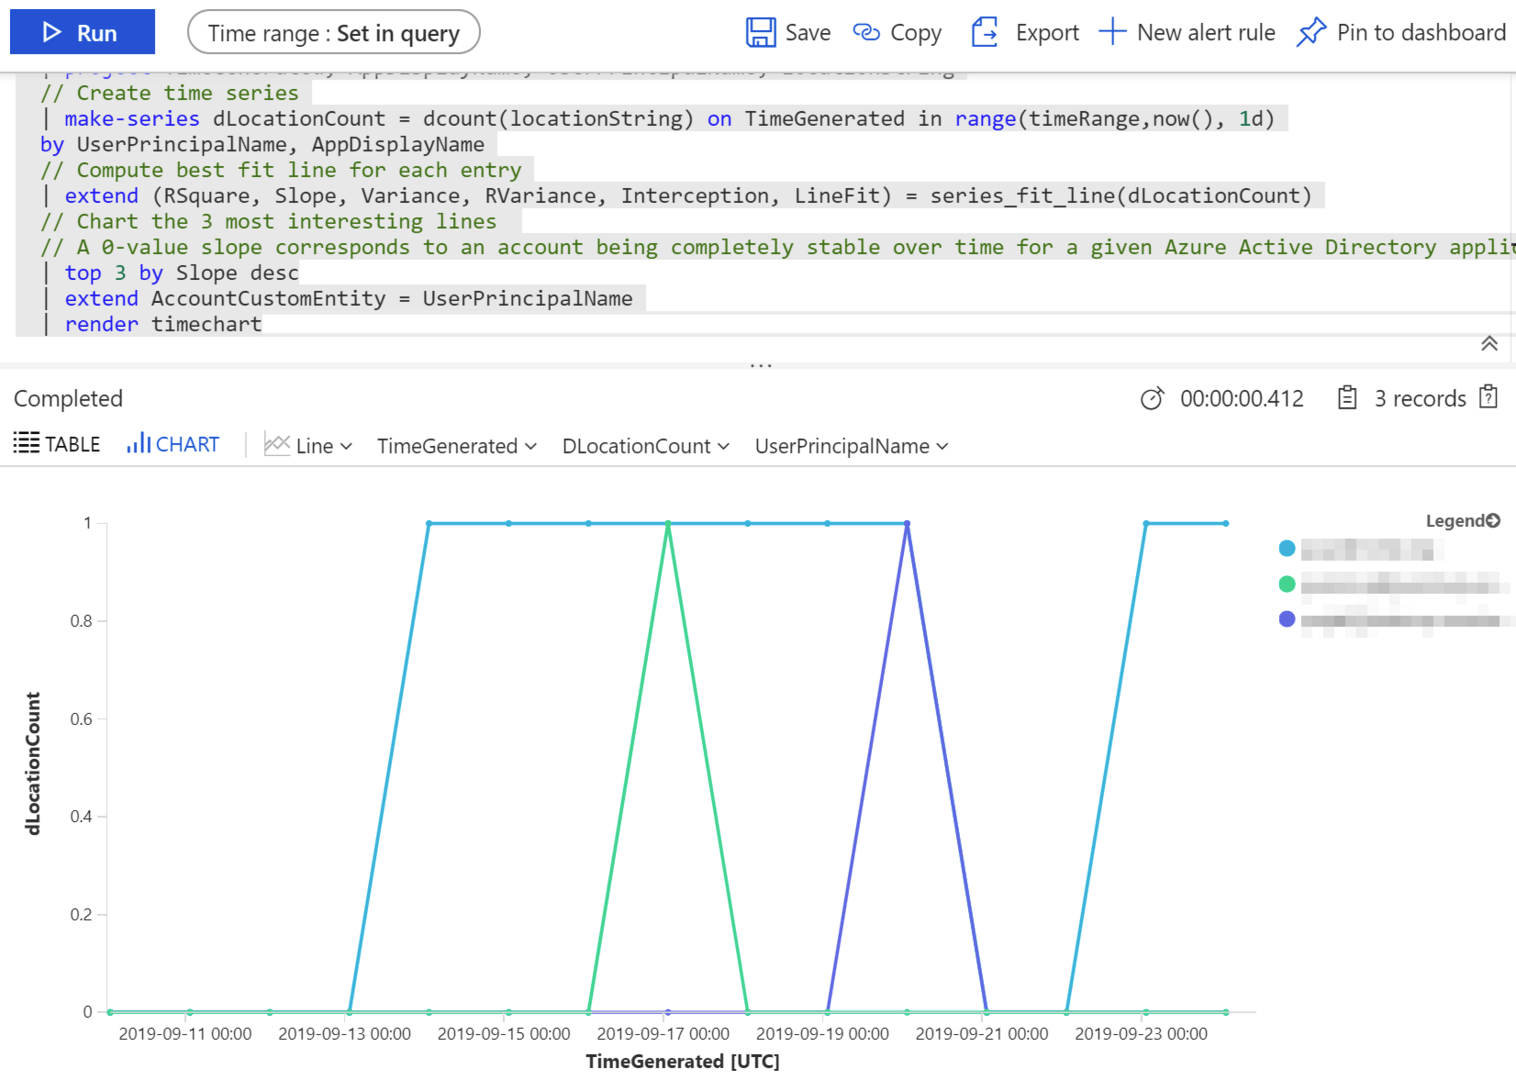
If you click Run on any of the sample queries, you’re taken to the query tool automatically. Here’s a rather dense sample query, that looks at user sign-ins and audit entries generated from Azure AD:

This produces a chart like this:
Getting started with Azure Sentinel: Hunting
Now that we are ingesting data, and Azure Sentinel is onboarded it’s time to go hunting! Hunting in this context means that investigators run queries, investigate and use playbooks (known as notebooks in Azure Sentinel lingo) to proactively look for security threats.
Click Hunting in Azure Sentinel, and you’re presented with about 82 pre-defined queries. You could run all the queries, create new queries or click through the ones you find most interesting.
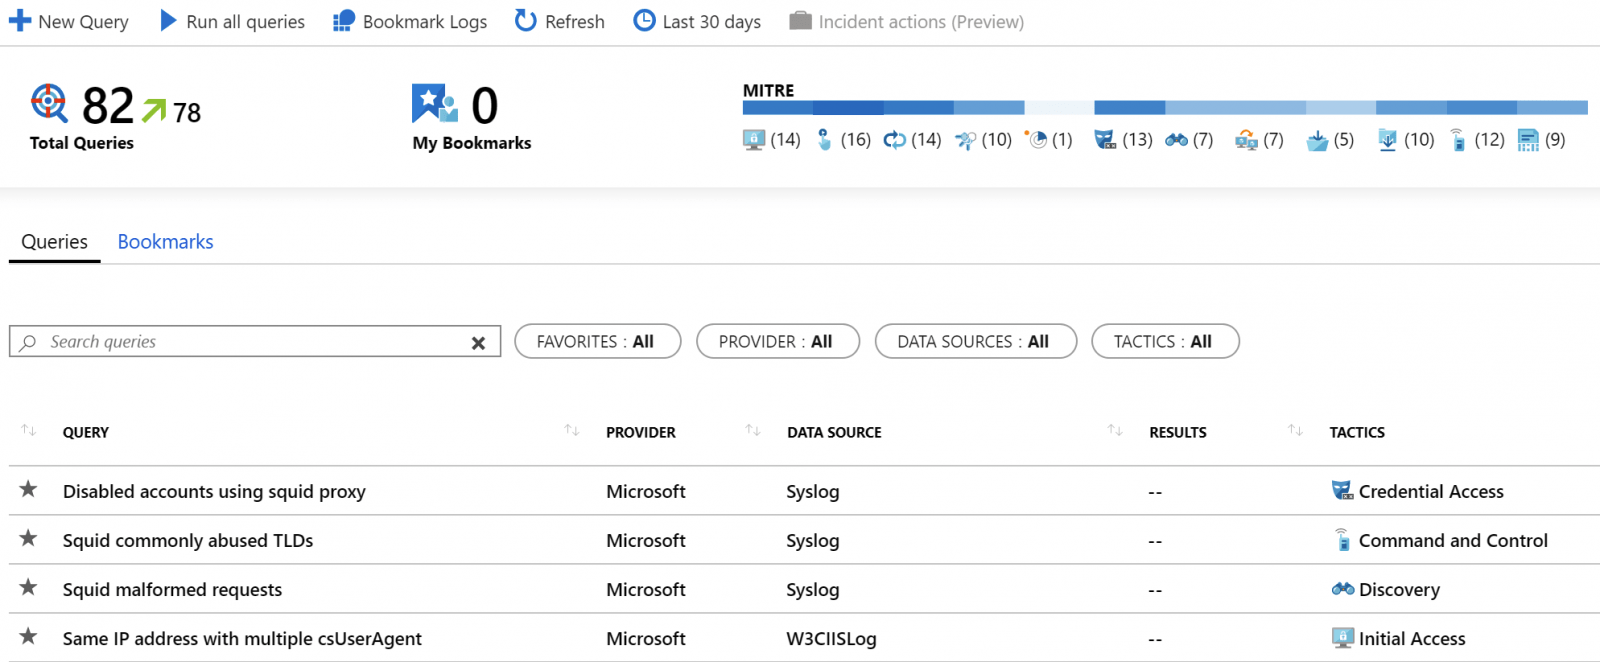
There’s a graphic in the top right corner for MITRE, and it means that MITRE ATT&CK knowledge base is being benefited from.
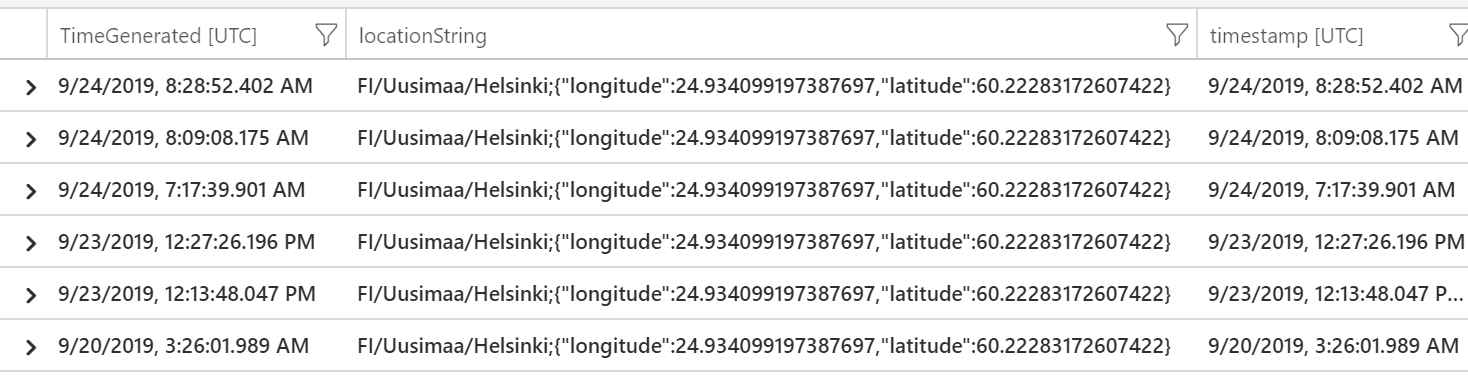
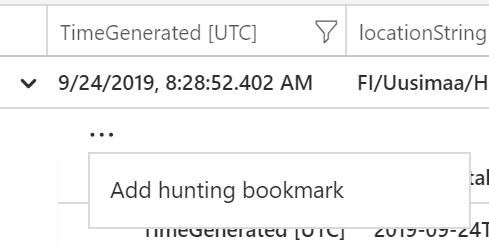
I chose to run Anomalous Azure Active Directory apps based on authentication location query first. It returned 13 results of my recent logins to Azure Portal, including the latitude and longitude values for my approximate location.
I can click on a row to expand it and then click on the ellipsis (…) to add a new hunting bookmark.
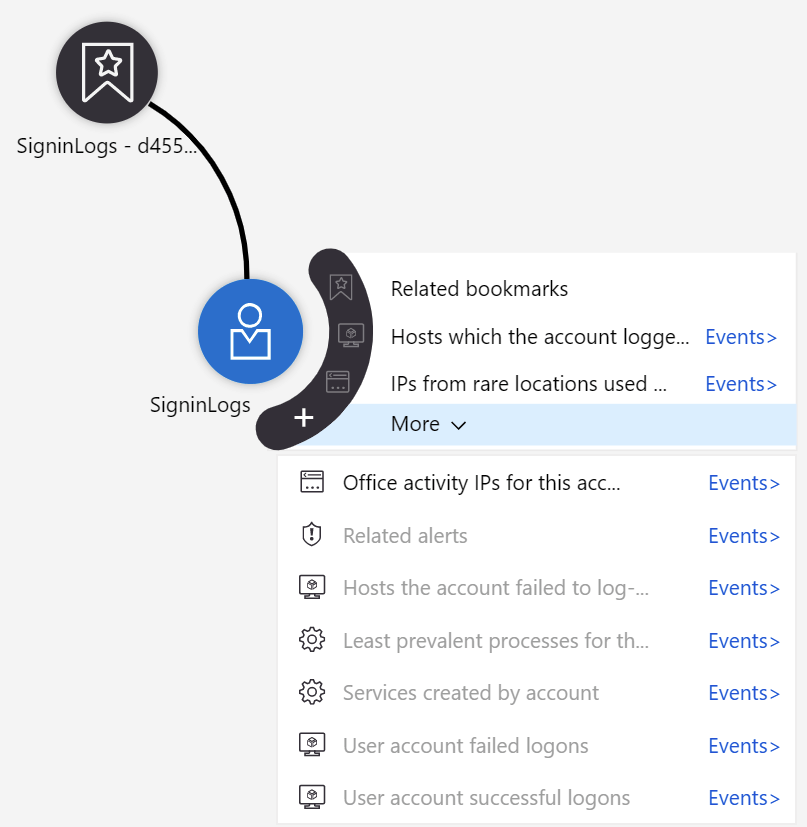
This bookmark is now accessible through Hunting > Bookmarks. I can then initiate a new query with data from my previous log entry – and this provides a very powerful hunting tool with deep insights:
There’s also a community-based effort around hunting queries in a GitHub repo. I chose to try out one, so I picked the AnomalousUserAppSigninLocationIncrease rule from the repo. You can see the query here. The easiest way to run a single query is to copy the KQL syntax and paste it into Azure Sentinel > Logs.
You can also use Jupyter Notebooks for crafting pre-defined tasks for hunting. Jupyter Notebooks are widely used by data scientists, especially in Machine Learning and AI projects. Azure Sentinel uses the same approach here, which is handy.
To run notebooks, click Azure Sentinel > Notebooks and then click Clone Azure Sentinel Notebooks. This clones your sample notebooks to a separate instance of Azure Notebooks, which is the service that executes your Jupyter Notebooks. That’s a lot of notebooks, for sure.
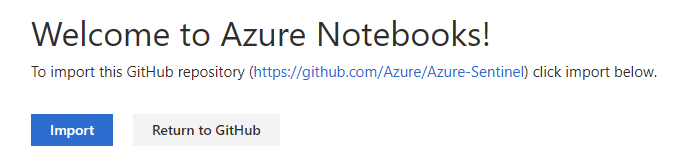
This imports all Azure Sentinel notebooks from the GitHub repo I mentioned above. What’s great about this is that you get all the community-driven notebooks with a click of a button! Importing takes a few minutes to complete, and you’re then presented with Azure Notebooks view for your Github-cloned repo.
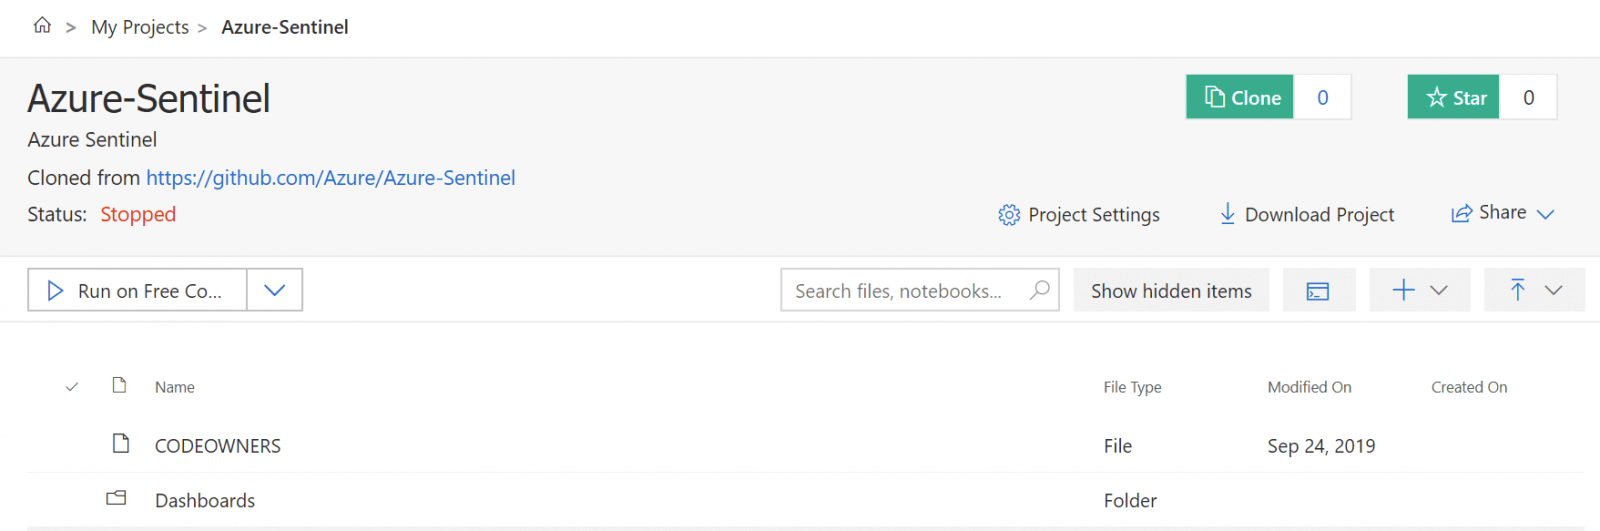
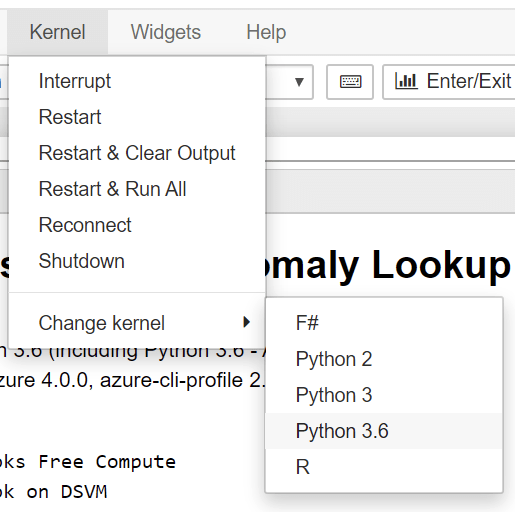
Click on Notebooks folder, and choose any notebook. I’m using Guided Investigation – Anomaly Lookup.ipynb for this. It opens in another tab, so you’ve got a beautiful set of tabs open by now – but hang in there, it gets better!
The Jupyter Notebook-based Azure Sentinel Notebook opens. To my eyes, it looks very scientific. Click on Kernel > Change kernel and select Python 3.6 just to be certain you’re executing your notebook in a recent version of Python.
You can walk through each step of the notebook and run the selected commands automatically by clicking Run.
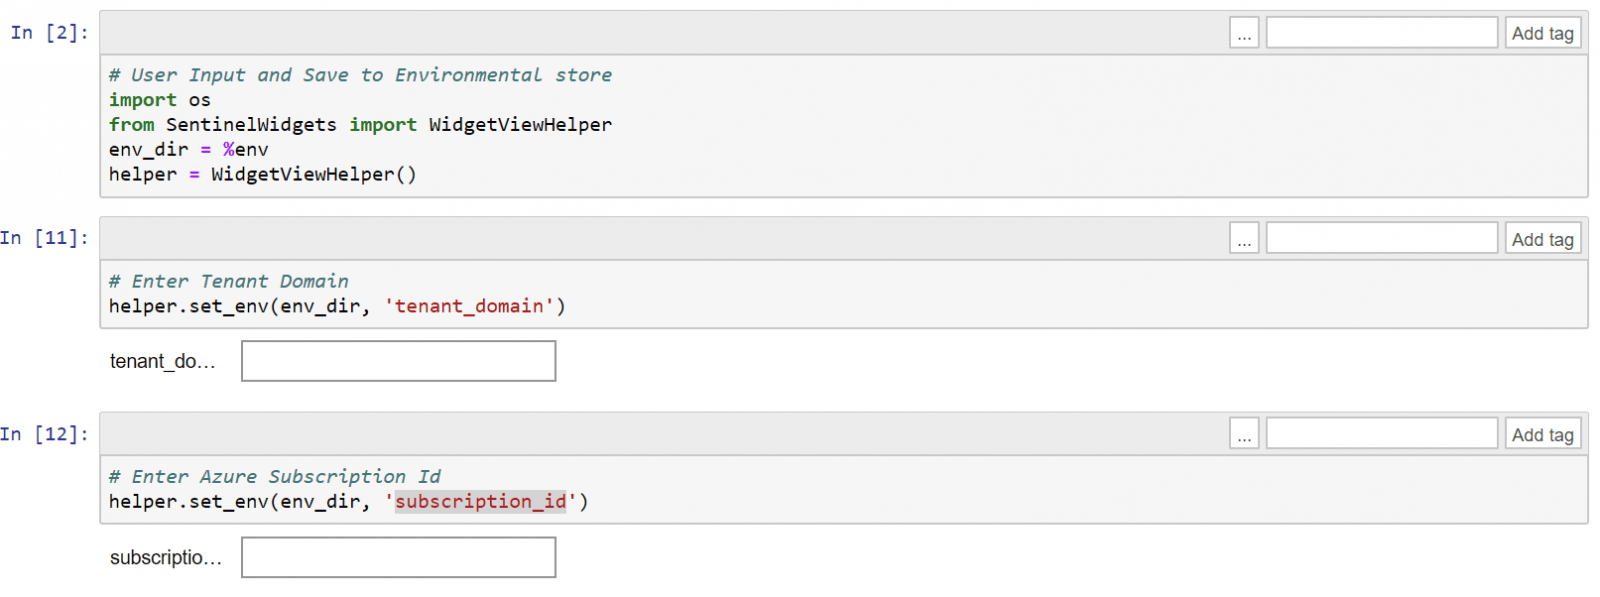
If you want a sanity check to verify Azure Sentinel and the notebook are configured correctly, run the Get Started notebook. It will walk you through all the base settings and allows you to select some data from Azure Sentinel for viewing.
Getting started with Azure Sentinel: Detecting threats
Beyond hunting, you can also detect threats in Azure Sentinel. This is akin to configuring pre-configured alerts in Azure Monitor when certain activities occur.
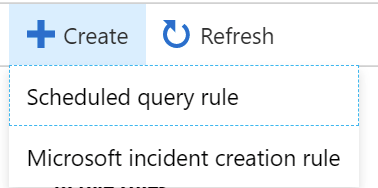
To build your detection rules, click Azure Sentinel > Analytics. Click + Create to add a new rule.

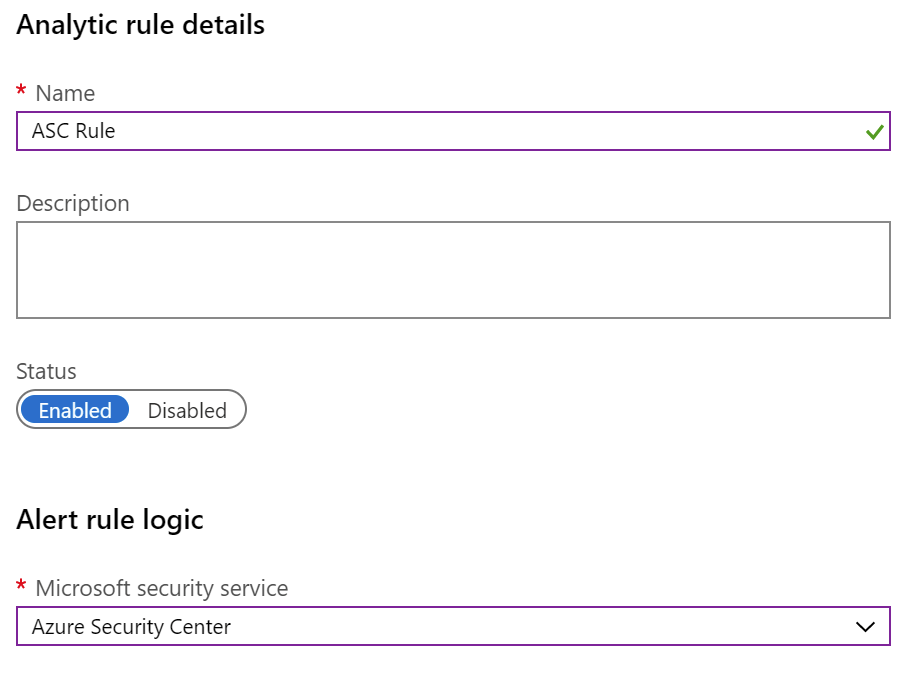
You can create a rule based on a scheduled query (using the query language in Log Analytics), or use a pre-defined service-triggered rule – such as an alert from Azure Security Center. I’ll choose the latter – Microsoft incident creation rule – as it’s a bit more explanatory to what happens when detecting a threat.
You can choose between Azure Security Center, Cloud App Security, Azure ATP, and Azure AD Identity Protection. I chose ASC for this example.
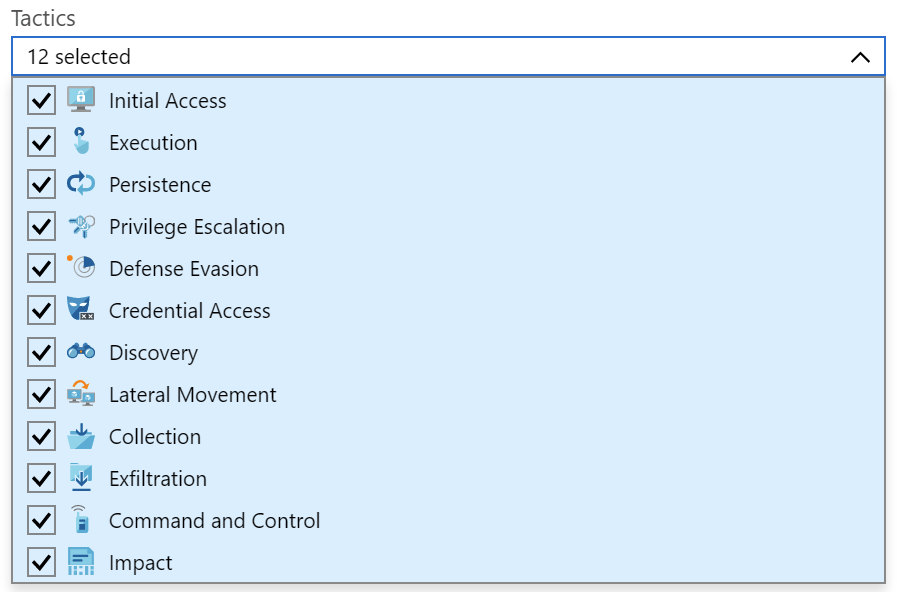
If you want more freedom, use Scheduled query rule when creating the rule. This will allow you to select which tactics to watch for, and what severity level we’re interested in.
You’ll then need to create a custom query, and set query scheduling and alert threshold. A sample query might be to look for SigninLogs and whether there are any failed sign-ins:

You can choose to execute a playbook when the alert triggers. Alternatively, you can skip and just create the rule. Playbooks are based on Logic Apps, so you can easily add one later, edit the rule and have it call your Logic App. One example would be to automatically disable sign-ins for a user that continuously fails to successfully sign in. As you have the capabilities of Logic Apps at your disposal, it’s also trivial to integrate with external systems such as a ticketing system or sending a message to Microsoft Teams to your IT admins.
Additional resources
Microsoft is delivering a free security webcast, with Azure Sentinel in the spotlight on September 26, 2019. You can register here, and I trust you’ll get the recording from the same site.
Other useful resources:
- Azure Sentinel using multiple tenants (MSP scenario, using Azure Lighthouse)
- Fusion setting in Azure Sentinel will be deprecated – a new UI setting will be available later
- Using Machine Learning with Azure Sentinel
- Tobias Zimmergren’s article on Monitoring Office 365 with Azure Sentinel
- Quick Start Guide for Azure Sentinel (free ebook from Microsoft)
- Maarten Goet’s rundown of Azure Sentinel
In closing
I hope you’ve enjoyed this guide to getting started and understanding Azure Sentinel as much I did writing and researching for it! Azure Sentinel has been in preview for about 7 months, and today it’s generally available. I’m already seeing some serious push from Microsoft and Microsoft Partners towards building solutions that rely on Azure Sentinel – and it has a vibrant community already around it.