Building a command-line utility using .NET Core and C# to track my car
I’m still partially on vacation mode, as school and other obligations won’t resume until next week. The fun part about the Finnish summer holidays is that the whole country essentially shuts down and hibernates for 6 weeks. This provides a nice way to think about other stuff than work, as customers and colleagues are mostly offline or unreachable until mid-August.
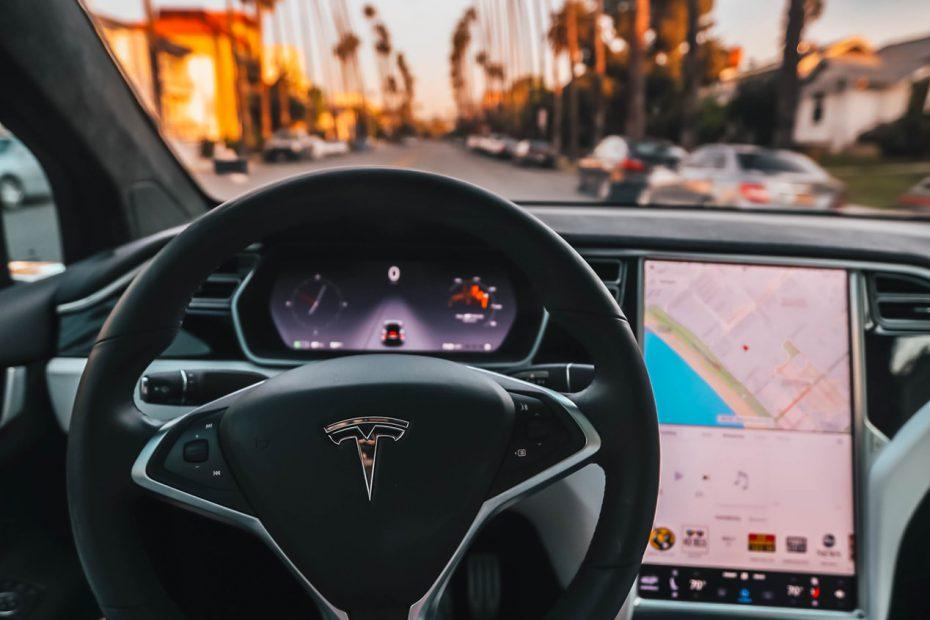
I’d been thinking of checking out how I could get data from my car. I drive a Tesla Model S, which is a nice car to drive. Part of the experience of owning an electric car such as Tesla is that you get software updates over the air, and these are all manageable through the mobile app.
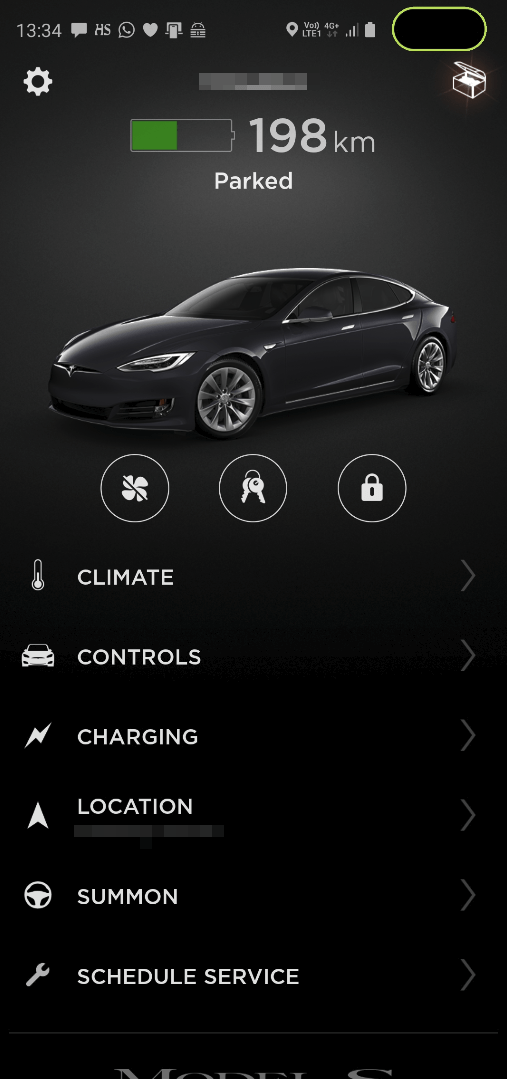
It’s been rock solid for the 2,5 years I’ve had the car. During winter I usually turn on the heating before leaving home, and when I arrive home I might fiddle with the charging settings if I’m anticipating a longer drive the next day.
I figured there has to be an API that Tesla is providing, which I could maybe access. Turns out I’m about 5 years too late in my thinking, as plenty of people have solved this problem before me – which is great! It gives me the opportunity to learn something else, too.
Figuring out the Tesla API
Official access is not available for the API. What this means is that Tesla is not providing an SDK or documentation for their API. Someone has reverse-engineered the calls from the mobile app to the API and created nice documentation which you can access here. Additional documentation by Tim Dorr can be found here.
The API is hosted at https://owner-api.teslamotors.com,and works like a typical REST API with OAuth2 authentication. I fired up Postman and did a few test calls against the API with my credentials – at it worked!
The API first requires authentication, which requires four parameters:
- Client ID
- Client Secret
- MyTesla email
- MyTesla password
MyTesla account is the account owners are using for the mobile app, so the last two values I already had. Client ID and Client Secret are hardcoded, which is weird – but, it works. This could possibly be because Tesla doesn’t bother making a distinction which appliance is calling their API, as long as it’s a valid user. I found working Client ID and Client Secret online.
After successful authentication, the API provides methods for listing vehicles and getting their states and settings, among other things. I’m most interested in getting vehicle data and state, such as velocity and location.
A bearer access token needs to be passed to the API for subsequent calls. Using Postman this is trivial, so I tested both authentication and data retrieval first to verify I was able to work with the API.
Building the command-line tool
I’m a huge fan of building serverless and other non-server-bound solutions. For this, I chose to first build a simple command-line tool to see how I could work with the data I was going to retrieve. Later on, refactoring code to Azure Functions, a custom API or similar should be quite trivial.
I fired up Visual Studio 2019 and created a new project based on .NET Core 2.2 and C#. I’ve used RestSharp occasionally, so this provided a great way to refresh my knowledge after a long summer break.
First, I needed to instantiate a new RestClient:
static RestClient client = new RestClient("https://owner-api.teslamotors.com");In my somewhat mediocre attempt to keep my code readable, I then created a method for performing the OAuth2 authentication:
        public static teslaToken Authenticate()
        {
            var request = new RestRequest("oauth/token", Method.POST);
            request.AddHeader("Content-Type", "application/json");

            request.AddJsonBody(new
            {
                grant_type = "password",
                client_id = "CLIENT_ID_GOES_HERE",
                client_secret = "CLIENT_SECRET_GOES_HERE",
                email = email,
                password = password
            });

            // execute the request
            IRestResponse response = client.Execute(request);
            teslaToken token = new teslaToken();

            if (response.StatusCode == HttpStatusCode.OK)
            {
                JsonDeserializer deserial = new JsonDeserializer();
                token = deserial.Deserialize<teslaToken>(response);
            }

            return token;
        }
The token I’m receiving is described in a simple class:
public class teslaToken
    {
        public string access_token { get; set; }
        public string token_type { get; set; }
        public int expires_in { get; set; }
        public string refresh_token { get; set; }
        public int created_at { get; set; }
    }
Next, I need to select a vehicle. This is done through the API using /api/1/vehicles method.
public static teslaVehicle GetVehicle(string vehiclename)
        {
            var request = new RestRequest("api/1/vehicles", Method.GET);
            request.AddHeader("Content-Type", "application/json");
            request.AddHeader("Authorization", "Bearer " + token.access_token);

            // execute the request
            var response = client.Execute(request);
            teslaVehicles vehicles = new teslaVehicles();

            if (response.StatusCode == HttpStatusCode.OK)
            {
                JsonDeserializer deserial = new JsonDeserializer();
                vehicles = deserial.Deserialize<teslaVehicles>(response);

                for (int i = 0; i < vehicles.count; i++)
                {
                    teslaVehicle vehicle = vehicles.response[i];
                    if (vehicle.display_name == vehiclename)
                    {
                        return vehicle;
                    }
                }
            }
            else
            {
                throw new Exception("Unable to connect to Tesla API");
            }
            return null;
        }
I built some simple logic into this, in case I’d have a huge collection of Tesla cars someday. Perhaps I’m being overly optimistic.
Again, the class definition for this is describers in teslaVehicle:
public class teslaVehicle
    {
        public object id { get; set; }
        public int vehicle_id { get; set; }
        public string vin { get; set; }
        public string display_name { get; set; }
        public string option_codes { get; set; }
        public object color { get; set; }
        public List<string> tokens { get; set; }
        public string state { get; set; }
        public bool in_service { get; set; }
        public string id_s { get; set; }
        public bool calendar_enabled { get; set; }
        public int api_version { get; set; }
        public object backseat_token { get; set; }
        public object backseat_token_updated_at { get; set; }
    }
And as it’s plural, I also need teslaVehicles:
public class teslaVehicles
    {
        public List<teslaVehicle> response { get; set; }
        public int count { get; set; }
    }
I should now have successfully authenticated and retrieved a handle for my vehicle.
Next, let’s query for some data. I want to start with vehicle_state first:
public static teslaVehicleStateData getVehicleData(teslaVehicle vehicle)
        {
            var teslauri = "api/1/vehicles/" + vehicle.id + "/data_request/vehicle_state";

            var request = new RestRequest(teslauri, Method.GET);
            request.AddHeader("Content-Type", "application/json");
            request.AddHeader("Authorization", "Bearer " + token.access_token);

            // execute the request
            var response = client.Execute(request);

            if (response.StatusCode == HttpStatusCode.OK)
            {
                JsonDeserializer deserial = new JsonDeserializer();
                teslaVehicleState state = new teslaVehicleState();
                state = deserial.Deserialize<teslaVehicleState>(response);
                Console.WriteLine(response.Content);
                return state.response;
            }
            else
            {
                throw new Exception("Unable to connect to Tesla API");
            }
        }
As I’m getting yet another JSON object, I need another class for this called teslaVehicleStateData:
public class teslaVehicleStateData
    {
        public int api_version { get; set; }
        public string autopark_state_v2 { get; set; }
        public string autopark_style { get; set; }
        public bool calendar_supported { get; set; }
        public string car_version { get; set; }
        public int center_display_state { get; set; }
        public int df { get; set; }
        public int dr { get; set; }
        public int ft { get; set; }
        public bool homelink_nearby { get; set; }
        public bool is_user_present { get; set; }
        public string last_autopark_error { get; set; }
        public bool locked { get; set; }
        public MediaState media_state { get; set; }
        public bool notifications_supported { get; set; }
        public double odometer { get; set; }
        public bool parsed_calendar_supported { get; set; }
        public int pf { get; set; }
        public int pr { get; set; }
        public bool remote_start { get; set; }
        public bool remote_start_enabled { get; set; }
        public bool remote_start_supported { get; set; }
        public int rt { get; set; }
        public SoftwareUpdate software_update { get; set; }
        public SpeedLimitMode speed_limit_mode { get; set; }
        public int sun_roof_percent_open { get; set; }
        public string sun_roof_state { get; set; }
        public long timestamp { get; set; }
        public bool valet_mode { get; set; }
        public bool valet_pin_needed { get; set; }
        public string vehicle_name { get; set; }
    }
That’s a lot of data!
I’m also interested in the actual drive data — is the car in motion? And where is it? For this, I implemented the following method:
public static teslaVehicleDriveStateData getVehicleDriveStateData(teslaVehicle vehicle)
        {
            var teslauri = "api/1/vehicles/" + vehicle.id + "/data_request/drive_state";

            var request = new RestRequest(teslauri, Method.GET);
            request.AddHeader("Content-Type", "application/json");
            request.AddHeader("Authorization", "Bearer " + token.access_token);

            // execute the request
            var response = client.Execute(request);

            if (response.StatusCode == HttpStatusCode.OK)
            {
                JsonDeserializer deserial = new JsonDeserializer();
                teslaVehicleDriveState state = new teslaVehicleDriveState();
                Console.WriteLine(response.Content);
                state = deserial.Deserialize<teslaVehicleDriveState>(response);
                return state.response;
            }
            else
            {
                throw new Exception("Unable to connect to Tesla API");
            }
        }
And as you can probably guess, this requires yet another class that I’ve named teslaVehicleDriveStateData:
public class teslaVehicleDriveStateData
    {
        public int gps_as_of { get; set; }
        public int heading { get; set; }
        public double latitude { get; set; }
        public double longitude { get; set; }
        public double native_latitude { get; set; }
        public int native_location_supported { get; set; }
        public double native_longitude { get; set; }
        public string native_type { get; set; }
        public int power { get; set; }
        public string shift_state { get; set; }
        public int speed { get; set; }
        public long timestamp { get; set; }
    }
And that’s it!
Running the tool
I compiled my app to an executable, and queried for vehicle state data first:
{
	"response": {
		"api_version": 6,
		"autopark_state_v2": "ready",
		"autopark_style": "dead_man",
		"calendar_supported": true,
		"car_version": "2019.20.4.2",
		"center_display_state": 0,
		"df": 0,
		"dr": 0,
		"ft": 0,
		"homelink_nearby": false,
		"is_user_present": false,
		"last_autopark_error": "no_error",
		"locked": true,
		"media_state": {
			"remote_control_enabled": true
		},
		"notifications_supported": true,
		"odometer": 49900.755643,
		"parsed_calendar_supported": true,
		"pf": 0,
		"pr": 0,
		"remote_start": false,
		"remote_start_enabled": true,
		"remote_start_supported": true,
		"rt": 0,
		"software_update": {
			"expected_duration_sec": 2700,
			"status": ""
		},
		"speed_limit_mode": {
			"active": false,
			"current_limit_mph": 85.127853,
			"max_limit_mph": 90,
			"min_limit_mph": 50,
			"pin_code_set": false
		},
		"sun_roof_percent_open": 0,
		"sun_roof_state": "unknown",
		"timestamp": 1565348566771,
		"valet_mode": false,
		"valet_pin_needed": true,
		"vehicle_name": "-"
	}
}
Looks great! Upon seeing the data I realize it isn’t of much interested to me – perhaps odometer is something I could use for tracking mileage in the future.
Next, I queried for vehicle drive data:
{
"response": {
"gps_as_of": 1565348718,
"heading": 299,
"latitude": 60.291134,
"longitude": 24.968681,
"native_latitude": 60.291134,
"native_location_supported": 1,
"native_longitude": 24.968681,
"native_type": "wgs",
"power": 0,
"shift_state": null,
"speed": null,
"timestamp": 1565348719667
}
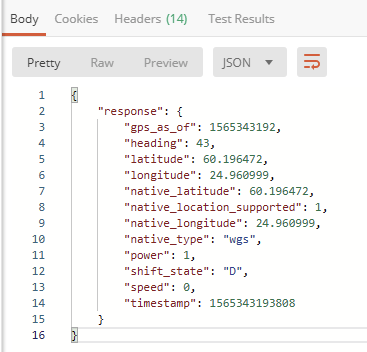
}Speed is null, so the car is parked (as implicated by ‘locked: true’ in vehicle state data). Latitude and longitude are interesting, and plotting the numbers to Google Maps gives me the exact location:

It’s parked to a huge shopping mall near the airport!
The response also includes a timestamp (in UNIX Epoch time format), which is handy if I want to plot the values in a world map. Using Power BI allows me to import latitude and longitude values from a JSON file easily, and plot them on the map:

In summary
This was a short and educational little project, as I got to work with a new API, and also got to use RestSharp a little bit more – although in a relatively simple approach.
Sometime in the future, when I have more time I’ll need to port this code to a serverless platform and have it ping the car on a regular basis to track and store the results for better analysis and monitoring. For now, I’m happy with this crude and simple solution!