Building a custom connector for Power BI that supports OAuth2 to visualize my wellness data

In my previous blog post, I wrote about the Oura Ring and how it tracks my wellness and activities. As part of the service, Oura provides there’s also a comprehensive API that can be leveraged for your purposes.
As the data that is being tracked is very personal (“hmm, I wonder why Jussi is being active at 3:23 am.. oh, he’s feeding the baby”), I see little justifications (yet) for sharing this data with anyone else.
I wanted to visualize the data from Oura’s Cloud using their API. But I wanted to do this in my terms by using Microsoft’s Power BI. If you’re not familiar with Power BI, I suggest you take a quick look at this nice introductory video from Microsoft. It’s only 90 seconds.
I claim not to be a Power BI expert. I’m just really, really good at poking things at random and bending them at my will in a very short time.
To get started, I needed Power BI Desktop. This is the rich power user tool for building Power BI reports. Said reports will then pull data from systems of your choice – or APIs of your choice, and for me, this would be the Oura Ring Cloud API. You don’t need the paid Power BI subscription but the Oura Ring to access their APIs. Makes sense; without a ring, you wouldn’t have any data to work with.
Note: The guidance below on building a custom connector for Power BI applies to any common API, so even if you don’t have the Oura ring, the same steps in this post still apply.
Getting started: Connecting to Oura Cloud API with Power BI Desktop
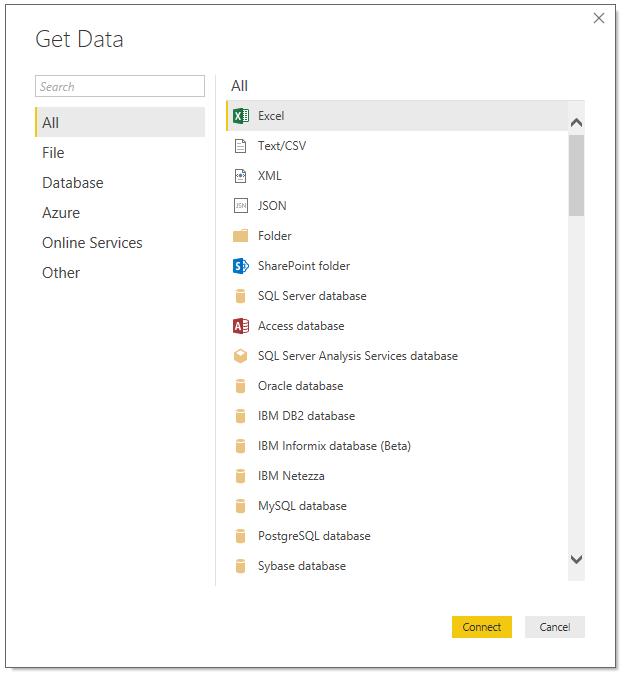
Power BI Desktop has a wealth of built-in connectors. Below you’ll see a sample of these. As the Oura API is producing JSON, I hoped I could use the JSON Connector. This, unfortunately, requires the .json files to be already somewhere on the disk, and I need data that will update automatically.
I briefly considered building a simple Azure Function to wrangle the .json files, but I figured there has to be a more approachable way. Turns out I need to build a Custom Connector.
Implementing the Custom Connector for Power BI
A custom connector is something I hadn’t done before. I’d seen the list of connectors grow over time, but I figured it was just Microsoft being busy and adding new connectors based on UserVoice feedback.
I found this instructional article on docs.microsoft.com to help me get started. What I needed to build was a custom connector that, in turn, connects with Oura’s API, performs OAuth2 authorization, and allows me to use the access token that is generated to perform queries. “How hard can it be” I remember asking myself.
For starters, I needed Visual Studio, which I already had installed – version 2017. To develop Power BI-related projects, I needed to install Power Query SDK from VS Marketplace. It’s a next-next-done install.
This adds a new Project Template in Visual Studio called Data Connector Project. The other template, PQ File, is just the connector class without any fluff (but this isn’t needed as the Data Connector Project already includes this too).

I’m using the dark theme to make this look more professional
For once, the project template is super simple! I’ve had it with all the scaffolding, generators, and other weird new-school tools that produce non-intelligible files in a hundred directories. This is simple, and we like simple. Simple rarely fails majestically.
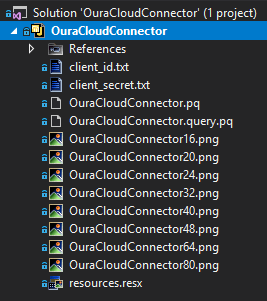
Note: I’ve added client_id.txt and client_secret.txt manually; more on those below.
The core of the connector is in the .pq file, which I’ve named OuraCloudConnector.pq. The first time I opened this file, I almost rolled my eyes out of my head. “What.. the..?” It looks like this:
[DataSource.Kind="HelloWorld", Publish="HelloWorld.Publish"]
shared HelloWorld.Contents = (optional message as text) =>
    let
        message = if (message <> null) then message else "Hello world"
    in
        message;

HelloWorld = [
    Authentication = [
        Implicit = []
    ],
    Label = Extension.LoadString("DataSourceLabel")
];

HelloWorld.Publish = [
    Beta = true,
    ButtonText = { Extension.LoadString("FormulaTitle"), Extension.LoadString("FormulaHelp") },
    SourceImage = HelloWorld.Icons,
    SourceTypeImage = HelloWorld.Icons
];

HelloWorld.Icons = [
    Icon16 = { Extension.Contents("HelloWorld16.png"), Extension.Contents("HelloWorld20.png"), Extension.Contents("HelloWorld24.png"), Extension.Contents("HelloWorld32.png") },
    Icon32 = { Extension.Contents("HelloWorld32.png"), Extension.Contents("HelloWorld40.png"), Extension.Contents("HelloWorld48.png"), Extension.Contents("HelloWorld64.png") }
];
I had very little to start with. Upon further inspection this is Power Query M Formula Language, the lingua franca of Power BI and all things Data. I think. I have zero intention in learning M any more than I need to learn Swedish grammar. Based in my experience I often encounter a situation like this — I just need to learn enough to survive but not too much as I don’t have all day.
Dissecting the sample Hello World code took about an hour and involved some creative googling. There are 4 parts to a connector:
- Data Source definition (DataSource.Kind) — what does the connector do?
- Authentication (HelloWorld = [ Authentication.. ]) — how do we authenticate to the data source?
- Connector details (DataSource.Publish)– how does the connector look like in Power BI Desktop
- Metadata (Icons, Window.width)– icons, window sizing and other details
In the end, it wasn’t that incomprehensible. It took me so long to figure out I could just F5 through my connector without deploying itF5. This builds the solution and runs a testing tool called M Query Output that I found very useful.
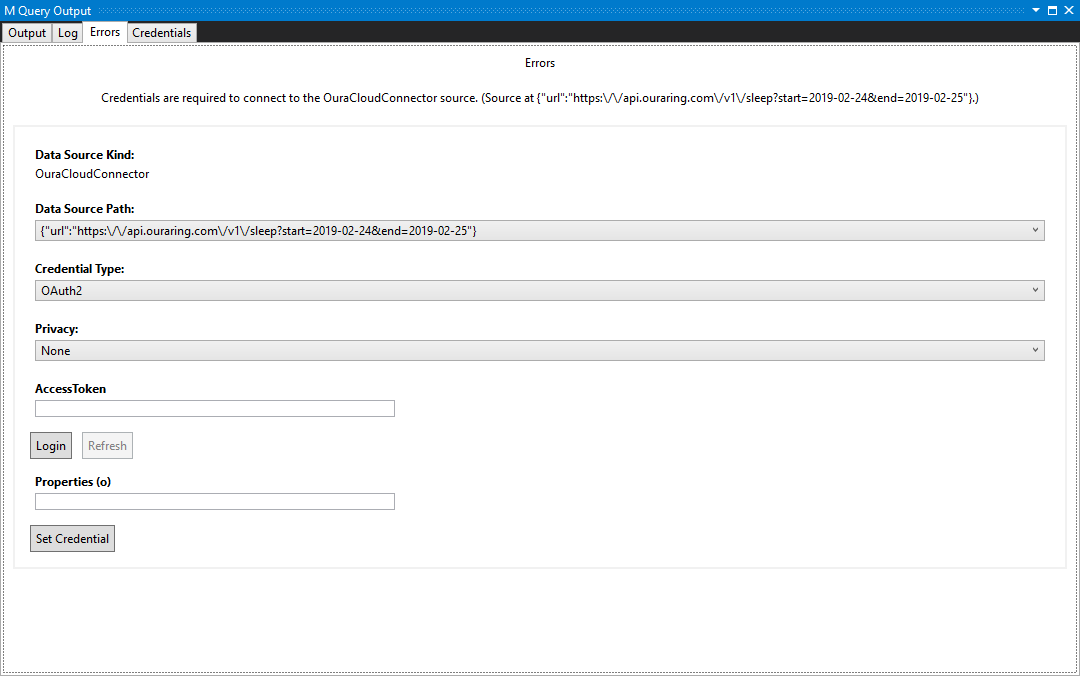
If you see an error, it means you’re about to learn something new
Based on my data source definition and authentication details, I could execute tests against a live API and run sample queries. These queries are picked from the ProjectName.query.pq -file:
let
    result = OuraCloudConnector.Contents()
in
    result
OuraCloudConnector.Contents() is the connector definition (Kind) and the method allows for passing parameters. Such as an URL. To my API. Makes sense, right?
Challenges ahead
I trawled through the sample connectors from GitHub that Microsoft has produced. The Microsoft Graph sample called MyGraph I found to be especially useful. Using the Hello World sample, the MyGraph sample and a lot of traffic inspection with Fiddler I was able to produce a working OAuth2 implementation.
By first verifying what Oura’s API is expecting, I was then able to reproduce those calls manually with a browser and then re-tracing those steps back to my M -powered custom connector. This took one evening to get to a state where I could get data in Power BI. I wouldn’t proclaim myself an expert on either Power BI or custom connectors, but at least I have something to show in the next quarterly secret meeting of Power BI gurus (I think they have those types of meetings?).
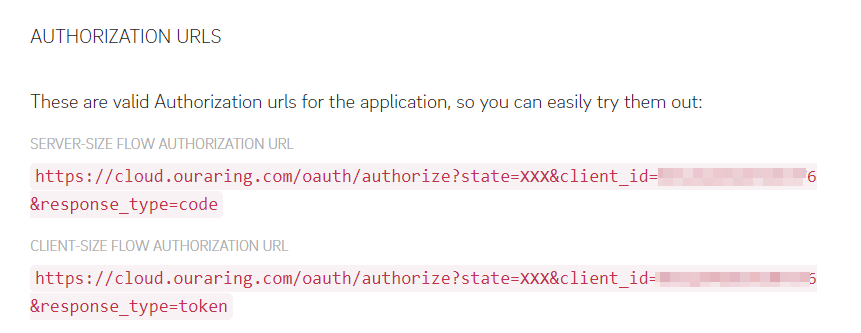
Oura’s API is pleasant to work with as it is close to a standard OAuth2 implementation. They even have a tiny helper tool that generates clickable test links. I also found the API to be reliable – it didn’t fail me once during my tests.
When things go wrong, you’ll get raw HTTP status codes back. Helpful in a sense, but upon seeing the 16th Unauthorized 401, you realize it’s time to open a bottle of red.
I went back and forth between successfully calling the APIs from my browser, tracing the GETs and POSTs with Fiddler, and trying to replicate those calls identically from M within my custom connector and the M Query Tool. As I’m more accustomed to C#, PowerShell, plain old BAT files, and other scripting interfaces, it took some extra effort to bend M to my will. I probably didn’t succeed in the most fashionable sense, but it works on my machine!
Finalizing the Custom Connector with a working OAuth2 authorization flow
I’m a little bit proud that I got this working. Let’s walk through the code — it’s also available in my Github repo.
First, I need a few variables to hold URIs for my OAuth2 calls:
client_id = Text.FromBinary(Extension.Contents("client_id.txt"));
client_secret = Text.FromBinary(Extension.Contents("client_secret.txt"));
redirect_uri = "https://oauth.powerbi.com/views/oauthredirect.html";
token_uri = "https://api.ouraring.com/oauth/token";
authorize_uri = "https://cloud.ouraring.com/oauth/authorize";
logout_uri = "https://login.microsoftonline.com/logout.srf";
I need to pick the OAuth2 Client ID and Client Secret (that Oura API generates for me to use) in a text file. This was the model for storing secrets all samples from Microsoft used, and I couldn’t find a working and more reasonable alternative. Keep in mind all data being accessed is personal, so I see this as an accessible approach until a more secure approach is offered for M. These two text files simply contain the strings for Client ID and Client Secret and they do not change.
authorize_uri is used to initiate the authorization polka with the API. token_uri is used to retrieve an access token, and redirect_uri is used to redirect back to Power BI Desktop. logout_uri, I did not need it but felt it would look nicer here for completeness.
Next, Oura API provides scopes, but I only need the daily scope:
scope_prefix = "";
scopes = {
    "daily"
};
And now, it’s time to define the actual custom connector. What happens below is that I’m simply getting a Power Query statement and passing it as-is directly to the web and picking up – what I presume and trust – is JSON data back. It’s very simple to implement in M:
[DataSource.Kind="OuraCloudConnector", Publish="OuraCloudConnector.Publish"]
shared OuraCloudConnector.Contents = (url as text) =>
    let
        source = Json.Document(Web.Contents(url))
    in
        source;
Next, I need to implement OAuth2 tango:
OuraCloudConnector= [
    TestConnection = (dataSourcePath) => { "OuraCloudConnector.Contents", dataSourcePath },
    Authentication = [
        OAuth = [
            StartLogin=StartLogin,
            FinishLogin=FinishLogin,
            Refresh=Refresh,
            Logout=Logout
        ]
    ],
    Label = Extension.LoadString("DataSourceLabel")
];
Authentication is set to OAuth, and I needed a few helper functions (StartLogin, FinishLogin, Refresh, and Logout) to complete these. I lifted the helper functions from the MyGraph sample.
I need to adjust the helper functions to pass only the values Oura API expects. For this to work, I need a few minor changes in TokenMethod – this is called when StartLogin() is completed and a redirect occurs.
TokenMethod = (grantType, tokenField, code) =>
    let
        queryString = [
            grant_type = "authorization_code",
            redirect_uri = redirect_uri,
            client_id = client_id,
            client_secret = client_secret
        ],
        queryWithCode = Record.AddField(queryString, tokenField, code),

        tokenResponse = Web.Contents(token_uri, [
            Content = Text.ToBinary(Uri.BuildQueryString(queryWithCode)),
            Headers = [
                #"Content-type" = "application/x-www-form-urlencoded",
                #"Accept" = "application/json"
            ],
            ManualStatusHandling = {400}
        ]),
        body = Json.Document(tokenResponse),
        result = if (Record.HasFields(body, {"error", "error_description"})) then
                    error Error.Record(body[error], body[error_description], body)
                 else
                    body
    in
        result;
I adjusted QueryString slightly by changing grant_type to a fixed value of authorization_code, and I also need to send out the Client Secret as we’re not using Basic authentication. This is documented in the Oura API documentation.
Everything else in the HelloWorld sample I left untouched. In retrospect, I only needed to make small adjustments, but the challenge was finding out what to inject and where. I accidentally broke the Visual Studio project once and had to start all over. I’m thankful for the unlimited file versions in Dropbox.
Putting it all together
Now that my code compiles and builds, it’s time to run some tests! Upon compilation Power Query SDK produces a .MEZ file. Yet another new file format. But it’s a .ZIP file, so all is good in the world again. I found a note from Microsoft that, in the future, these files will be renamed to .PQX.
To deploy the custom connector, copy it to %USERPROFILE%\Documents\Power BI Desktop\Custom Connectors\ and then restart Power BI Desktop. It automatically picks up all custom connectors once you enable Custom data connectors in Preview features.
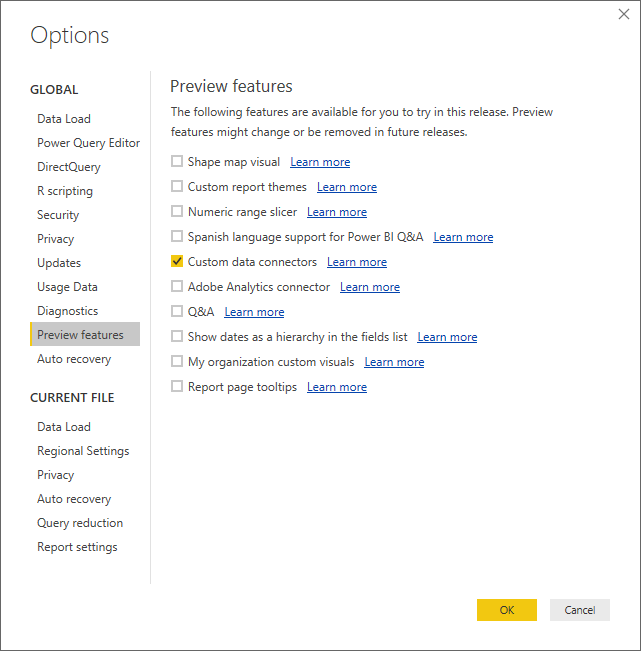
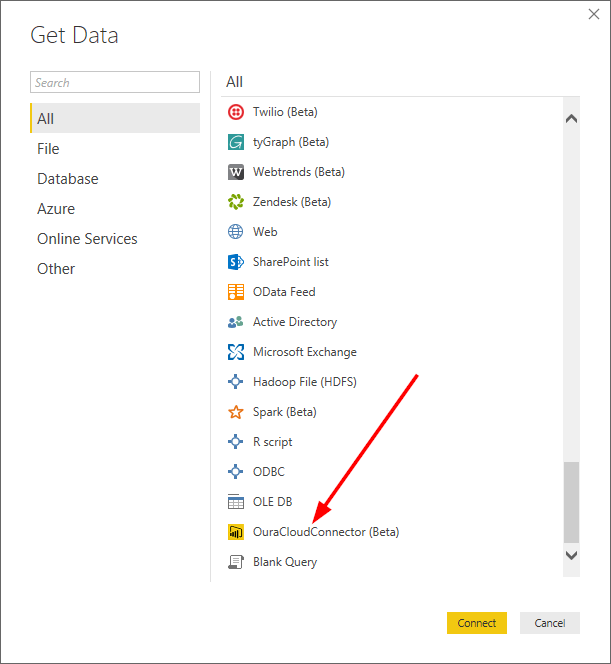
Selecting Get Data now produces the same long list of connectors, but you’ll find your custom connector at the bottom! The ‘(beta)’ tag is appended because we set the property to True within our class.
As we require a URL to query, a prompt will ask for it first. I wanted to keep the custom connector as flexible as I could. This way, I can fiddle with the API without redeploying my connector.
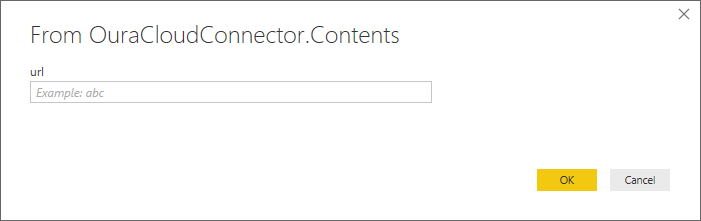
For the URL, I put https://api.ouraring.com/v1/readiness?start=2019-02-24&end=2019-02-25. This calls the Oura API for readiness data between February 24th and 25th, 2019.
We then need to sign in and accept the license for Oura’s API.
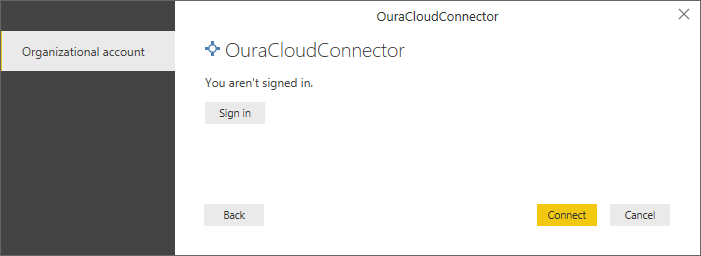
As we’re using the Client ID and Client Secret (and the resulting access token), no user authentication needs to occur. Accept the Oura API terms of service and policy.
And next Power Query opens within Power BI Desktop, allowing us to fiddle with the data.
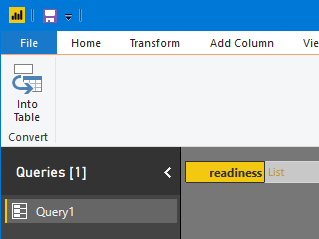
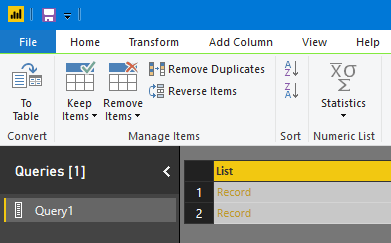
We can see readiness as a list. There are two records, as we’re querying for two dates.
Selecting the first record, we finally see our data!
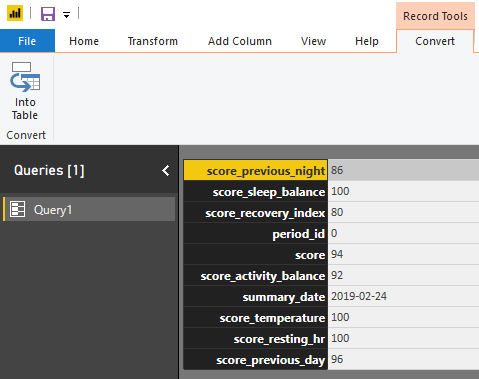
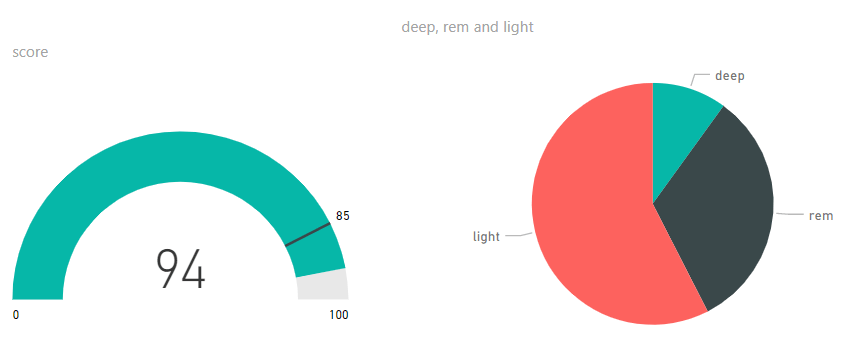
My readiness score for the night of the 24th of February was an impressive 94 (out of 100). Anything above 85 % is considered a good recovery. I can now use Power Query’s impressive roster of tools to transpose this table into a functional table and then automatically name the columns.
This table:
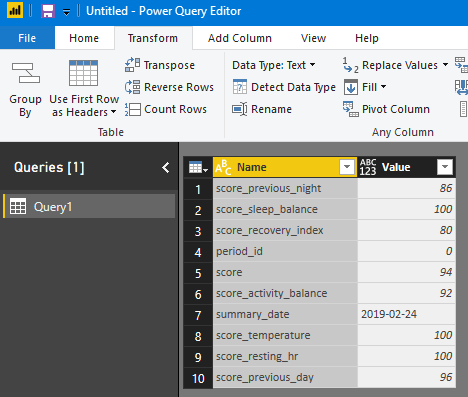
Becomes this after transposing and using the first row as headers:

Once I close and apply, I get all the data fields to work with:
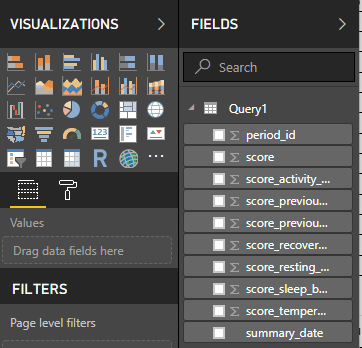
From here, it’s as simple as dragging and dropping fields and dimensions to my visualization!
In summary
This was, once again, a fun project to work on. I learned a lot from OAuth2 authorization, APIs in general, M Language, and building custom connectors for Power BI. At times the challenges I had with M Language seemed quite frustrating, but after sleeping over it, I was happy again to start troubleshooting the authorization issues.
The implementation is far from polished, but it works. I’ve published the solution in Github, and you’re free to contribute or reuse my findings. See the repo here.
Thanks for reading!